The OCI Developer’s Workflow: Bridging Your Mac and Local VM with a Shared Folder
☁️ Pre-Flight Checklist
This is a connection flight. Before we taxi down the runway, here’s your flight plan. Keep this handy to navigate your flight path. Welcome aboard the cloud! ☁️
🌥️ Takeoff
- The Goal: Edit on Mac, Run in Linux
⛅️ Cruising Altitude
- How to Set Up a Shared Folder in UTM (macOS to Ubuntu 25.0 VM)
- How This Workflow Benefits OCI Development
🌤️ Landing & Taxi
- Conclusion
Enjoy your flight! ☁️
In our previous article, we established why running a local Ubuntu VM is a game-changer for any serious OCI professional. You now have a pristine, production-mirroring environment. But there’s a problem: it’s isolated. How do you get your Terraform scripts, application code, or Ansible playbooks from your Mac into the VM without a clunky, manual process?
This is where a shared folder becomes the critical bridge in your local OCI lab. It’s not just about convenience; it’s about simulating the deployment and testing workflow of a real cloud environment. You need a way to edit files on your host and immediately test them in a Linux environment that mirrors your OCI instances.
This guide will show you how to set up a persistent, high-performance shared folder using UTM and bindfs, solving the tricky permissions issues along the way.
The Goal: Edit on Mac, Run in Linux
Our objective is to create a folder on your Mac that appears inside your Ubuntu VM as a native directory. You’ll be able to use your favourite macOS editor (like VS Code) to write code and instantly compile, run, and test it within the Linux environment.
How to Set Up a Shared Folder in UTM (macOS to Ubuntu 25.0 VM)
These steps will walk you through the process of sharing a folder from your macOS host to your Ubuntu guest VM. This allows you to edit code and manage files on your Mac and have them instantly accessible inside
the VM.
Part 1: Create a Shared Folder on Your Mac (Host)
First, we need a dedicated folder on your Mac that you want to share with the VM.
- Open Finder and navigate to where you want to create the folder. For this guide, we’ll use the desktop.
- Create a new folder. You can name it whatever you like, but for this example, we’ll call it UTM_Share.
Tip: You can also do this from the terminal on your mac
cd `/Desktop
mkdir UTM_share
(Optional) Place a test file inside the ‘UTM_Share‘ folder so we can confirm the connection later. You can create a simple text file named
hello_from_mac.txt.cd UTM_share touch hello_from_mac.txt
Part 2: Configure Sharing in UTM
Next, we need to tell UTM which folder to share and what to call it.
Important: You must shut down your virtual machine before changing its hardware settings, including shared directories.
- Shut down your Ubuntu VM.
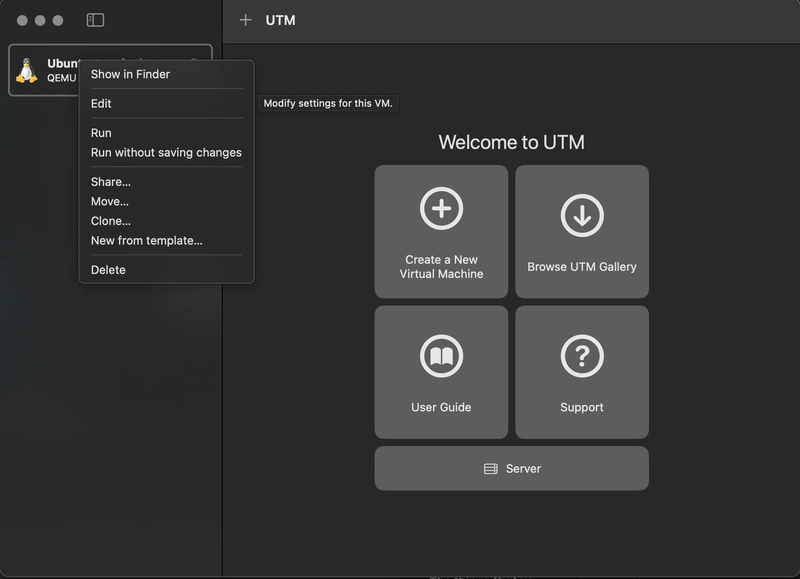
- In the main UTM window, select your Ubuntu VM from the list on the left.
-
Right-click and select the edit option to open the VM’s configuration.
-
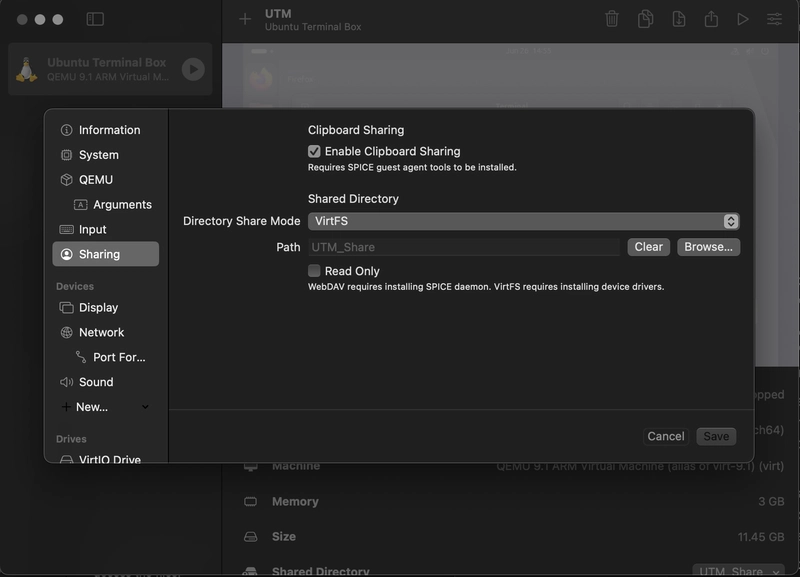
Navigate to the Sharing tab from the list on the left.

-
Click on the browse button to add a new shared directory.
-
Navigate to and select the UTM_Share folder you created on your Desktop.
-
The “Name” field will auto-populate with UTM_Share. This is the “mount tag” we will use inside the VM. You can leave it as is.
-
Ensure the “Read Only” checkbox is unchecked if you want to write files from within the VM.
-
Click Save to close the VM settings.
Part 3: Mount the Shared Folder in Ubuntu (Guest)
Now, we’ll start the VM and mount the shared directory so we can access the files.
1. Start your Ubuntu VM and login
2. Open a terminal and create a mount point:
sudo mkdir -p /mnt/utm
3. Open /etc/fstab with a text editor:
Open your fstab file:
sudo nano /etc/fstab
Add the following to the end
# UTM Shared Folder
share /mnt/utm 9p trans=virtio,version=9p2000.L,rw,_netdev,nofail,auto 0 0
Save with Crtl + O, press Enter, then Ctrl + X.
TROUBLESHOOT STEP
In the UTM docs you’re told to follow this step after:
Apply Mount Now (Without Reboot)
sudo systemctl daemon-reload
sudo systemctl restart network-fs.target
systemctl list-units --type=mount
Now check:
ls /mnt/utm
But you may get this:
Failed to restart network-fs.target: Unit network-fs.target not found.
This is expected in some modern Ubuntu setups (especially 25.04). It’s not a blocker at all. Since network-fs.target isn’t available, just mount manually to confirm it works:
sudo mount /mnt/utm
Now check:
ls -na /mnt/utm
You should see something like:
drwxr-xr-x  3 502 20  96 Jun 26 20:31 .
-rw-r--r--  1 502 20  14 Jun 26 20:30 test.txt
This confirms the shared Mac folder is mounted.
4. Apply the new fstab rules:
sudo systemctl daemon-reexec
sudo mount /mnt/utm
5. Verify the mount:
ls -na /mnt/utm
You should see files like hello_from_mac.txt with UID (e.g., 501) that differs from your linux user.
Part 4: Fixing Permissions Using bindfs
The shared files may not be writable by your Linux user (usually UID 1000). By default, files in /mnt/utm may be owned by macOS UID 501 and GID 20, which doesn’t match your Ubuntu user’s UID/GID (usually 1000:1000). You might get permission denied errors when writing files. Use bindfs to remap ownership.
1. Install bindfs:
sudo apt update
sudo apt install bindfs
2. Check UID and GID:
id -u   # should return 1000
id -g   # should return 1000
3. Check UID/GID of /mnt/utm:
ls -na /mnt/utm
Look for numbers like 501 (UID) and 20 (GID).
4. Create a remapped mount directory:
mkdir ~/utm
5. Add this second mount to /etc/fstab:
Open your fstab file:
sudo nano /etc/fstab
Add this line:
# bindfs mount to remap UID/GID
/mnt/utm /home/smyekh/utm fuse.bindfs map=501/1000:@20/@1000,x-systemd.requires=/mnt/utm,_netdev,nofail,auto 0 0
⚠️ Replace ‘smyekh’ with your actual Linux username if different.
- map=501/1000 remaps UID 501 → 1000
- @20/@1000 remaps GID 20 → 1000
- x-systemd.requires=/mnt/utm ensures it’s mounted after /mnt/utm
Save (Ctrl + O, Enter, Ctrl + X)
6. Reload and mount:
sudo systemctl daemon-reload
sudo mount /home/smyekh/utm
⚠️ Again replace ‘smyekh’ with your actual username.
If you get an error saying the mount point is not empty:
ls -A ~/utm
# If it contains files, it's because /mnt/utm was already populated.
# This confirms sharing is working. You can safely continue.
7. Final Verification
echo "Synced via bindfs!" > ~/utm/test_from_linux.txt
Check your Mac’s UTM_Share folder, test_from_linux.txt should be there!
Troubleshooting Summary
| Issue | Fix |
|---|---|
| permission denied when writing to /mnt/utm | Use bindfs to remap UID/GID |
| network-fs.target not found | Ignore; not critical for UTM/9p |
| mount: mountpoint is not empty | It’s fine if files are present already |
| No shared files visible | Confirm UTM Sharing settings and folder path |
| Files don’t appear on Mac | Ensure writing to ~/utm and not directly to /mnt/utm |
You now have a fully working shared folder between macOS and Ubuntu using UTM’s VirtFS and bindfs to handle permissions. This setup is persistent across reboots and ideal for syncing files, sharing projects, and bridging workflows between host and guest environments.
I used the UTM documentation (official UTM VirtFS guide), which explains how to mount shared folders using the 9p filesystem (9pfs) via VirtIO.
How This Workflow Benefits OCI Development
Simulating Code Deployment: In OCI, you don’t code directly on the production server. You write code locally and deploy it. A shared folder perfectly mimics this: your Mac is your workstation, and the ~/utm directory in your VM is the “deployed” target.
Testing Infrastructure as Code (IaC): Imagine you’re writing a Terraform script to provision an OCI network. You can edit the .tf files in VS Code on your Mac, and because the folder is shared, you can immediately run terraform plan inside the VM. The VM has the OCI CLI and a Linux environment, ensuring your script behaves exactly as it will in a CI/CD pipeline or a bastion host.
Developing and Testing Applications: You can write your Python, Go, or Node.js application on your Mac, and the code is instantly available in the VM to be compiled, run, and tested against Linux-specific dependencies.
Conclusion
This setup combines the best of both worlds: the rich user interface of macOS and the production-parity environment of your Linux VM. Happy coding
You’ve now engineered more than just a shared folder; you’ve built a professional workflow. This setup combines the rich UI of macOS with the production-parity environment of your Linux VM, creating a tight feedback loop for developing and testing OCI solutions.
But what about networking? In our next and final guide in this series, we’ll tackle the last piece of the puzzle: port forwarding. We’ll show you how to access web servers and other services running inside your VM directly from your Mac, completing your local OCI lab setup.
Missed a leg of your journey? These are the connecting flights:
⬅️ Part 1: Your OCI Development Environment is Broken. Let’s Fix It with a Local VM
➡️ Part 3: Completing Your Local OCI Lab: A Guide to Port Forwarding in UTM
Cover Photo by BoliviaInteligente on Unsplash

