🏛️ Stop Writing Brittle Tests: Your Blueprint for a Scalable TypeScript POM
🤖 In our last article, we mastered Custom Types, creating a safety net for our test data. We learned how to define the exact shape of our data payloads and API responses. Now, it’s time to build the structure that will house our test logic: the Page Object Model (POM).
Think of it like this: so far, you’ve been building with scattered piles of wood and nails. Your tests might work, but they’re messy, hard to read, and break easily when the UI changes. This article gives you the architectural blueprint—the Class—to build a sturdy, scalable, and maintainable test automation framework.
We will use TypeScript’s most powerful features to build a POM that is not just effective, but a joy to work with.
✅ Prerequisites
This guide assumes you are comfortable with the concepts from our previous article and have a basic setup with Playwright.
- TypeScript Fundamentals:
- Basic TypeScript types (
string,number,boolean) - Structuring data with
ArraysandObjects - Writing reusable code with
Functions - Automating actions with
Loops(for,while) - Making decisions with
Conditionals(if/else) -
Union&LiteralTypes -
Type Aliases&Interfaces
- Basic TypeScript types (
- A Playwright Project: You should have a basic understanding of how to write and run a test.
If you have these concepts down, you’re ready to build a truly professional test suite.
😵 The Problem: Brittle, Unreadable Tests
Before we build the solution, let’s look at the problem. Without a design pattern like the POM, your test files quickly become a chaotic mix of locators and actions.
Imagine a test file responsible for logging a user in and out. It might look something like this:
// 🚨 THIS IS THE "BEFORE" - WHAT WE WANT TO FIX 🚨
import { test, expect } from '@playwright/test';

test('A brittle test without a POM', async ({ page }) => {
    // --- Test Step 1: Log In ---
    // Locators and actions are mixed together
    await page.getByRole('link', { name: 'Sign in' }).click();
    await expect(page.getByRole('heading', { name: 'Sign in' })).toBeVisible();
    await page.getByRole('textbox', { name: 'Email' }).fill(process.env.EMAIL!);
    await page
        .getByRole('textbox', { name: 'Password' })
        .fill(process.env.PASSWORD!);
    await page.getByRole('button', { name: 'Sign in' }).click();

    // How do you know the login was successful? By locating the username.
    // This logic is repeated in every test that needs to log in.
    await expect(
        page.getByRole('navigation').getByText(process.env.USER_NAME!)
    ).toBeVisible();

    // --- Test Step 2: Log Out ---
    // More locators, more actions...
    await page.getByRole('link', { name: 'Settings' }).click();
    await expect(
        page.getByRole('heading', { name: 'Your Settings' })
    ).toBeVisible();
    await page
        .getByRole('button', { name: 'Or click here to logout.' })
        .click();

    // And we verify by looking for the main page heading.
    await expect(page.getByRole('heading', { name: 'conduit' })).toBeVisible();
});
This approach has major flaws:
- Repetitive: The same locators and login steps are copied into every test.
- Hard to Maintain: If the “Sign in” button’s locator changes, you have to find and fix it in dozens of files. 😱
- Hard to Read: The intent of the test is lost in a sea of selector details.
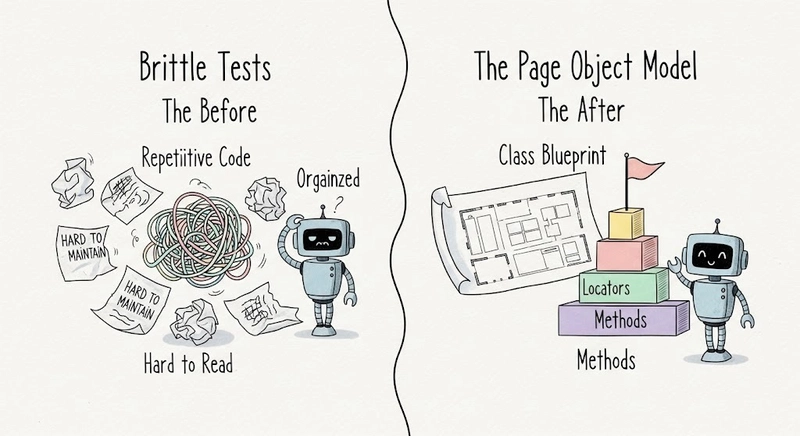
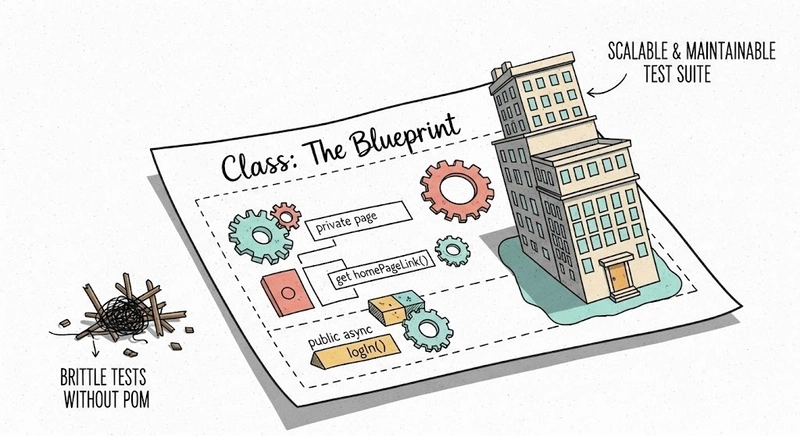
🏗️ The Solution: The Class as a Blueprint
A Class is a blueprint for creating objects. In our case, we’ll create a blueprint for our NavPage that bundles all its specific locators and user actions into one neat package.
This is the core of the Page Object Model.
The Constructor: Your Setup Shortcut
Our NavPage class needs to interact with the browser, which it does through Playwright’s Page object. We pass this object in when we create an instance of our class.
TypeScript has a fantastic shorthand for this using parameter properties.
// NavPage.ts
import { Page, Locator, expect } from '@playwright/test';

export class NavPage {
    // This one line does three things:
    // 1. Declares a constructor for the class.
    // 2. Defines a 'page' property.
    // 3. Makes it 'private' and assigns the incoming argument to it automatically.
    constructor(private page: Page) {}

    // ... locators and methods will go here
}
This is much cleaner than declaring the property and assigning it manually.
Defining Locators: Properties vs. Getters
Next, we need to define our element locators.
The Old Way: Class Properties
You could define locators as properties initialized in the constructor.
// The "old" way - less efficient
export class NavPage {
    private readonly page: Page;
    readonly homePageLink: Locator; // 1. Declare the property

    constructor(page: Page) {
        this.page = page;
        // 2. Initialize it in the constructor
        this.homePageLink = this.page.getByRole('link', { name: 'Home' });
    }
}
This works, but it’s verbose and initializes every single locator the moment you create the object, even if you don’t use it.
The Modern Way: Getters
A getter is a special method that looks like a property. It runs its code only when you access the property. This is perfect for locators.
// The "modern" way - clean and efficient
export class NavPage {
    constructor(private page: Page) {}

    // This code only runs when you call `navPage.homePageLink`
    get homePageLink() {
        return this.page.getByRole('link', {
            name: 'Home',
        });
    }

    get newArticleButton() {
        return this.page.getByRole('link', {
            name: 'New Article',
        });
    }
}
| Using Getters (get homePageLink()) | Using Properties (readonly homePageLink: Locator) |
|---|---|
| ✅ Pros: | ✅Pros: |
| ✅ Lazy Evaluation: The code to find the locator runs only when you access the property. This is efficient if your tests don’t use every locator in the Page Object. | ✅ Explicit Initialization: Locators are created once when the object is instantiated. This makes the setup process very clear and predictable. |
| ✅ Cleaner Syntax: Avoids cluttering the constructor with locator assignments, leading to less boilerplate code. | ✅ Clear Separation of Concerns: The constructor handles all setup, keeping initialization logic in one designated place. |
| ✅ Always Fresh: Re-evaluates the locator definition on each access, which feels intuitive for dynamic web pages. | ✅ Standard Practice: This is a very common and easily understood pattern for class properties in object-oriented programming. |
| ❌Cons: | ❌Cons: |
| ❌ Minor Overhead: Involves a function call on every access, though this is almost always negligible compared to test execution time. | ❌ Eager Loading: All locators are initialized immediately, even if unused, which can be slightly inefficient. |
| ❌ Less Obvious Execution: For developers new to getters, it might not be immediately apparent that code is running behind what looks like a simple property access. | ❌ Constructor Bloat: For pages with many elements, the constructor can become very long and cluttered with locator assignments. |
| – | ❌ More Boilerplate: Requires you to both declare the property at the top of the class and assign it a value inside the constructor. |
The winner is clear: Use getters for your locators.

Encapsulating Logic with Methods
Now for the magic. We bundle complex user actions into simple, readable methods. A “login” isn’t 5 separate lines of code anymore; it’s a single call to navPage.logIn().
// Inside the NavPage class...

/**
 * Navigates to the Sign In page and logs in the user.
 * @param email The user's email.
 * @param password The user's password.
 */
public async logIn(email: string, password: string): Promise<void> {
    await this.navigateToSignInPage(); // We can even call other methods!

    await this.emailInput.fill(email);
    await this.passwordInput.fill(password);
    await this.signInButton.click();

    // The assertion is part of the action!
    // The method only resolves when the user profile is visible.
    await expect(
        this.page.getByRole('navigation').getByText(process.env.USER_NAME!)
    ).toBeVisible();
}
Notice we made this method public. Access modifiers are crucial for a robust POM.
Enforcing Rules: public, private, & readonly
- public: The method or property can be called from anywhere (e.g., your test file). All your action methods (
logIn,logOut) should be public. Methods are public by default if you don’t specify. - private: The property can only be used inside this class. Our page instance from the constructor is
private. This is critical—it prevents the test writer from doingnavPage.page.getByRole(...)and forces them to use the clean methods you’ve built. - readonly: The property cannot be reassigned after it’s initialized. While our getters are naturally read-only, if you were using properties for locators, you would mark them
readonlyto prevent accidental changes.
📜 The Final Blueprint: NavPage.ts
When you put it all together, you get a clean, self-documenting, and maintainable blueprint for your navigation and authentication functionality.
// NavPage.ts - The Complete Blueprint
import { Page, Locator, expect } from '@playwright/test';

export class NavPage {
    constructor(private page: Page) {}

    // --- Locators defined as Getters ---
    get homePageLink() {
        return this.page.getByRole('link', { name: 'Home', exact: true });
    }
    get signInButton() {
        return this.page.getByRole('button', { name: 'Sign in' });
    }
    get emailInput() {
        return this.page.getByRole('textbox', { name: 'Email' });
    }
    get passwordInput() {
        return this.page.getByRole('textbox', { name: 'Password' });
    }
    get settingsButton() {
        return this.page.getByRole('link', { name: 'Settings' });
    }
    get logoutButton() {
        return this.page.getByRole('button', {
            name: 'Or click here to logout.',
        });
    }
    get signInNavigationLink() {
        return this.page.getByRole('link', { name: 'Sign in' });
    }
    get signInPageTitle() {
        return this.page.getByRole('heading', { name: 'Sign in' });
    }

    // --- Public Action Methods ---

    /** Navigates to the Sign In page. */
    async navigateToSignInPage(): Promise<void> {
        await this.signInNavigationLink.click();
        await expect(this.signInPageTitle).toBeVisible();
    }

    /** Logs in the user using the provided credentials. */
    async logIn(email: string, password: string): Promise<void> {
        await this.navigateToSignInPage();
        await this.emailInput.fill(email);
        await this.passwordInput.fill(password);
        await this.signInButton.click();
        await expect(
            this.page.getByRole('navigation').getByText(process.env.USER_NAME!)
        ).toBeVisible();
    }

    /** Logs out the currently logged-in user. */
    async logOut(): Promise<void> {
        await this.settingsButton.click();
        await this.logoutButton.click();
    }
}
🏆 The Payoff: Clean, Readable Tests
Now, look at how our original test is transformed. It’s declarative, easy to read, and communicates its intent perfectly.
To make this work, we typically create a custom Playwright fixture that initializes our NavPage for us. That’s how we get { navPage } in the test function signature.
// ✅ THIS IS THE "AFTER" - CLEAN AND ROBUST ✅
import { test } from '../fixtures/custom-fixtures'; // Assuming a custom fixture setup

test(
    'Verify Successful Log In/Log Out using POM',
    { tag: '@Smoke' },
    async ({ navPage }) => {
        // Our NavPage instance is injected here!
        await test.step('Perform Log In', async () => {
            await navPage.logIn(process.env.EMAIL!, process.env.PASSWORD!);
        });

        await test.step('Perform Log Out', async () => {
            await navPage.logOut();
        });
    }
);
Look at that! All the implementation details are hidden away. If a locator changes, you fix it in one place: NavPage.ts. Your tests never have to change.
🚀 Your Mission: Build a Settings Page Object
You now have the blueprint. It’s time to draw your own.
- Create a New File: Make a SettingsPage.ts file.
- Create the Class: Define a SettingsPage class with a private page: Page constructor, just like we did.
- Add Locators: Go to the settings page in your application. Add getters for the “Your Settings” title, the username input field, and the “Update Settings” button.
-
Create a Method: Write one public async updateUsername(newUsername: string) method. It should fill the username field and click the update button. Include an expect to verify the update was successful.
By building another Page Object, you will solidify your understanding of how to create a test automation framework that is built to last.
