How to setup Airtable MCP for effective work manahement 💻📊
Airtable is a great app for tracking projects, tasks, colloboration, CRM, inventory management, and more. It keeps things clear and organized. But, what if you don’t have to navigate the dashboards to get things done and do things from a single Chat interface.
Airtable MCP makes it possible. It connects your base to tools that understand your tables and fields. You can fetch records, update values, and generate summaries using real data.
In this post, you will see how to set up Airtable MCP with Claude or Cursor and use it to manage updates, track work, and speed things up.
What is MCP?
Think of MCP as a bridge that connects all your SaaS tools to your AI agent. It acts like an adapter, enabling your AI agent (Client) to understand and interact with your tools.
According to Anthropic (the team behind Claude and MCP),
“MCP is an open protocol that standardizes how applications provide context to LLMs. Think of MCP like a USB-C port for AI applications. Just as USB-C provides a standardized way to connect your devices to various peripherals and accessories, MCP provides a standardized way to connect AI models to different data sources and tools.”
credits: modelcontextprotocol.io
For more, check out this detailed post or MCP components: MCP Explained
What is Airtable MCP
Airtable MCP is a secure connection between your Airtable workspace and tools like Claude and Cursor. It lets large language models work with your Airtable data directly, using a defined set of supported actions.
Once it is connected, these tools can do a lot more than just look at your data, they can actually work with it.
What you can do with Airtable MCP?
- Read from your base: They can list records, pull details from tables, check field values, and even understand the base structure.
- Create new content: You can ask them to create tables, fields, records, or even leave comments on existing entries.
- Update records: They can change the status of tasks, fill in missing fields, or batch update rows across your base.
- Delete what you do not need: They can remove records, clear comments, or delete multiple rows at once, if you want them to.
- Understand how your base is built: They can fetch the schema and get a sense of your setup, so you do not need to explain every column in your prompt.
With this setup, your Airtable becomes more than a place to store data. It becomes something your tools can actually understand and help you manage, using real structure.
✅ What You will Need
Before you begin, make sure you have these set up:
-
Airtable Account
If you don’t have one yet, you can sign up at airtable.com. You will use this to create your base and connect it to the integration.
-
Claude Desktop App
Download and install it from claude.ai/download. This is one of the tools that will connect to your Airtable base.
-
Cursor Editor
You can download Cursor from cursor.so. It also supports the Airtable MCP integration and works well for coding workflows.
-
Node.js
You will need this to run the setup script. Install it from nodejs.org, then confirm it’s working by running
node -vin your terminal.
🛠 Setting Up Airtable MCP with Claude
Once your tools are ready, you can connect Airtable to Claude using the MCP setup flow from Composio. This lets Claude work with your Airtable data directly.
Step 1: Go to the Composio MCP Page
Head to https://mcp.composio.dev
Search for Airtable, then open the integration page.
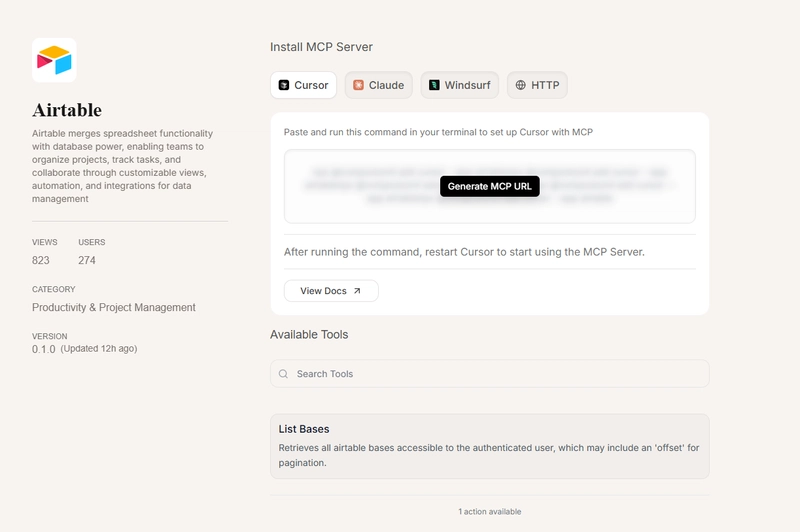
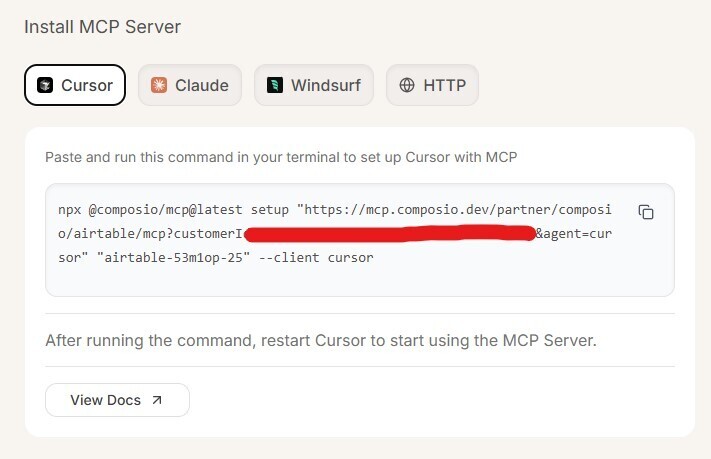
Step 2: Copy the Claude Setup Script
On the Airtable integration page, switch to the Claude tab. You’ll see a command that looks something like this:
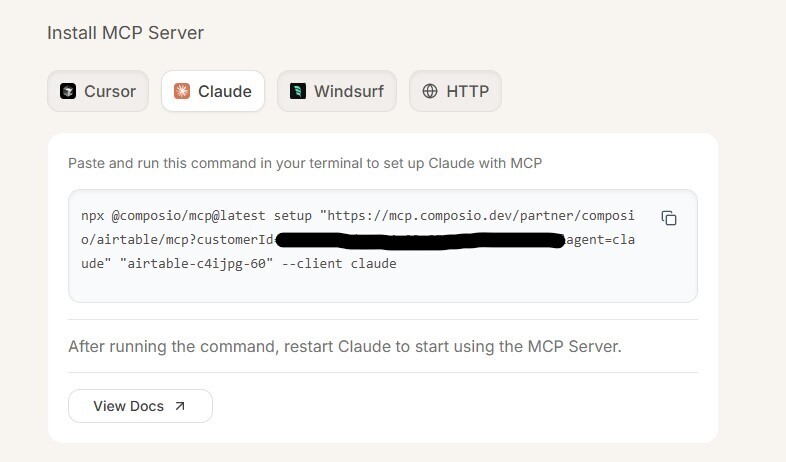
npx @composio/mcp@latest setup "https://mcp.composio.dev/partner/composio/airtable/mcp?customerId=<your_customer_id>" "" --client claude
Copy the full command, you will use it in the next step.
Step 3: Open Claude Config Folder
-
Open Claude Desktop
-
Go to
File > Settings > Developer > Edit Config -
This will open a folder on your system. On Windows, the path is usually:
C:Users<your_username>AppDataRoamingClaude
- Inside that folder, open a terminal window.
Step 4: Run the Setup Script
Paste and run the setup command you copied earlier:
npx @composio/mcp@latest setup "https://mcp.composio.dev/partner/composio/airtable/mcp?customerId=<your_customer_id>" "" --client claude
This will launch an OAuth2 flow in the terminal. You will be redirected to sign into your slack account and accept permissions.
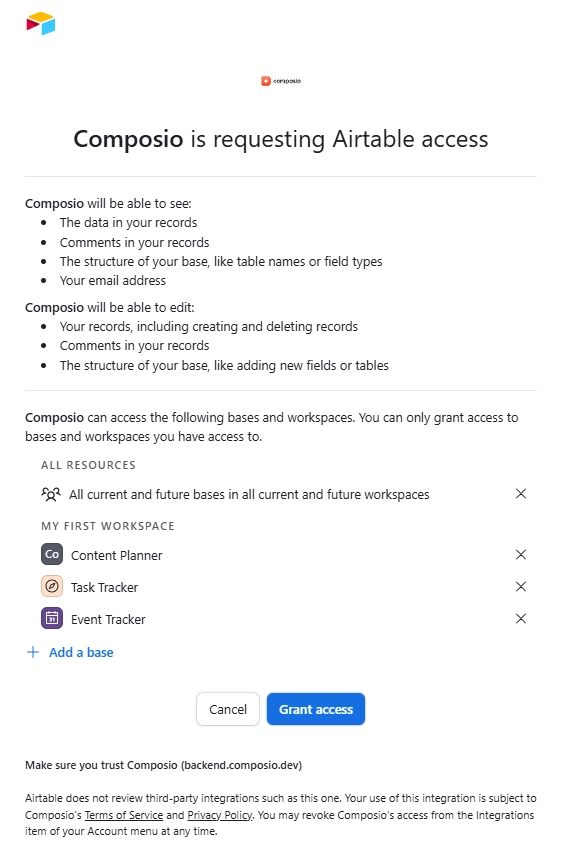
Once authentication is complete, you can see a screen like this
When it is done, the terminal will show a success message.

Step 5: Confirm the Connection (Optional)
In the same config folder, open claude_desktop_config.json.
You should now see Airtable with the MCP connection details.
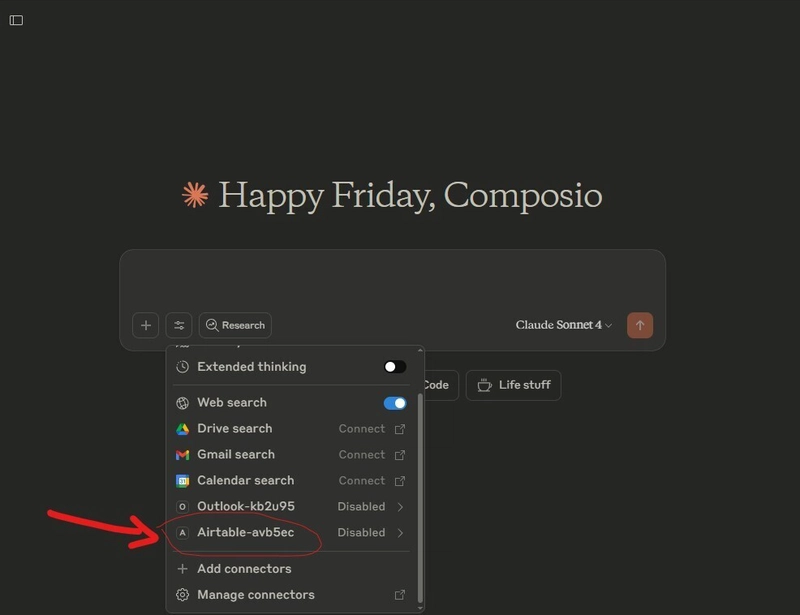
Step 6: Restart Claude
Close and reopen Claude Desktop.
You will now see Airtable listed as a connected integration, ready to use inside your prompts.
Use Case: View and Filter Bases Without Leaving Your Workflow
When working across different projects, it can be hard to remember which Airtable base holds what. With Airtable MCP connected, you can ask Claude or Cursor to list all your bases, filter them by name, and get the base IDs you need. Everything stays in one place so you can keep your focus.
Prompt Example
Show me all Airtable bases I have access to and highlight the ones with “content” in the name. Include their base IDs.
🔧 What Happens Behind the Scenes
When you run this prompt, the tool uses the List Bases action from Airtable MCP. It fetches all bases linked to your account, reads their names, and passes them to the model so it can sort or filter them based on your request.
▶️ Watch It in Action
This video shows how Claude or Cursor lists your Airtable bases using live data and helps you select the one you need, all from inside the prompt.
🛠 Setting Up Airtable MCP with Cursor
To connect Airtable with Cursor, follow these steps:
Step 1: Go to the Composio MCP Page
Head over to https://mcp.composio.dev and search for Airtable.
Click on it and switch to the Cursor tab.
Step 2: Copy the Setup Script
You’ll see a command under the Cursor tab. It should look like this:
npx @composio/mcp@latest setup "https://mcp.composio.dev/partner/composio/airtable/mcp?customerId=<your_customer_id>" "" --client cursor
Step 3: Open Cursor in Your Project
Open Cursor and navigate to the folder or file where you want to use the integration.
Step 4: Run the Script in Terminal
Open a terminal inside Cursor, paste the script, and run it.
If you have not connected to Airtable before, an OAuth2 authentication window will appear. Log in to your Airtable account and allow access when prompted. Then it will open a success screen like this:
Once the connection is complete, you will see a success message in the terminal
Step 5: Confirm the Connection (Optional)
To confirm everything worked, you can check the config file at:
~/.cursor/mcp.json
Look for Airtable listed under connected services.
After that, you are all set. Cursor can now work with your Airtable data through MCP, just like Claude.
✅ Summary
Airtable MCP gives Claude and Cursor direct access to your bases, so they can actually work with the data. You can list records, update fields, create tables, or even pull schema details to help the model understand what it is looking at.
With a quick setup through Composio, your Airtable workspace becomes something your tools can use in real time. No more copying rows or explaining columns. Once connected, Claude and Cursor can help you review updates, track work, and make smarter decisions, right from your existing Airtable setup.
FAQs
1. Do I need a paid Airtable plan to use Airtable MCP?
No, a free Airtable account works fine. Just make sure the base you want to connect is in your workspace and accessible.
2. Can Claude or Cursor access all my Airtable data?
Only if you allow it during the authentication step. You choose which bases and workspaces are accessible during setup.
3. What if I have multiple Airtable accounts?
You can connect more than one, but you will need to run the setup script separately for each account and switch between them in your tool if needed.
4. Is this integration secure?
Yes. The connection uses OAuth2 and is permission-based. You control access and can revoke it any time from your Airtable account settings.
5. Can I use Airtable MCP with both Claude and Cursor at the same time?
Yes. You can set up the integration with both tools, and they will each have access to your Airtable data independently once configured.

