How to Set Up an AWS Application Load Balancer for Your EC2 Instances
Introduction
Scalability and high availability are crucial for modern web applications. In my recent project, I learned how to distribute incoming traffic across multiple EC2 instances using AWS Elastic Load Balancing (ELB). In this guide, I’ll walk you through the process of setting up an Application Load Balancer (ALB) that routes traffic to Ubuntu servers running Nginx.
Prerequisites
Before we begin, make sure you have:
An active AWS account
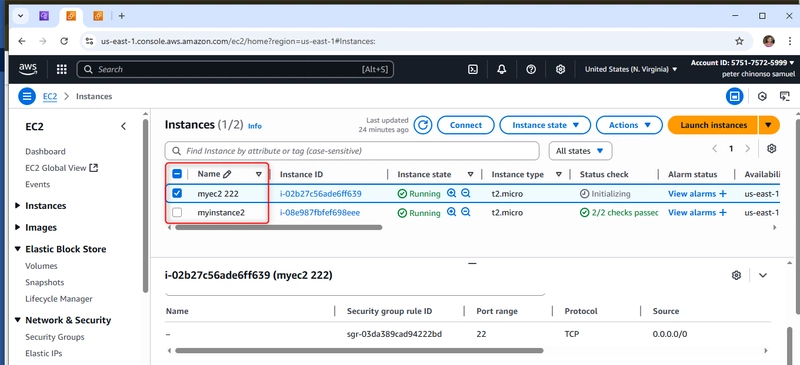
At least two EC2 instances running web server software (I used Nginx on Ubuntu)
Basic understanding of AWS VPC and security groups
Step 1: Understanding Load Balancer Types
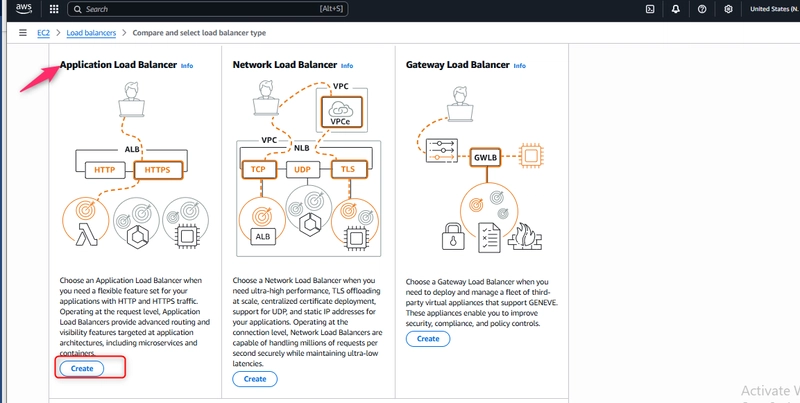
AWS offers three types of load balancers:
Application Load Balancer (ALB) – Best for HTTP/HTTPS traffic with advanced routing capabilities
Network Load Balancer (NLB) – Ultra-high performance for TCP/UDP traffic
Gateway Load Balancer (GWLB) – For deploying third-party virtual appliances
For my web application, I chose the Application Load Balancer since it operates at the request level and provides advanced routing features perfect for HTTP traffic.
Step 2: Creating the Load Balancer
Basic Configuration
Navigate to EC2 → Load Balancers → Create Load Balancer
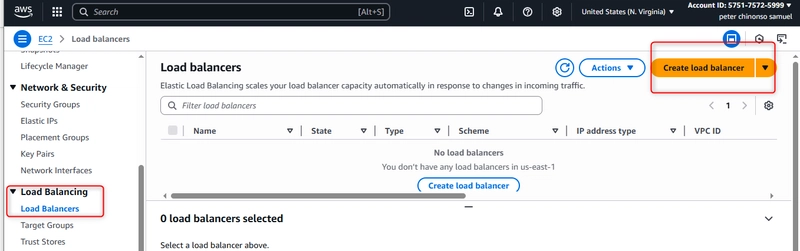
Select “Application Load Balancer”
Configure basic settings:
Name: TestALB (cannot be changed later)
Scheme: Internet-facing (for public access)
IP address type: IPv4
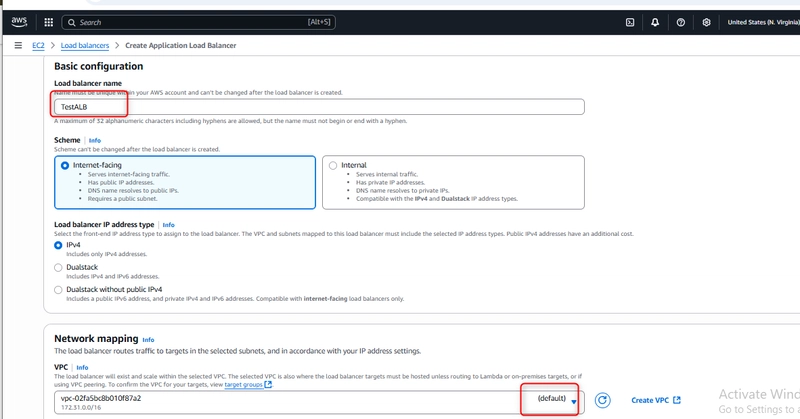
Network Mapping
Select your VPC (I used vpc-02fa5bc8b010f87a2)
Choose at least two Availability Zones for high availability
I selected us-east-1a and us-east-1b
Each zone requires a public subnet with至少 8 available IP addresses
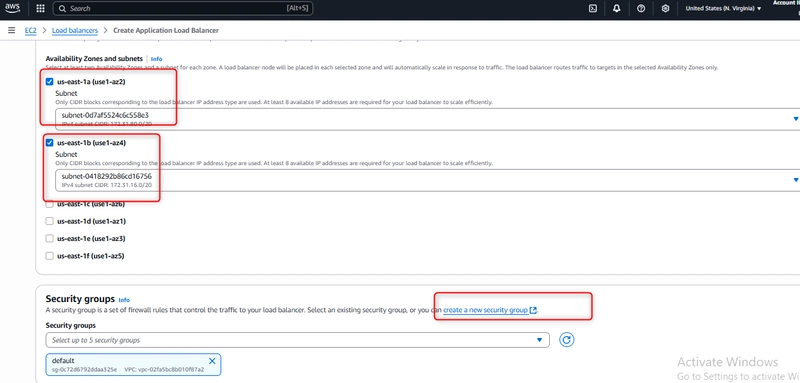
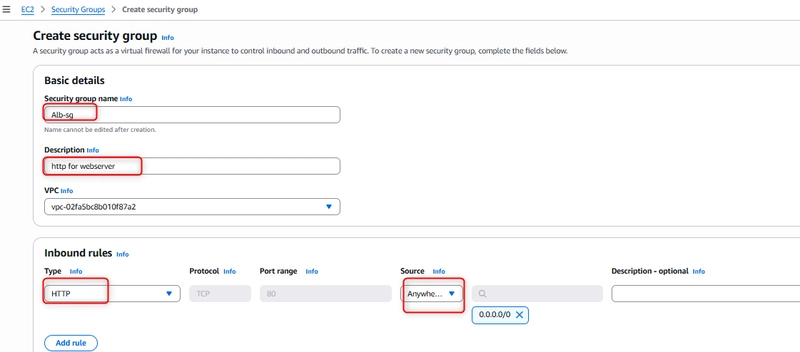
Step 3: Configuring Security Groups
Security is crucial for any internet-facing resource. I created a dedicated security group for the load balancer:
Name: Alb-sg
Description: HTTP for webserver
Inbound rules: Allow HTTP (port 80) from 0.0.0.0/0
Outbound rules: Allow all traffic (can be restricted for production)
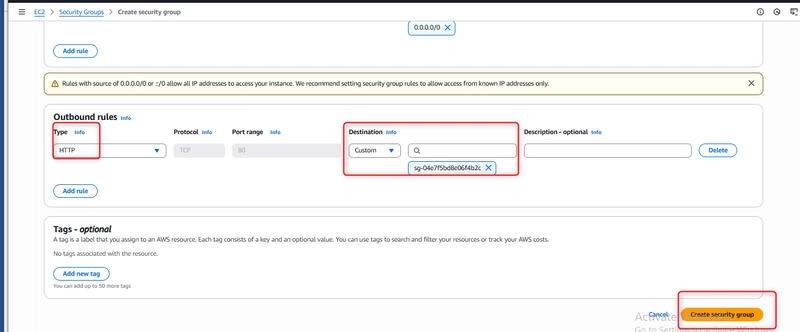
Important: While I used 0.0.0.0/0 for testing, in production you should restrict access to known IP addresses.
Step 4: Setting Up Target Groups
Target groups define where the load balancer routes traffic:
Target type: Instances (routes to EC2 instances)
Name: webserver
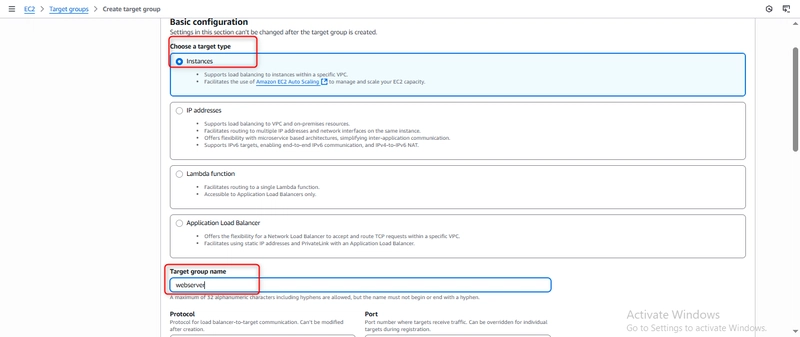
Protocol: HTTP
Port: 80
Health checks:
Protocol: HTTP
Path: / (the default health check endpoint)
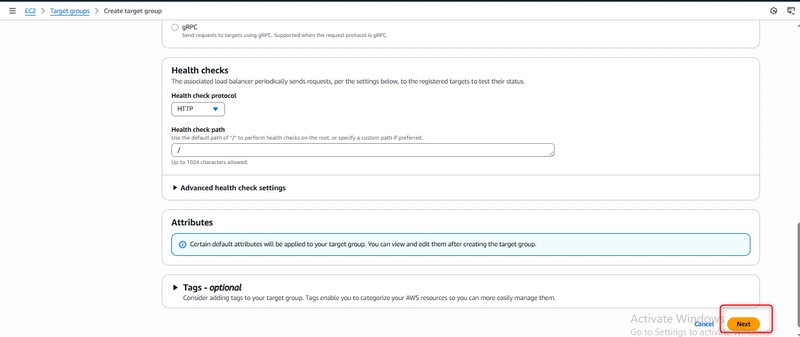
Health checks are essential for the load balancer to detect unhealthy instances and stop routing traffic to them.
Step 5: Registering Targets
With the target group created, I registered my EC2 instances:
Selected both running instances (myec2 and myfirstec2)

Both instances were in the “personalsecurity” security group
Assigned port 80 for HTTP traffic
Verified both instances showed as “healthy” in the target group
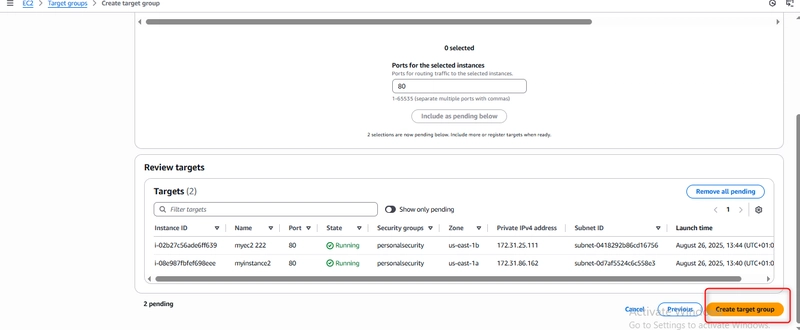
Having instances in different Availability Zones ensures high availability—if one zone fails, traffic routes to instances in other zones.
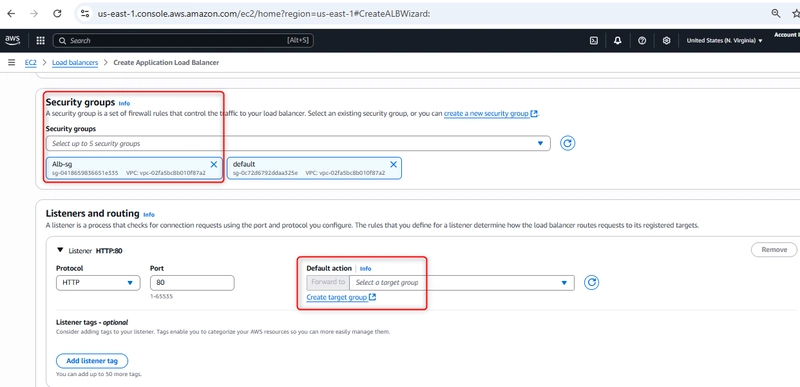
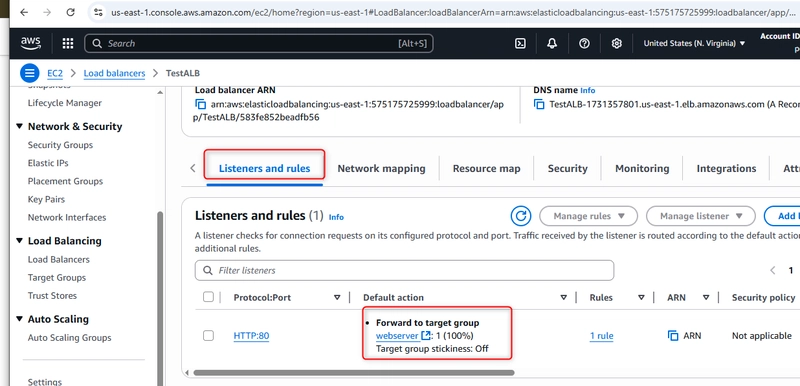
Step 6: Configuring Listeners and Rules
Listeners check for connection requests on specific ports:
Protocol: HTTP
Port: 80
Default action: Forward to “webserver” target group
Target group stickiness: Off (for this setup)
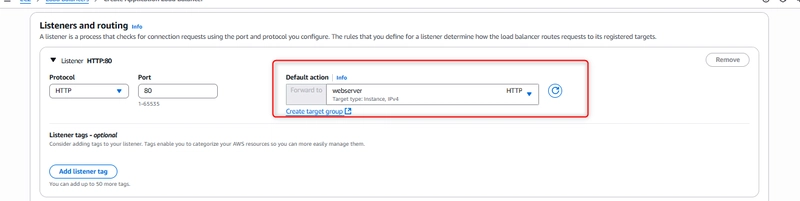
The listener configuration tells the load balancer to accept HTTP traffic on port 80 and forward it to our registered instances.
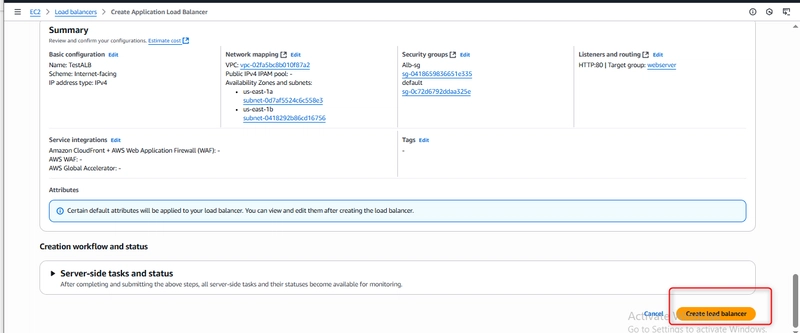
Step 7: Review and Create
Before finalizing, I reviewed all configurations:
Basic configuration: TestALB, Internet-facing, IPv4
Network mapping: Correct VPC and subnets in two AZs
Security groups: Alb-sg allowing HTTP traffic
Listeners: HTTP:80 forwarding to webserver target group
After verification, I created the load balancer. AWS provisioned it within a few minutes.

Step 8: Testing the Setup
Once the load balancer was active, I tested it using the provided DNS name:
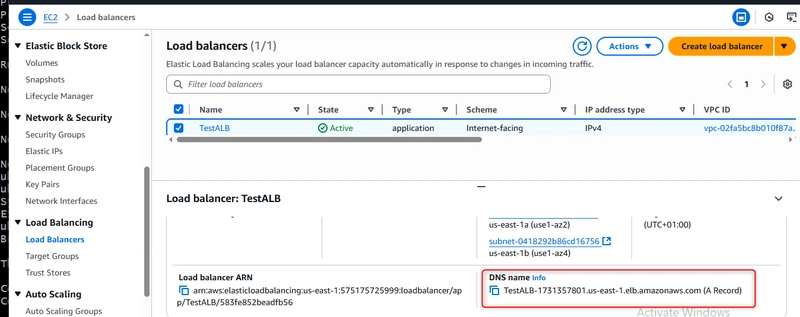
text
TestALB-1731357801.us-east-1.elb.amazonaws.com
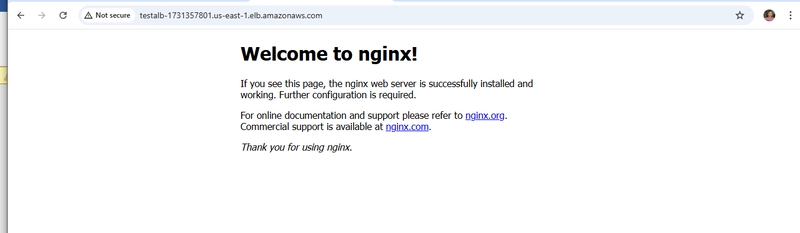
Accessing this URL in a browser displayed the Nginx welcome page, confirming that traffic was properly routed through the load balancer to my EC2 instances.
Monitoring and Maintenance
After setup, I monitored the load balancer using AWS CloudWatch metrics, which provide insights into:
Request counts
Latency metrics
HTTP response codes
Healthy host counts
Regular monitoring helps identify performance issues and ensures the load balancer is distributing traffic efficiently.
Best Practices and Lessons Learned
Always use multiple Availability Zones for high availability
Implement proper health checks to avoid routing traffic to unhealthy instances
Consider using HTTPS for production applications (requires SSL certificate)
Use appropriate security groups that follow the principle of least privilege
Enable access logs for troubleshooting and analysis
Consider using AWS WAF for additional security protection
Conclusion
Setting up an Application Load Balancer in AWS might seem complex at first, but it’s a straightforward process when broken down into steps. The ALB efficiently distributed traffic across my EC2 instances, providing scalability and high availability for my web application.
This setup forms the foundation for building resilient applications on AWS. From here, you could explore more advanced features like path-based routing, host-based routing, integration with Auto Scaling groups, or setting up HTTPS listeners with AWS Certificate Manager.
Have you set up load balancers on AWS? What challenges did you face? Share your experiences in the comments below!
Further Reading
AWS Elastic Load Balancing Documentation
Application Load Balancer Guide
Best Practices for ELB