How to Set Up a High-Availability Azure Blob Storage for a Public Website (With Versioning & Recovery)
As digital content demands continue to grow globally, businesses need scalable storage solutions that offer high availability, versioning, and public access to files like product images, videos, and marketing assets.
In this guide, I walk through setting up an Azure Storage Account tailored for a public-facing website with:
Read-access geo-redundancy (RA-GRS)
Anonymous blob access
Blob versioning
Soft delete for recovery
Each section is accompanied by screenshots from my own hands-on exercise, so you can easily follow along or replicate it in your environment.
Scenario Overview
This solution addresses the needs of a company with:
Global customers and rapidly growing demand
Mission-critical content requiring low-latency access
A need for document version control and recovery after deletions
A public website hosting marketing documents and images
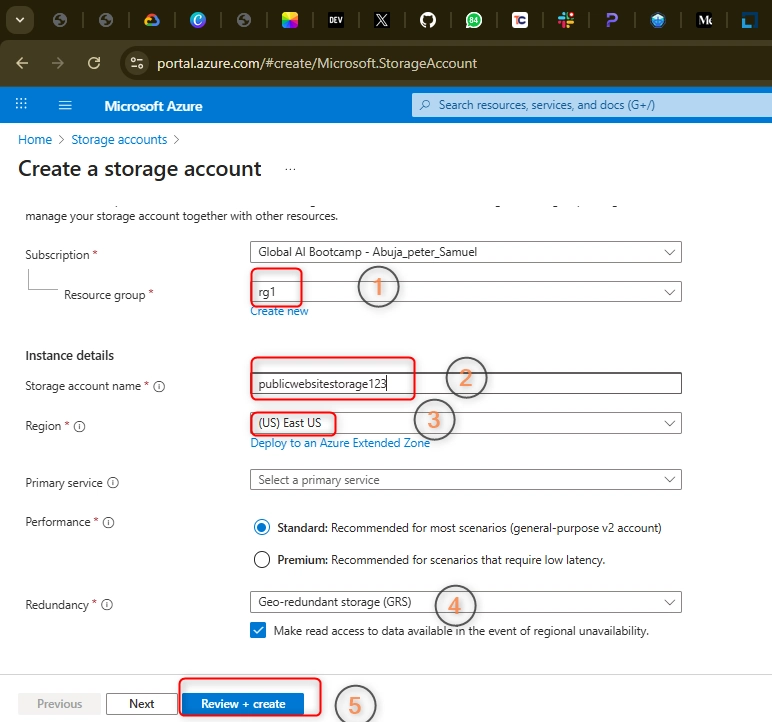
Step 1: Create a Storage Account with High Availability
In the Azure Portal, go to Storage accounts, then click + Create.
Create a new Resource Group (e.g., webstorage-rg).
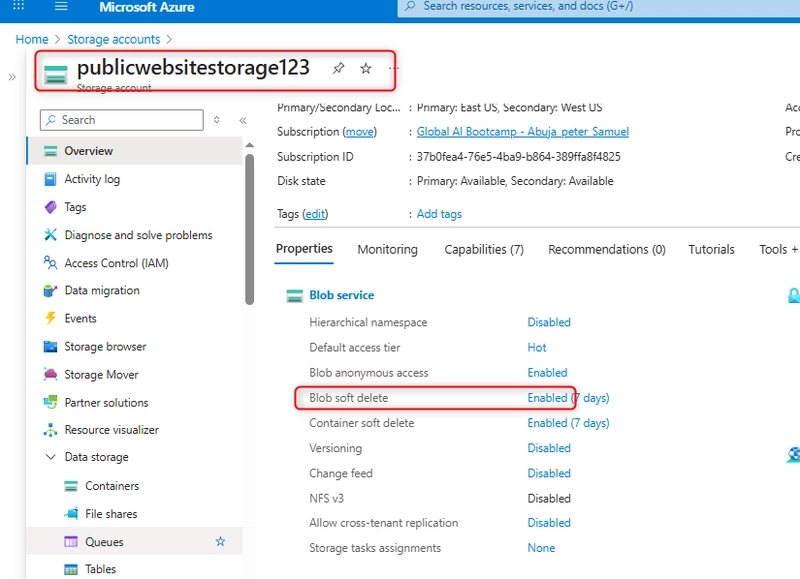
Choose a globally unique name for your storage account (e.g., publicwebsite12345).
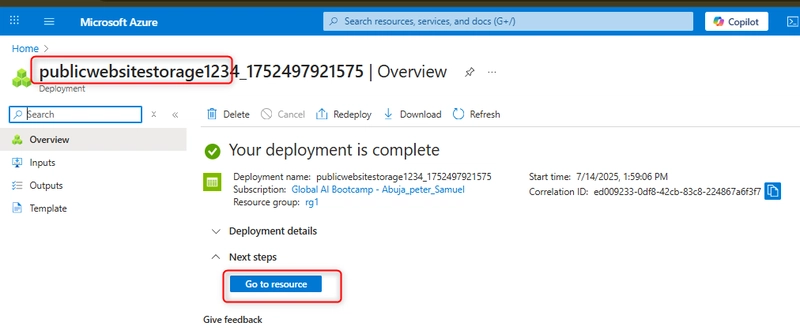
Use default settings and proceed to Review + create, then click Create.
Once deployed, go to the storage account resource.
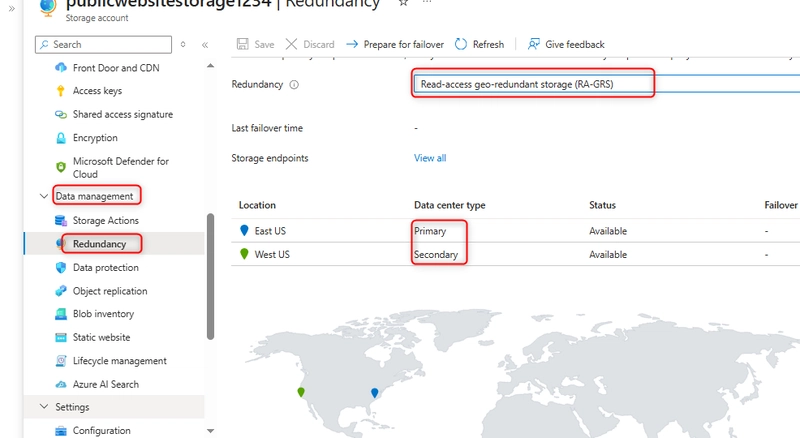
Step 2: Configure Redundancy for Regional Failover
To ensure high availability across regions:
Navigate to Data Management > Redundancy.
Select Read-access geo-redundant storage (RA-GRS).
Save changes and note the primary and secondary regions.
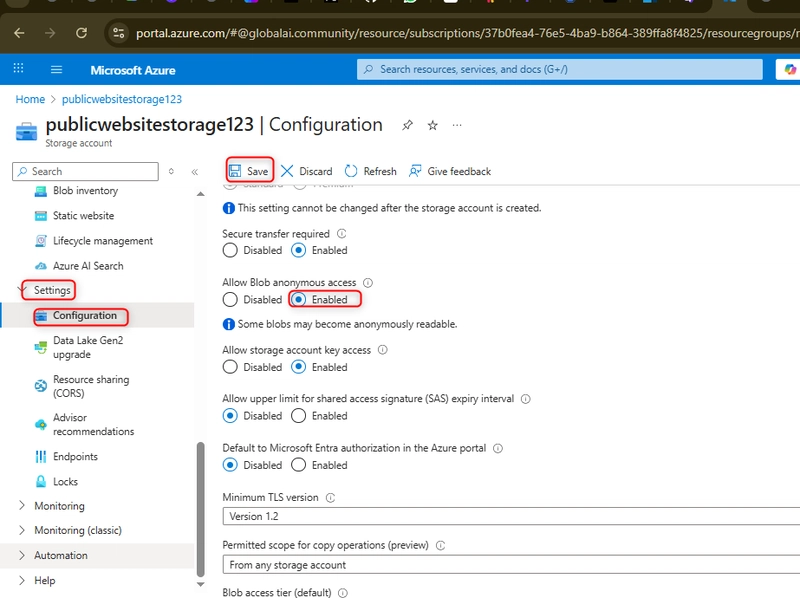
Step 3: Enable Anonymous Public Access to Blobs
To make your files publicly accessible without requiring user authentication:
Go to Settings > Configuration.
Set Allow blob anonymous access to Enabled.
Save changes.
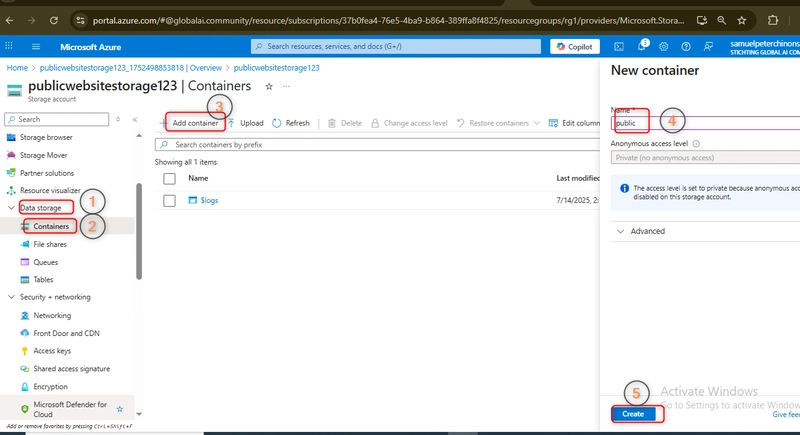
Step 4: Create a Blob Container
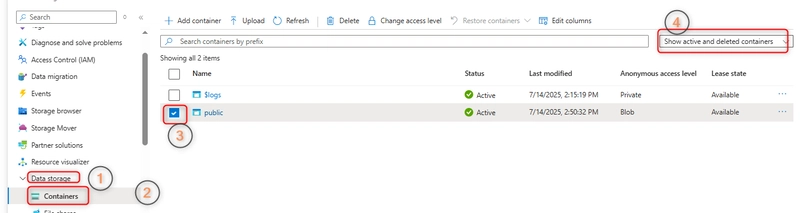
Go to Data Storage > Containers.
Click + Container, name it public, and click Create.
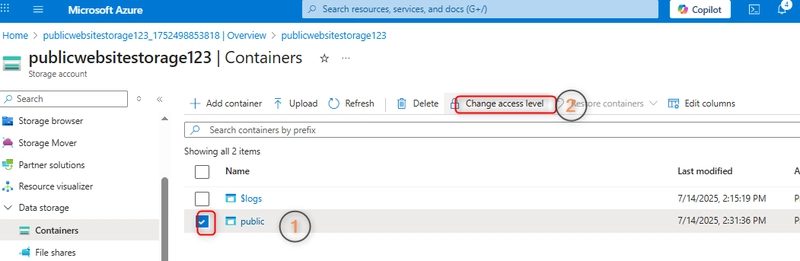
After creating the container, click Change access level.
Set access level to Blob (anonymous read access for blobs only).
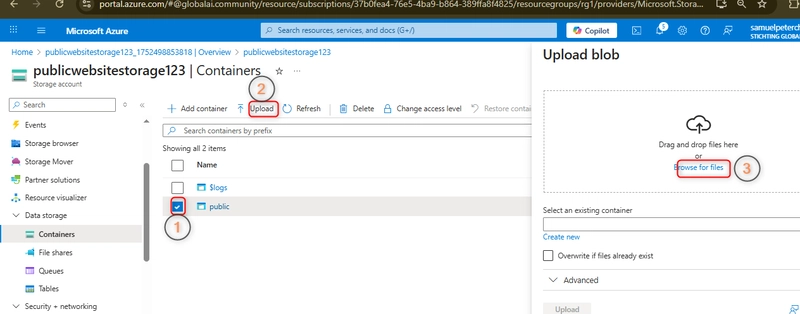
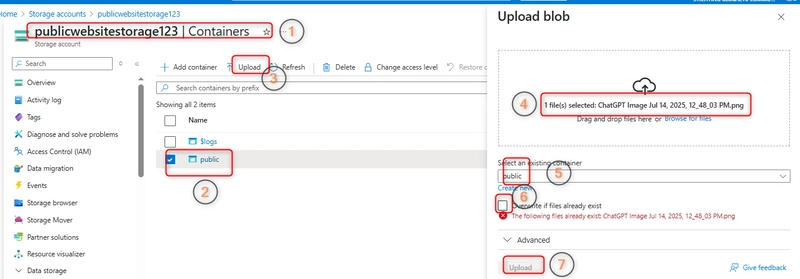
Step 5: Upload and Test Public Files
In your public container, click Upload.
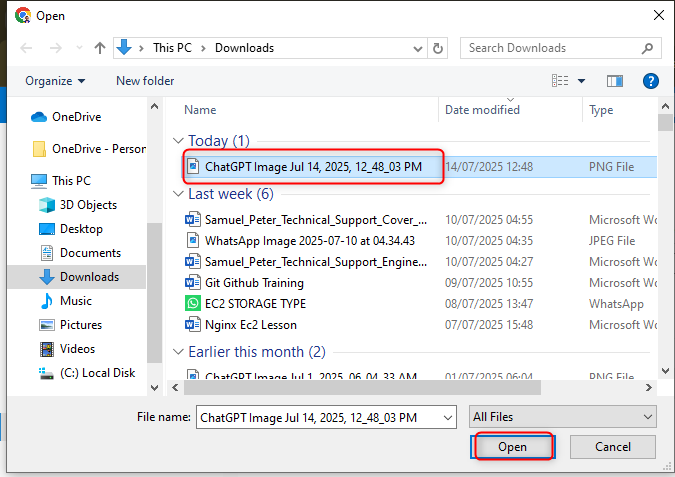
Choose an image or document file.
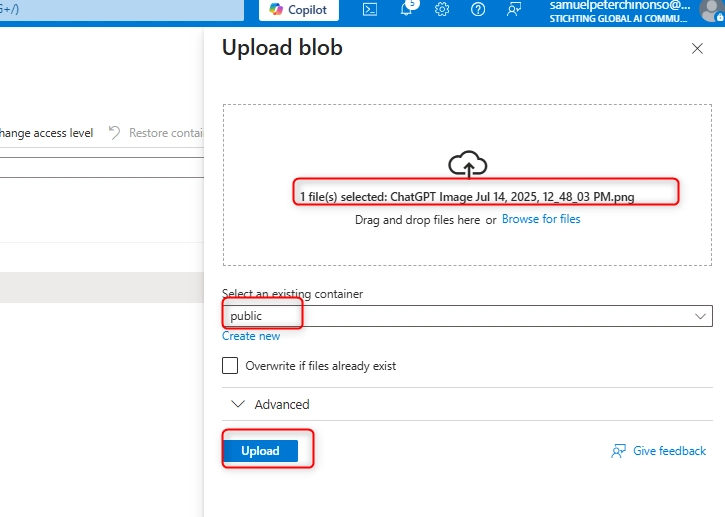
After uploading, open the file’s Overview tab and copy its URL.
Paste the URL in a browser to verify anonymous access.


Step 6: Enable Soft Delete for Blobs
To enable file recovery for up to 21 days:
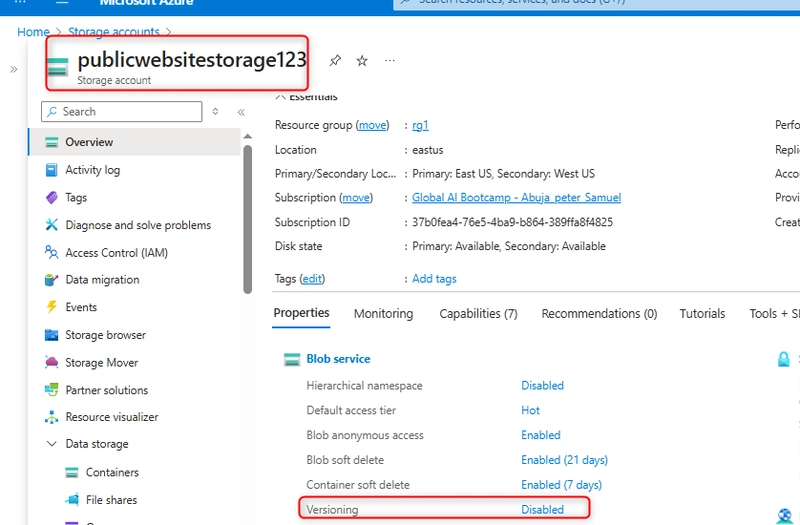
In the storage account, go to Overview > Properties under Blob service.
Select Soft delete and enable it.
Set Keep deleted blobs for to 21 days.
Save changes.

Test Soft Delete
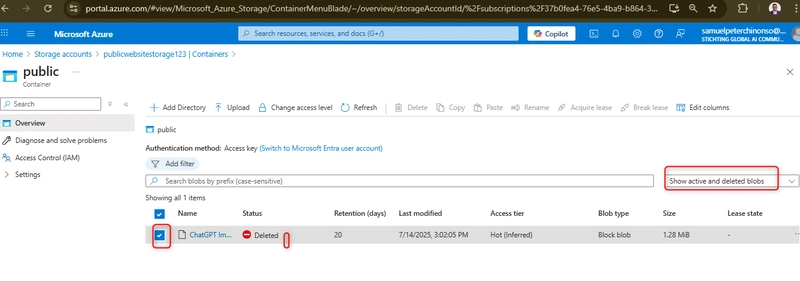
Delete a file in the container.
Toggle Show deleted blobs in the container view.
Select the deleted blob and click Undelete.
Refresh to verify restoration.
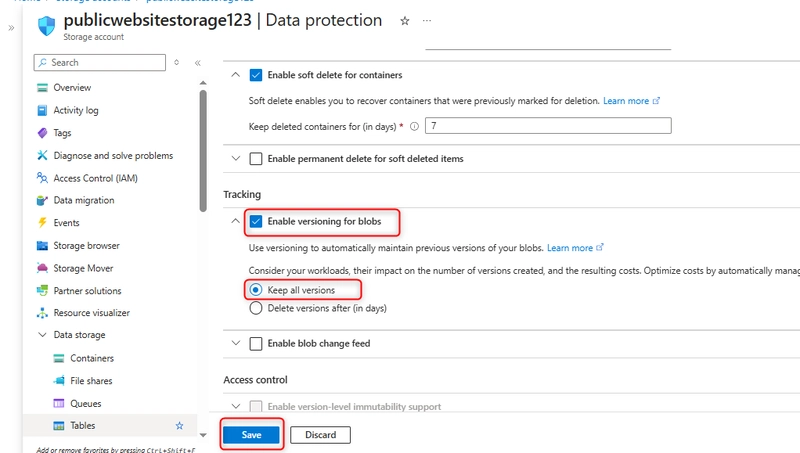
Step 7: Enable Blob Versioning
To track and manage different file versions:
Go to Overview > Properties under Blob service.
Select Versioning and enable it.
Save changes.
Test Versioning
Upload a new version of the same file.
Use Show deleted blobs to view prior versions.
Restore as needed.
Key Takeaways
Azure Blob Storage supports highly available, publicly accessible websites.
Redundancy settings like RA-GRS provide failover in regional outages.
Anonymous blob access simplifies content delivery.
Soft delete and versioning protect against data loss.
Connect With Me
Feel free to drop a comment if you have questions or are working on a similar project. You can also connect with me on LinkedIn to stay updated on more Azure and cloud infrastructure tutorials.