How to deploy PocketBase on AWS with Docker
First, I’m a huge PocketBase fan!
I use it for many projects (e.g., smartgoutcare) and to prototype fast.
This guide shows how to deploy PocketBase 0.31 on AWS EC2 using Docker, complete with persistence and auto-restart.
Perfect for indie devs and small apps that want a simple, production-ready backend.
This tutorial is up-to-date for PocketBase v0.31 and tested on Ubuntu 24.04 LTS.
Time: ~10–15 min. Cost: ~$0–$5/mo (t2.micro).
What this will cover:
- Create EC2 & assign Elastic IP
- SSH in & install Docker
- Run PocketBase container (volume + restart policy)
This post is the first in a four-part series on deploying and extending PocketBase.
By the end of next week, I’ll publish:
• Part 2: Custom domain + free HTTPS (TLS)
• Part 3: S3 storage, email setup, and automated backups
• Part 4: Integrating Cloudflare Functions to handle advanced logic or external APIs, a faster way to extend PocketBase without modifying its core or waiting for rebuilds
Once all four parts are live, you’ll have a complete, production-ready PocketBase setup with a clean path for future extensions.
Prerequisites
- AWS account
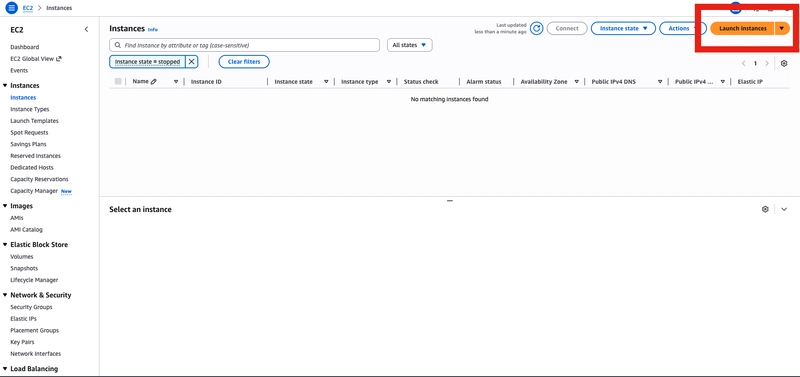
Step 1: Create an EC2 Instance
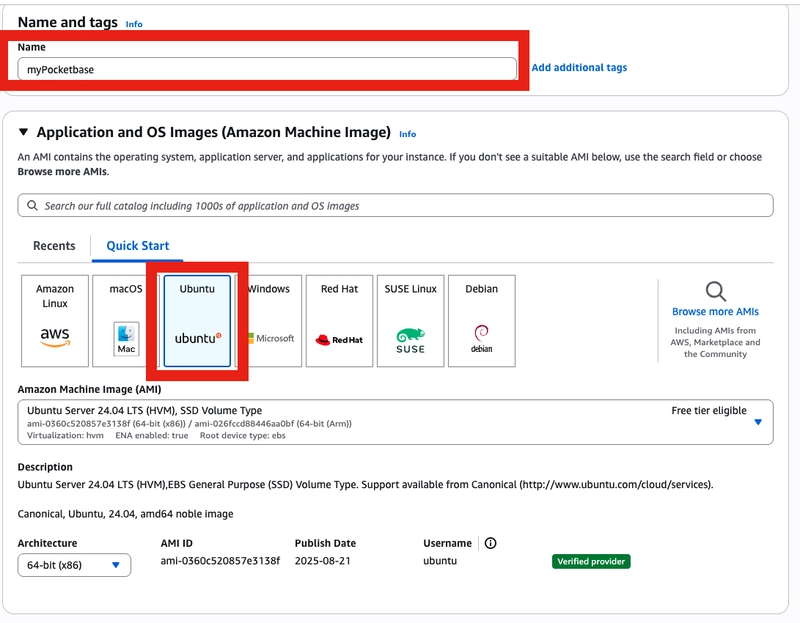
- In the AWS console, go to EC2 → Launch Instance.
- Choose your instance name and Ubuntu 22.04 LTS (free-tier eligible).
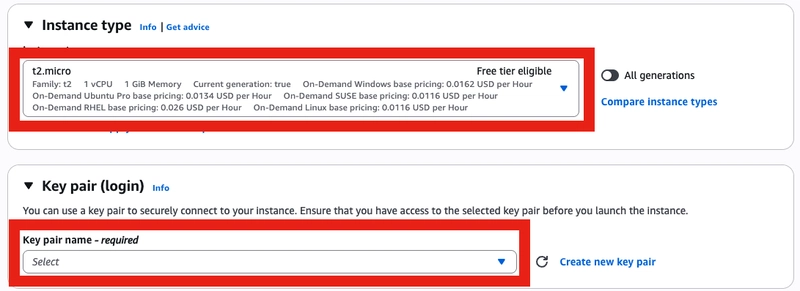
- Instance type: t2.micro or larger & select (create if not done yet) your key pair.
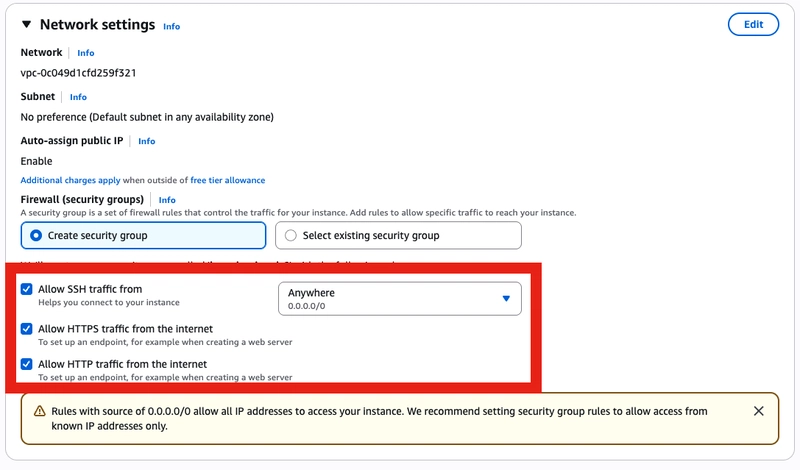
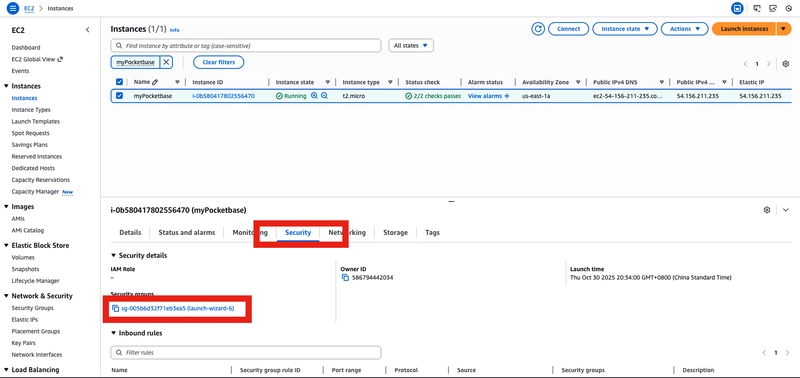
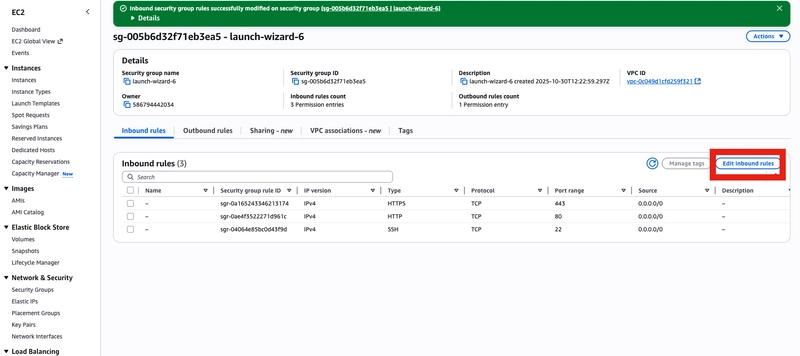
- Allow ports 22, 80, 443.
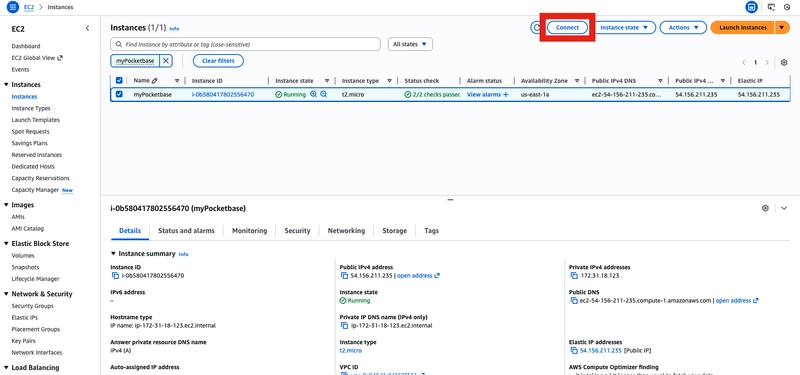
- Launch Instance
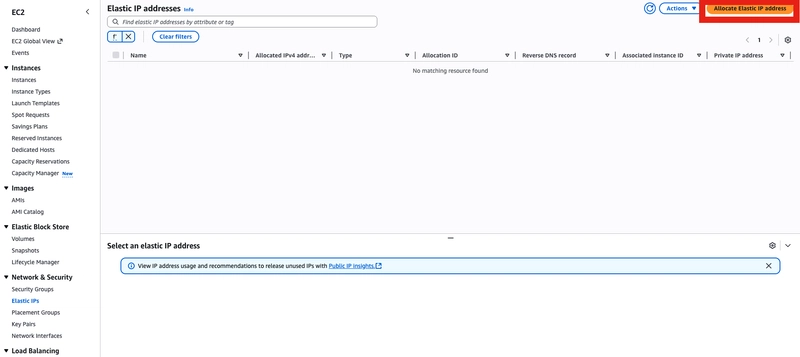
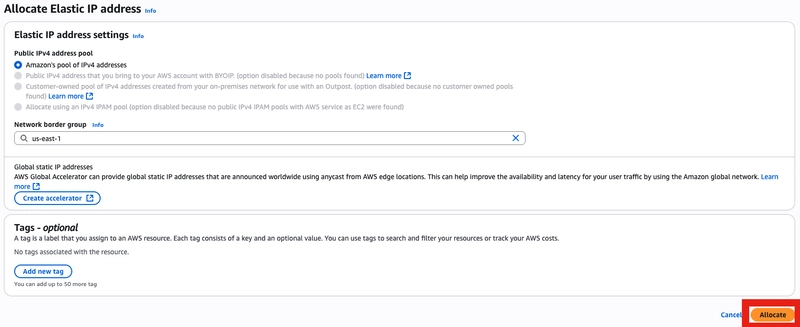
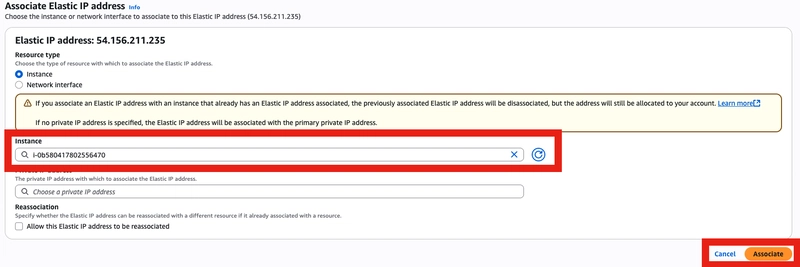
- Got to Elastic IP menu, then allocate an Elastic IP (this is very important in case your instance shut down, with Elastic IP you will keep the same IP, otherwise you will get a new random one that will screw up your DNS records)
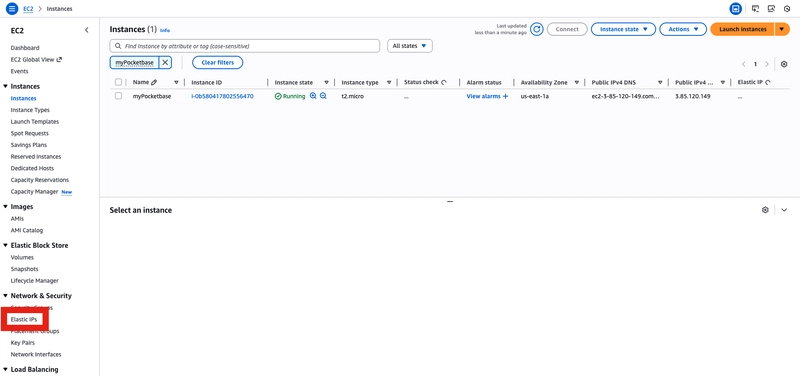
- Associate it with your instance
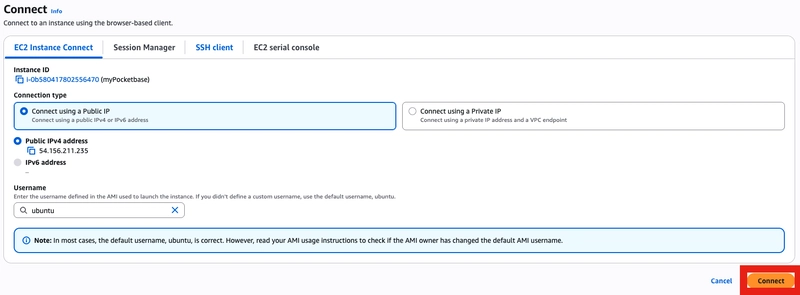
Step 2: Install Docker and run PocketBase
- Login into the instance
- Install Docker (From Docker [install docs])(https://docs.docker.com/engine/install/ubuntu/)
# Add Docker's official GPG key:
sudo apt-get update
sudo apt-get install ca-certificates curl
sudo install -m 0755 -d /etc/apt/keyrings
sudo curl -fsSL https://download.docker.com/linux/ubuntu/gpg -o /etc/apt/keyrings/docker.asc
sudo chmod a+r /etc/apt/keyrings/docker.asc

echo
  "deb [arch=$(dpkg --print-architecture) signed-by=/etc/apt/keyrings/docker.asc] https://download.docker.com/linux/ubuntu
  $(. /etc/os-release && echo "${UBUNTU_CODENAME:-$VERSION_CODENAME}") stable" |
  sudo tee /etc/apt/sources.list.d/docker.list > /dev/null

sudo apt-get update

sudo apt-get install docker-ce docker-ce-cli containerd.io docker-buildx-plugin docker-compose-plugin
They will ask you if you wanna install => press Y
- Create PocketBase image (There is no official Docker image, so let’s build it)
nano Dockerfile
And paste the following Dockerfile
FROM alpine:3.20

ARG PB_VERSION=0.31.0
ARG TARGETOS=linux
ARG TARGETARCH=amd64

# Create unprivileged user
RUN addgroup -S pb && adduser -S -G pb pb

# Basics
RUN apk add --no-cache ca-certificates tzdata curl unzip

# Install PocketBase
WORKDIR /pb
RUN curl -fL -o pb.zip
    https://github.com/pocketbase/pocketbase/releases/download/v${PB_VERSION}/pocketbase_${PB_VERSION}_${TARGETOS}_${TARGETARCH}.zip
 && unzip pb.zip -d /usr/local/bin
 && rm pb.zip
 && chmod +x /usr/local/bin/pocketbase

# Data dir
RUN mkdir -p /pb/pb_data && chown -R pb:pb /pb
VOLUME ["/pb/pb_data"]

EXPOSE 8080
USER pb

HEALTHCHECK --interval=30s --timeout=5s --retries=3
  CMD curl -fsS http://127.0.0.1:8080/ >/dev/null || exit 1

ENTRYPOINT ["pocketbase","serve","--http","0.0.0.0:8080"]
(To get out of nano: ctrl + X then Y then enter)
Build the image
sudo docker build -t pocketbase:0.31.0 .
- Deploy PocketBase
sudo mkdir -p /srv/pocketbase

sudo mkdir -p /srv/pocketbase
sudo chown -R 100:101 /srv/pocketbase   # user:group inside container
sudo chmod -R u+rwX,g+rwX /srv/pocketbase

sudo docker run -d
  --name pocketbase
  -p 8080:8080
  -v /srv/pocketbase:/pb/pb_data
  --restart always
  pocketbase:0.31.0
- Create a superuser account
sudo docker exec -it pocketbase /usr/local/bin/pocketbase
  --dir /pb/pb_data
  superuser create you@example.com StrongPass123!
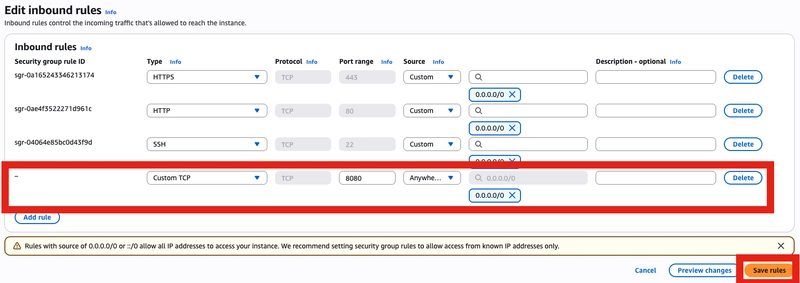
- Open 8080 temporarily
Here it is PocketBase is running. In order to have access to it until the next post, let’s open the port 8080 to see it.
- Go to the IP & enjoy

Get the IP and go to http://:8080 & log in with your credentials.
✅ You made it! Congrats! Next: Add a domain and HTTPS with Nginx and Certbot (Part 2).
Or skip setup entirely → deploy PocketBase in 20s with pbdeploy.