🚀 Getting Started with Microsoft Azure: A Beginner’s Practical Guide with VM, VNet, Storage & More!
Hands-on, beginner-friendly, and fun! This guide walks you through setting up your first resource group, virtual network, virtual machine, and storage account on Azure — with real screenshots from my own project lab. If you’re new to cloud computing or Azure, this is the perfect place to start!
🧠 Why This Project?
When learning Azure, it’s easy to feel overwhelmed. But once you roll up your sleeves and actually create things — boom! The fog clears.
That’s why I embarked on this hands-on Azure lab where I:
-Created a resource group to keep things organized ✅
-Set up a virtual network (VNet) with a subnet ✅
-Deployed a virtual machine (VM) running Ubuntu ✅
-Created a storage account for future data usage ✅
And guess what? I documented everything with screenshots for YOU.
🔧 Prerequisites: Get Your Azure Wings
👨💻 Need an Azure Account?
Start here for a free trial (yes, you get ₦ free credits!).
🌐 Step 1: Create a Resource Group
A resource group is like a folder to keep all your Azure resources neat and easy to delete later.
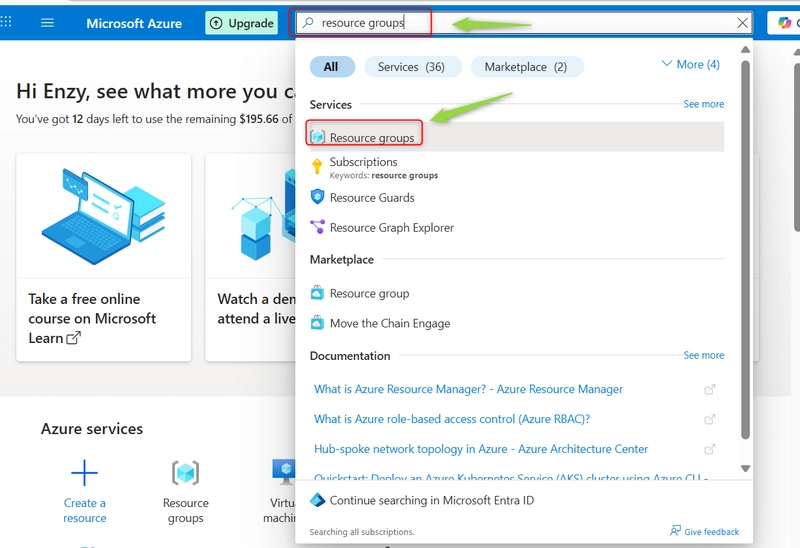
🔎 In the Azure Portal:
1.Search for Resource groups
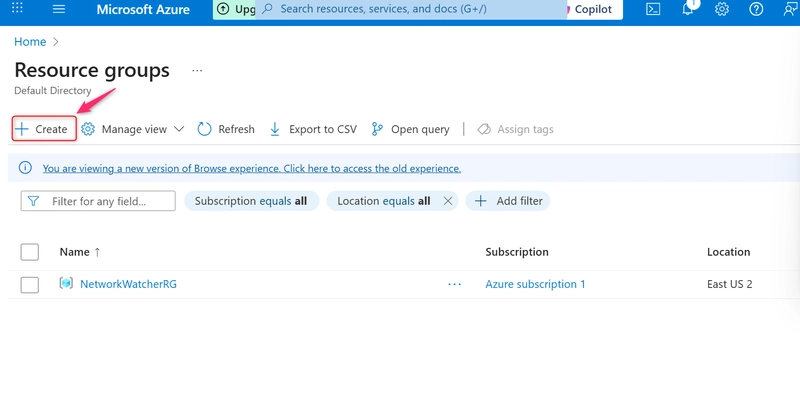
2.Click Create
3.Name it: guided-project-rg
4.Leave the region as default
5.Click Review + Create, then Create

💡 Pro Tip: Don’t touch the NetworkWatcherRG group if it was already there — it’s Azure’s own thing.
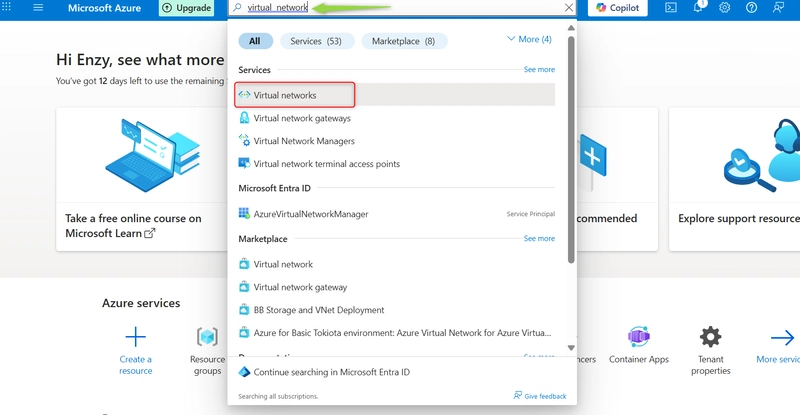
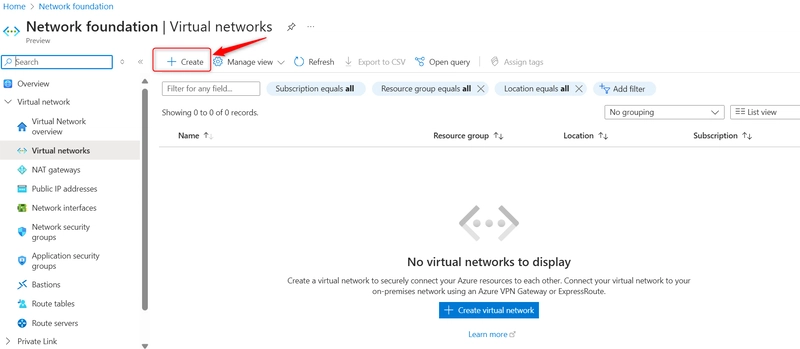
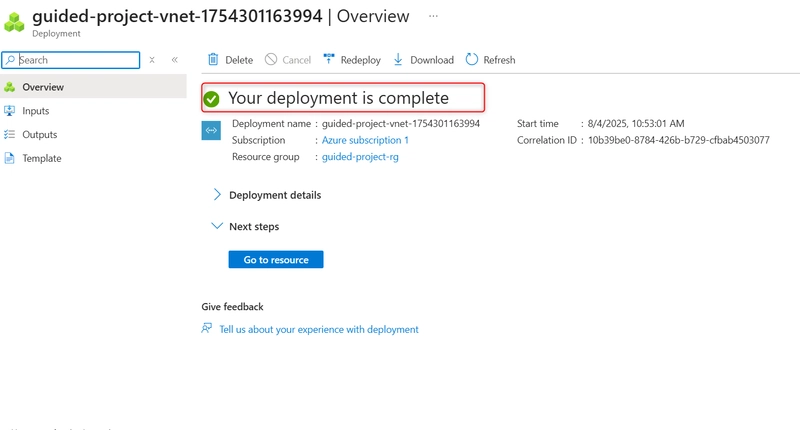
🛠️ Step 2: Create a Virtual Network (VNet)
VNet helps your Azure resources talk to each other securely.
1.Search for Virtual networks
2.Click Create
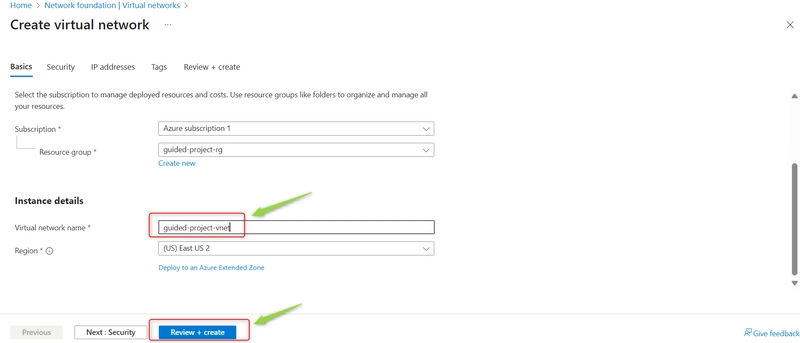
3.Use the same resource group (guided-project-rg)
**
4.Name it: guided-project-vnet**
5.Accept the default subnet
6.Click Review + Create, then Create
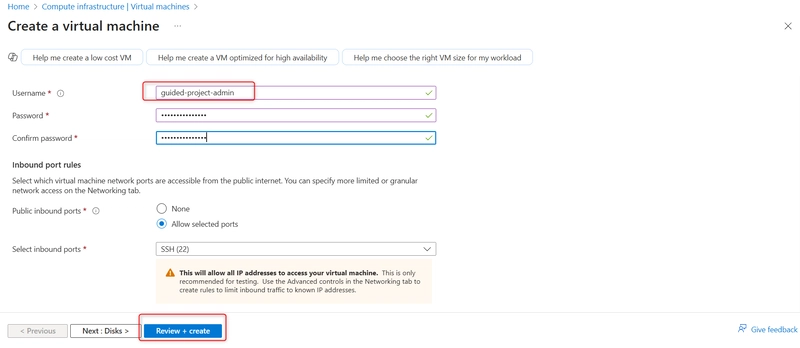
💻 Step 3: Deploy a Virtual Machine (VM)
Let’s spin up a Linux server!
Search Virtual Machines
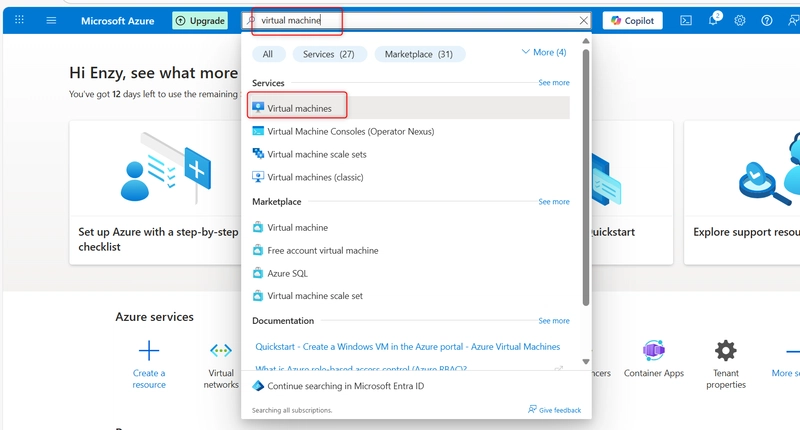
Click** Create > Virtual machine**
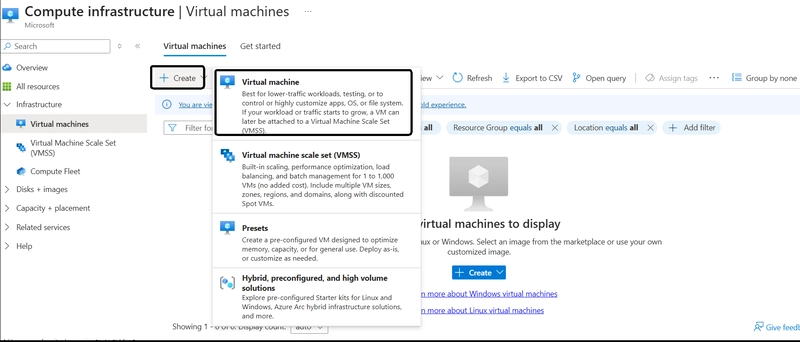
Ensure the following are set accordingly:
-Resource Group: guided-project-rg
-Name: guided-project-vm
-Image: Ubuntu Server 24.04 LTS (x64 Gen2)
-Authentication Type: Password
-Username: guided-project-admin
-Set a strong password 🔐
-Leave other settings as-is
-Click Review + Create, then Create
⏳ Wait for deployment…
💸 Don’t worry — Azure will show you the estimated cost per hour before you launch the VM.
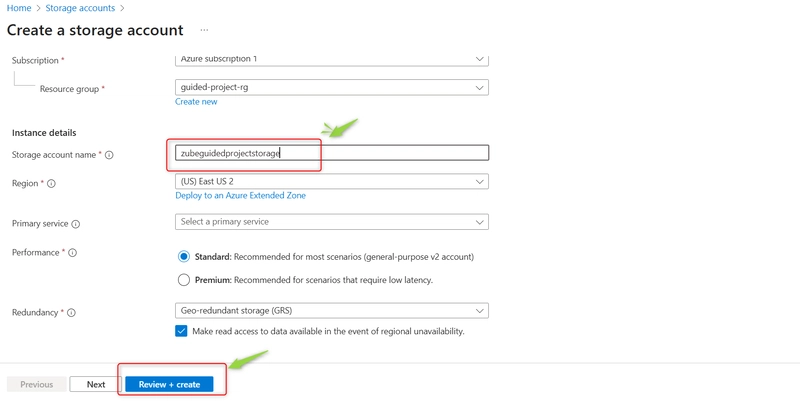
📦 Step 4: Create a Storage Account
Need to store logs, blobs, or backups? This is your go-to.
Search Storage accounts
Click Create
Resource Group: guided-project-rg
Give it a globally unique name like myguidedproject123
Click Review + Create, then Create
🥳 That’s It — You’ve Deployed 4 Key Azure Resources!
✅ Resource Group
✅ Virtual Network (with Subnet)
✅ Ubuntu Virtual Machine
✅ Storage Account
You’ve basically laid the foundation of a real-world cloud infrastructure!
🧼 Clean Up Tip
When you’re done exploring:
-Go to Resource groups
-Select guided-project-rg
-Hit Delete Resource Group
Be sure not to delete anything that was already in your Azure before the project!
🤔 Final Thoughts
Starting with Azure doesn’t have to be intimidating. By breaking it down into small, practical steps and seeing your deployments succeed, you gain confidence — and real skills.
I’ll keep posting more hands-on Azure walkthroughs. Make sure to follow for updates!
📌 Connect With Me
Let’s grow in tech together. Drop your thoughts, questions, or your own screenshots in the comments!