Create C# nested files in Visual Studio
Introduction
Microsoft Visual Studio supports nested files, which are usually appsettings.json. Other file types are supported by creating a file named .filenesting.json in the root of a C# project.
Example
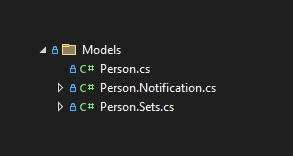
In the Models folder, a Person class is a partial class separated into three files.
To nest the three files created in the root folder of the project a file named nesting.json as shown below.
{
  "help": "https://go.microsoft.com/fwlink/?linkid=866610",
  "root": true,
  "dependentFileProviders": {
    "add": {
      "fileToFile": {
        "add": {
          "Person.Notification.cs": [
            "Person.cs"
          ],
          "Person.Sets.cs": [
            "Person.cs"
          ]
        }
      }
    }
  }
}
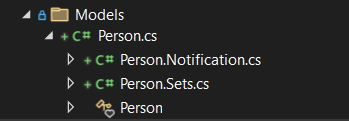
Note the organization for each node: a class file with the base file name, a descriptor, and an extension, followed by the base file name. The results are shown below.
Using Copilot prompt files to create .filenesting.json
By creating a prompt file Copilot can create a nesting file.
For this example partial classes are targeted under the Models folder.
-
Under the root folder of the Visual Studio solution, add a file named NestedPartialClasses.prompt.md under the folder .githubprompts (see example in provided source code)
-
Add the following instructions
- If there is a Models folder find all partial classes in it.
- Collect each partial class files
- Create in the root folder of the current project a file named .filenesting.json
- In this file, create a JSON structure that nests all the partial class files under their main class file. The main class file will have a single period in the file name.
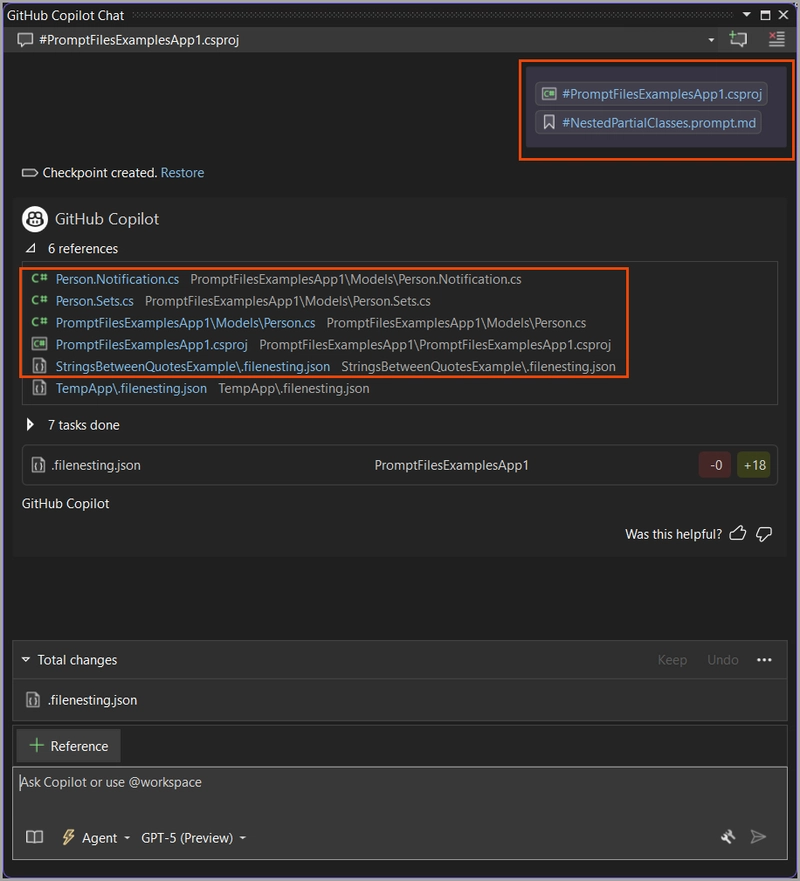
- Open Copilot Chat window.
- Select Agent mode
- Select the project
- Select the prompt file
- Select press enter
Copilot reads the prompt file instructions and executes. Once finished, accept the new file if it is correct, which it should be. Examine that the class is now nested under Solution Explorer.
Chat window targeting the project PromptFilesExampleApp1.
If the partial classes are in a different folder, adjust the instructions in the prompt file.
Source code
- Prompt file: Solution root folder .githubpromptsNestedPartialClasses.prompt.md
- Sample project: PromptFilesExamplesApp1
✔️ Note the following in the project file for permitting the use of the field keyword.
<LangVersion>preview</LangVersion>

