Control storage access
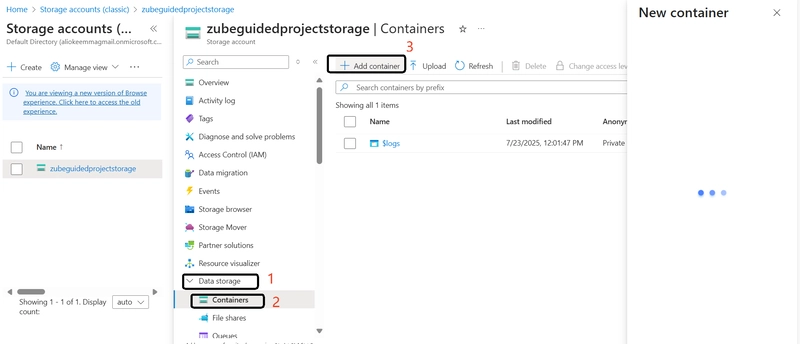
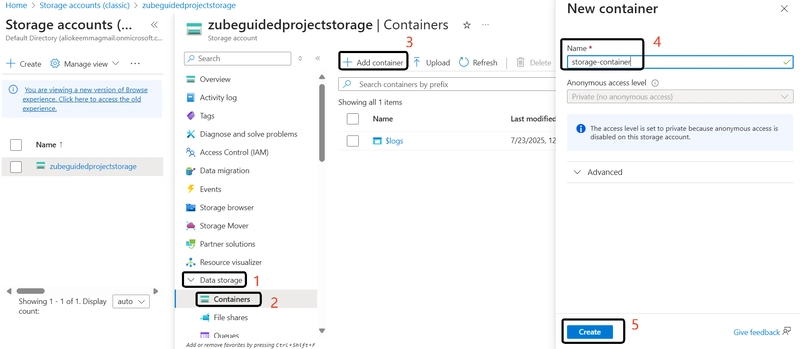
Create a storage container
Login to Microsoft Azure at https://portal.azure.com
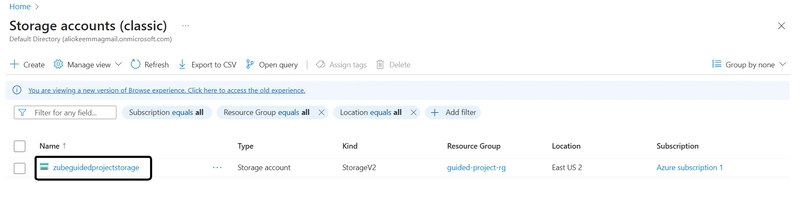
Select storage accounts under services.
Select the storage account you created in the Prepare exercise.
Select and Add container
Container Name is storage-container and then select create
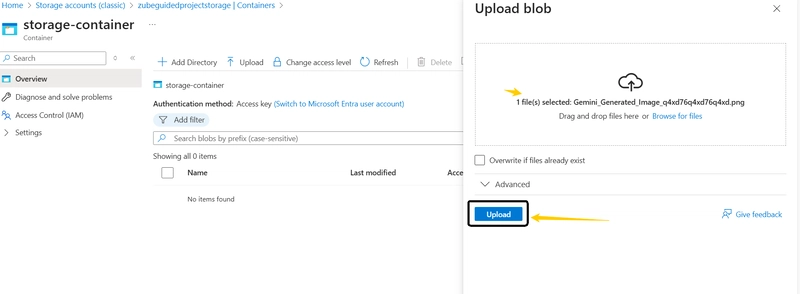
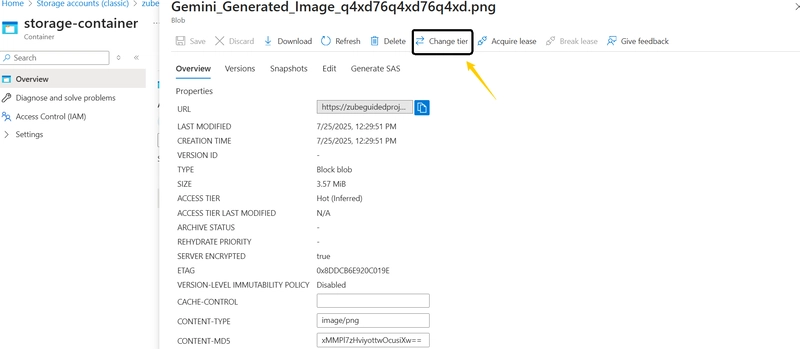
Upload a file to the storage container
Click on the container you just created and select upload

Once the file is ready for upload, select Upload.
Change the access tier
Select the file you just uploaded and Select Change tier.
Select** cold** and save
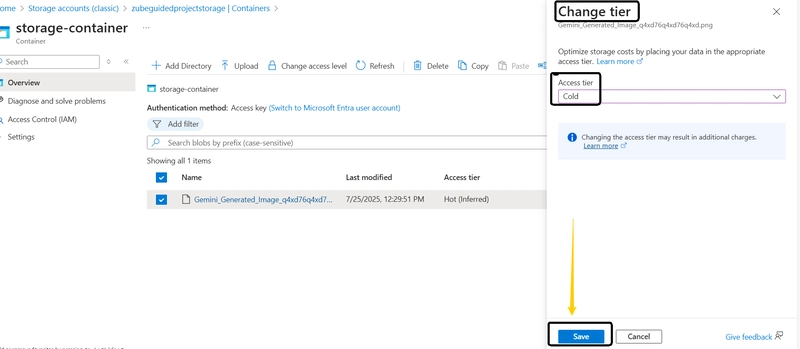
You’ve successfully uploaded a storage blob and changed the access tier from Hot to Cold. Now, let’s work with file shares.
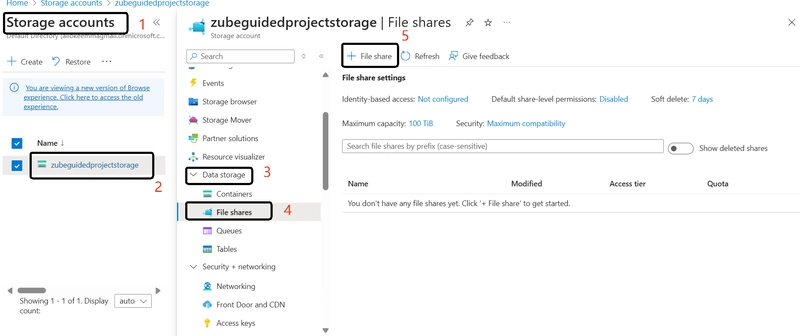
Create a file share
From the Azure portal,Select storage accounts under services.
Select your** storage account** . (Note: it should be associated with the resource group guided-project-rg you created.)
On the storage account blade, under the Data storage submenu, select File shares and Select + File share.
On the Basics tab, in the name field enter file-share.
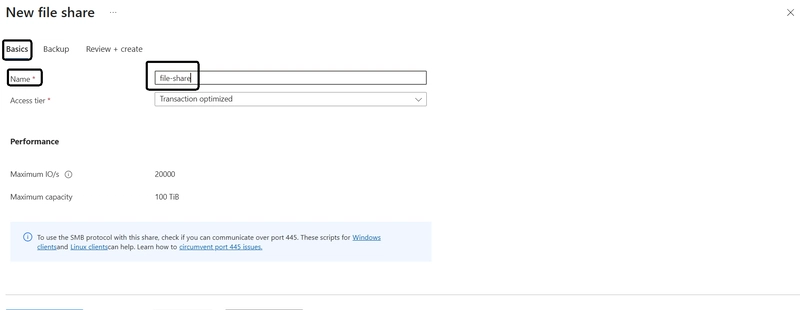
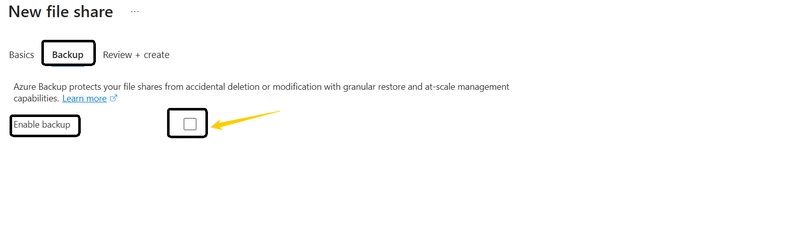
On the Backup tab, uncheck Enable backup.
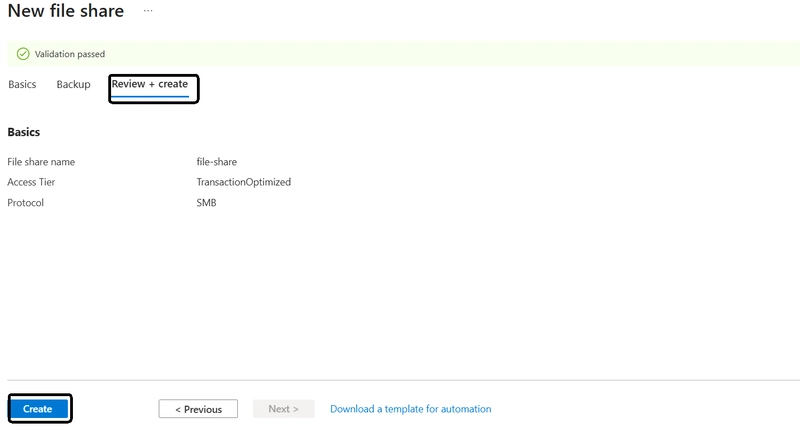
Select Review + create.
Select Create.
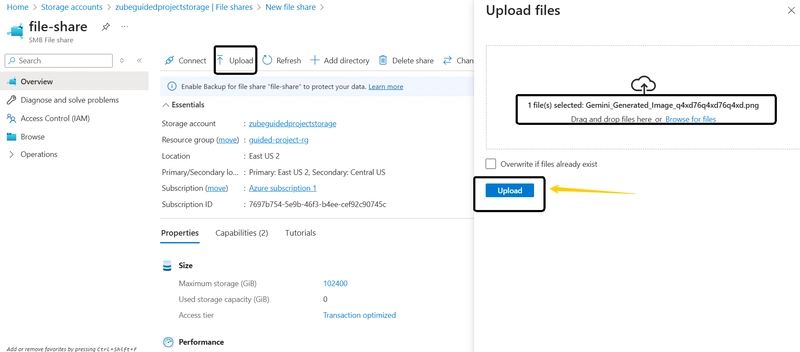
Once the file share is created, select Upload.
Upload the same file you uploaded to the blob storage or a different file.
Select Home to return to the Azure portal home page.
we will be figuring one way to control access to the files that have been uploaded.
Create a shared access signature token
From the Azure portal home page, enter and Select storage accounts under services.
Select the storage account you created in the Prepare exercise.
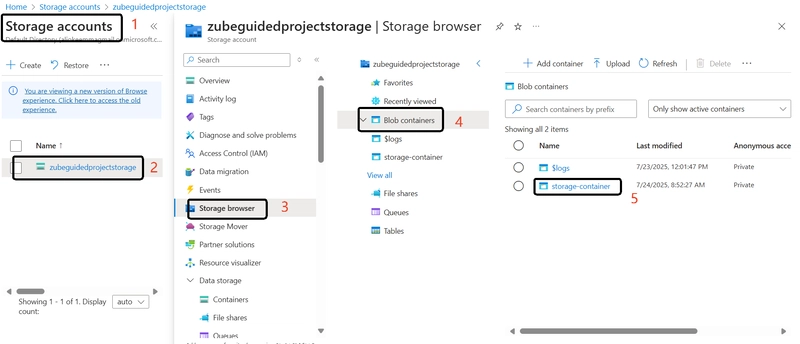
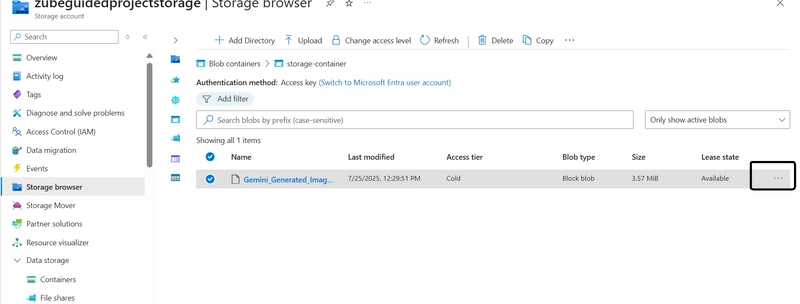
On the storage account blade, select Storage browser.
Expand Blob containers.
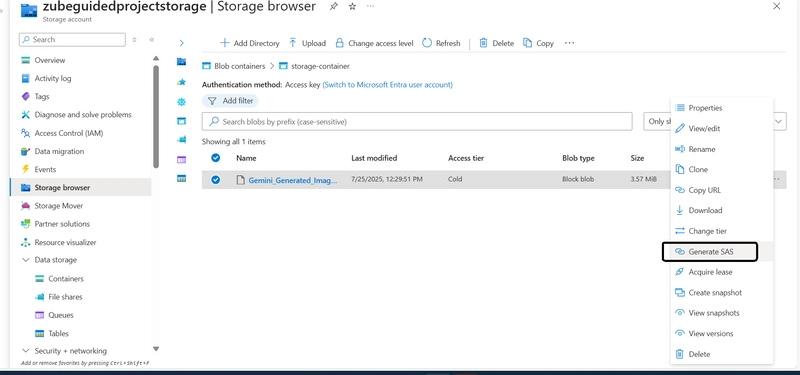
Select the ellipses (three dots) on the end of the line for the image you uploaded.
Select Generate SAS.
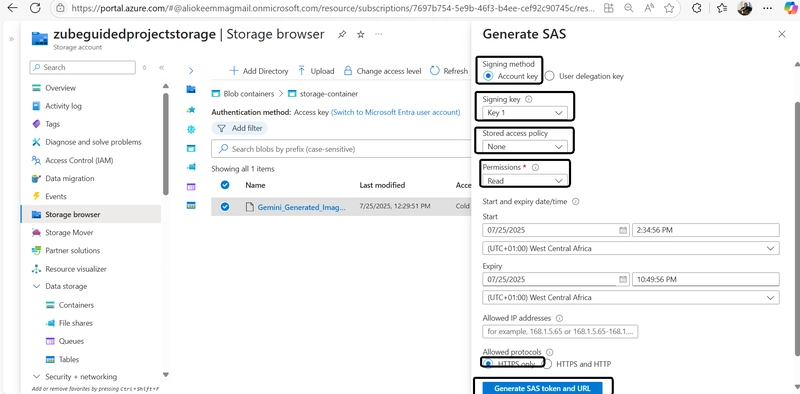
Note: When you generate a shared access signature, you set the duration. Once the duration is over, the link stops working. The **Start automatically populates with the current date and time.
Set Signing method to Account key.
Set Signing key to Key 1.
Tip: There are two signing keys available. You can choose either one, or create SAS tokens with different durations.
Set Stored access policy to None.
Set Permissions to** Read*.
Enter a custom **start and expiry time* or leave the defaults.
Set Signing method to Account key.
Set Signing key to Key 1.
Tip: There are two signing keys available. You can choose either one, or create SAS tokens with different durations.
Set Stored access policy to None.
Set Permissions to** Read*.
Enter a custom start and expiry time or leave the **defaults.
Set **Allowed protocols* to HTTPS only.
Select Generate SAS token and URI.
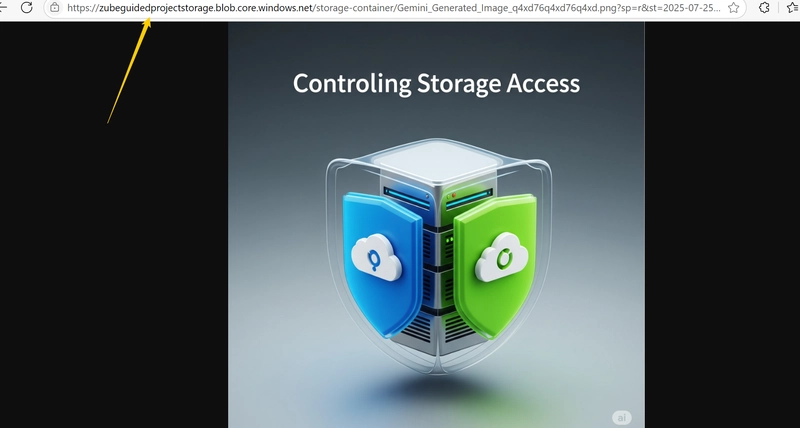
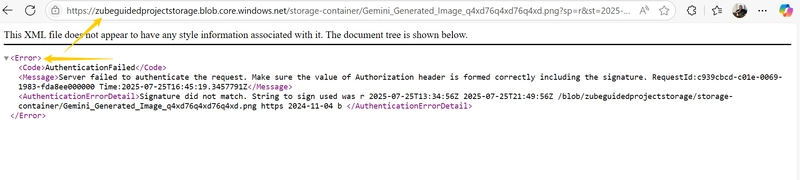
Copy the Blob SAS URL and paste it in another window or tab of your browser. It should display the image you uploaded. Keep this tab or window open.
Rotate access keys
From the Azure portal home page, in the search box, enter storage accounts.
Select storage accounts under services.
Select the storage account you created in the Prepare exercise.
Expand the Security + networking submenu.
Select Access keys.
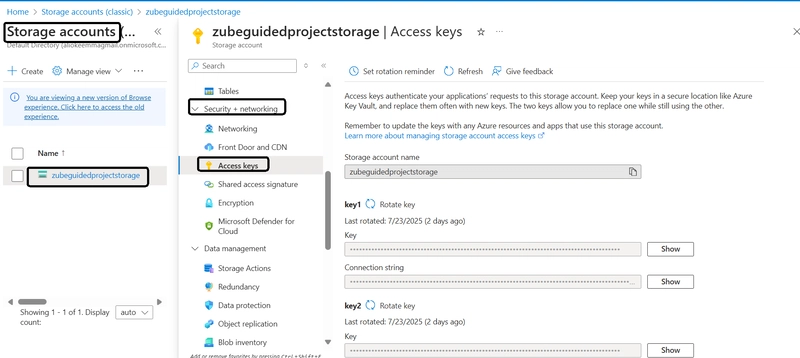
For Key 1, select Rotate key.
Read and then acknowledge the warning about regenerating the access key by selecting Yes.

Once you see the success message for rotating the access key, go back to the window or tab you used to check the SAS token and refresh the page. You should receive an authentication failed error.
We have come to the end of the process, remember to like, Comment and share!
