Building Security by Design: My AWS Project Showcasing VPC, NAT Gateway, and Private Networking Mastery
INTRODUCTION
This project reflects how I combine cloud architecture principles with practical implementation to build secure, scalable environments.
In today’s cloud-driven world, security and design are not optional — they are essential. As part of my hands-on learning and practical implementation of AWS architecture, I completed a project titled “Building a Secure Web Architecture on AWS.” The aim was to design a secure, professional-grade cloud network that demonstrates how public and private resources can coexist in the same environment, safely and efficiently.
This project combines concepts of network isolation, controlled routing, and secure connectivity — principles that are fundamental to cloud security and modern infrastructure management. Every step was documented with annotated screenshots, from setup to validation.
PROJECT OVERVIEW
Objective:
To build a secure network architecture on AWS consisting of a public and a private section. The web server in the public section is accessible from the internet, while the database server in the private section remains hidden from external access but can still reach the internet securely through a NAT Gateway
Final Architecture
Phase 1: Foundation Setup – Building Your Private Network (VPC)
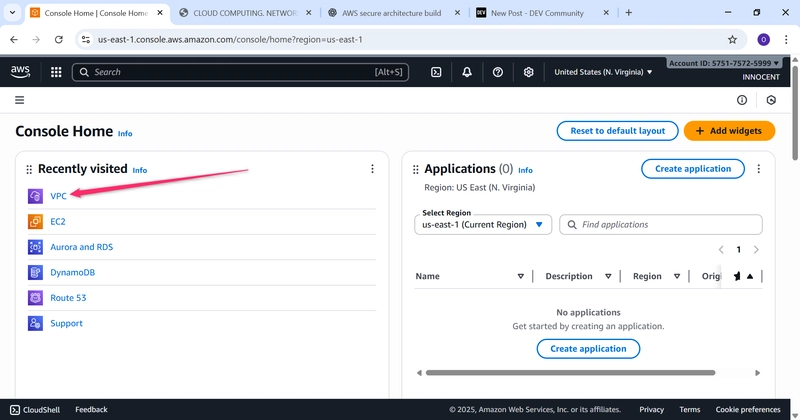
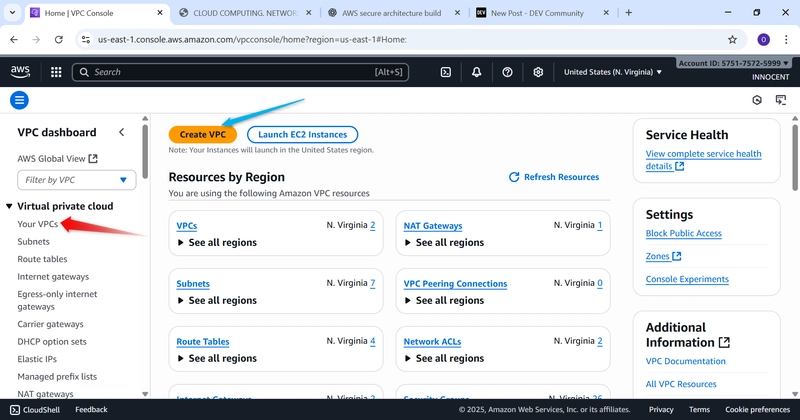
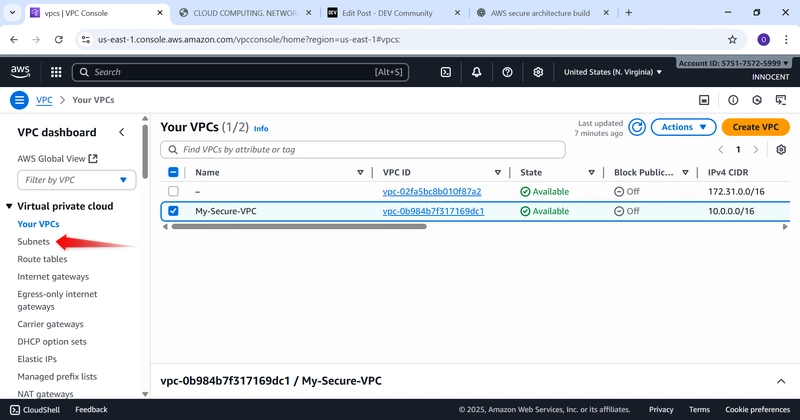
- Create a VPC (Your Private Cloud Network)
o Go to: AWS Console -> VPC service -> “Your VPCs” -> “Create VPC”.
o Settings:
▪ Name tag: My-Secure-VPC
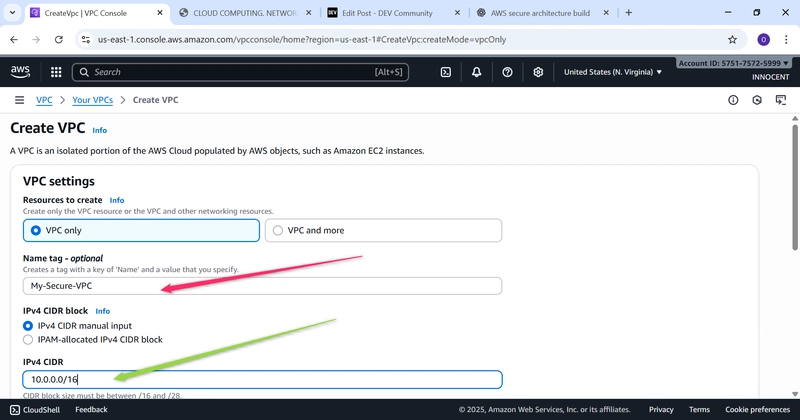
▪ IPv4 CIDR block: 10.0.0.0/16 (This creates 65,536 private IP
addresses for your use).

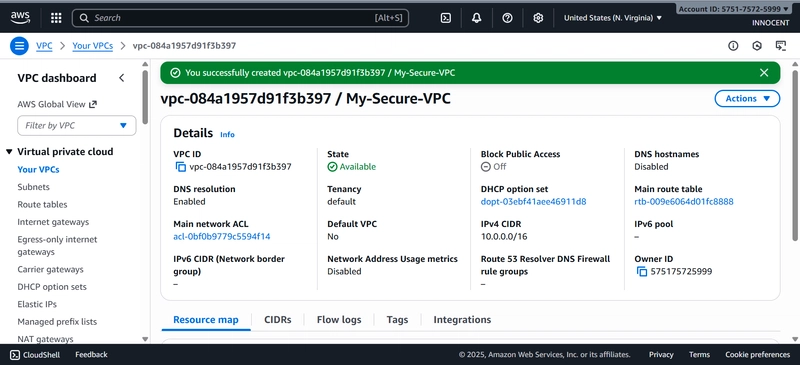
o Click Create.

Goto Ec2 Instance to configure the Networking Environment

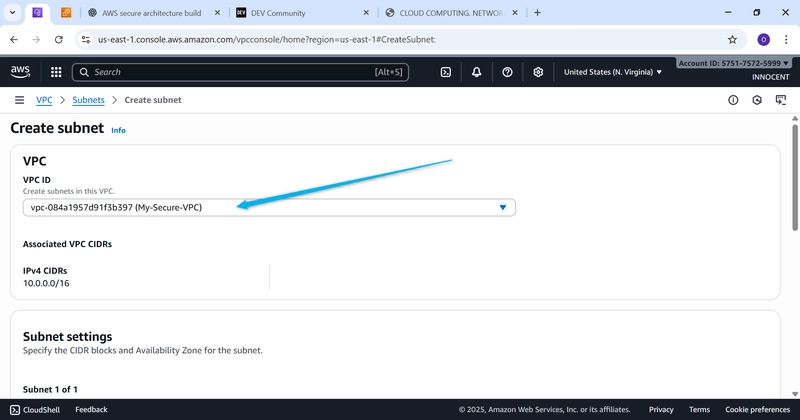
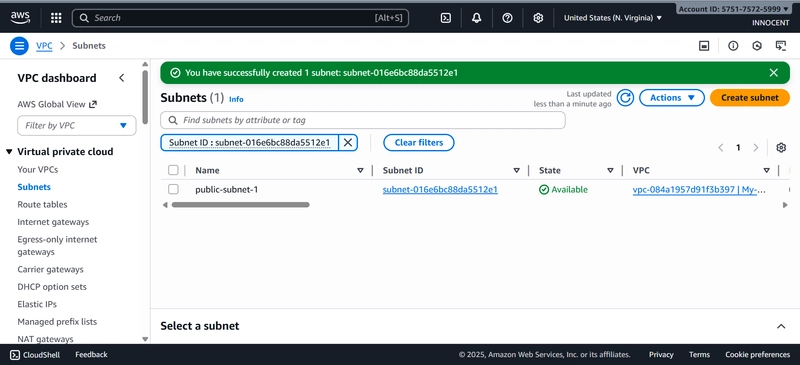
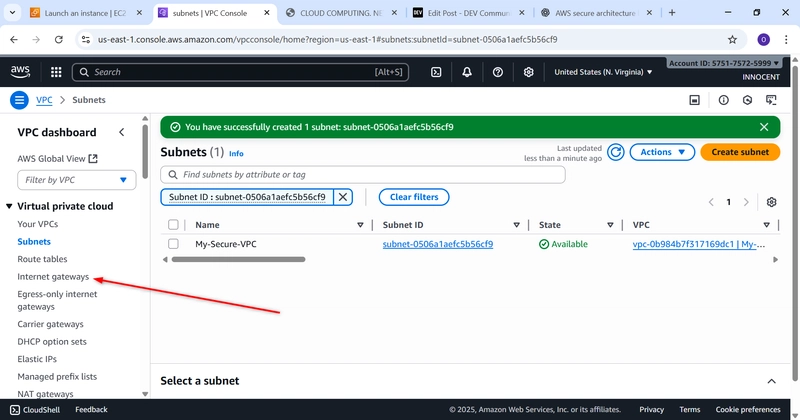
- Create Subnets (Your Designated Areas)
o Go to: Subnets -> Create subnet.
o VPC ID: Select My-Secure-VPC.
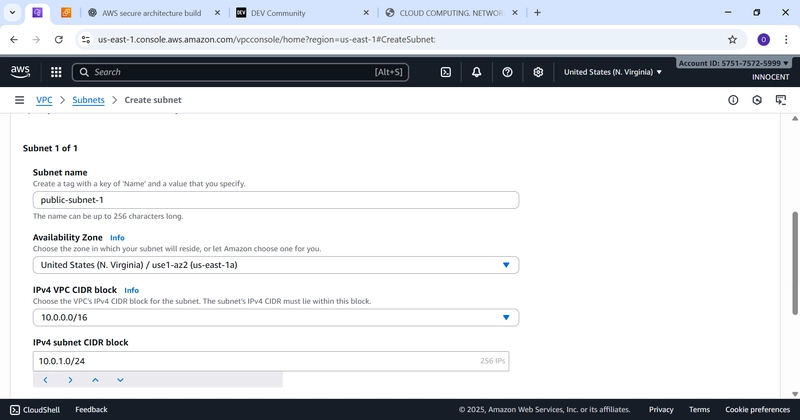
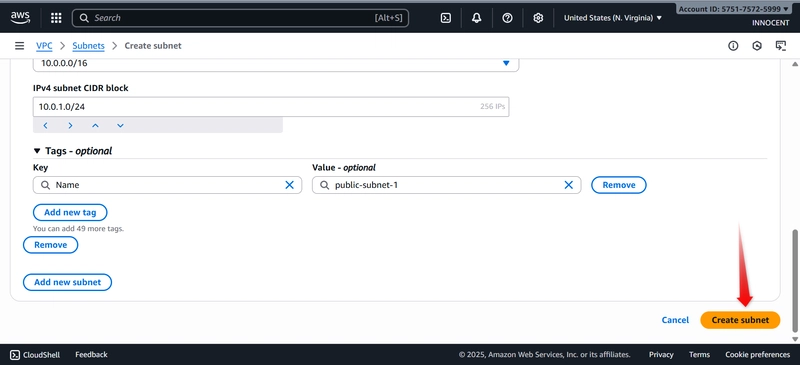
o Create Public Subnet:
▪ Subnet name: public-subnet-1
▪ Availability Zone: Pick the first one (e.g., us-east-1a).
▪ IPv4 CIDR block: 10.0.1.0/24 (This gives us 256 addresses in this
zone).
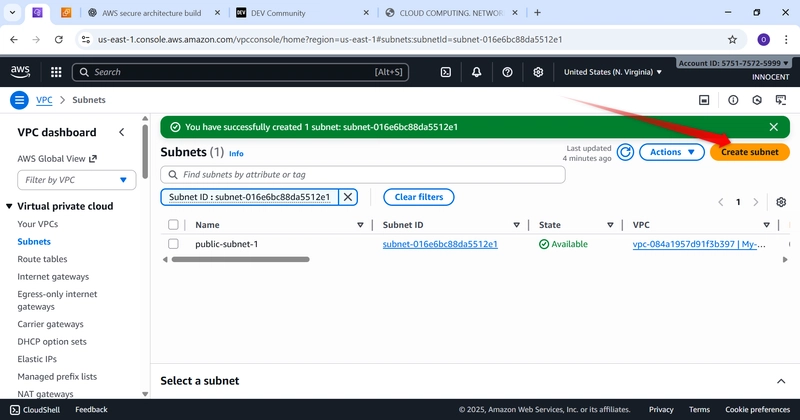
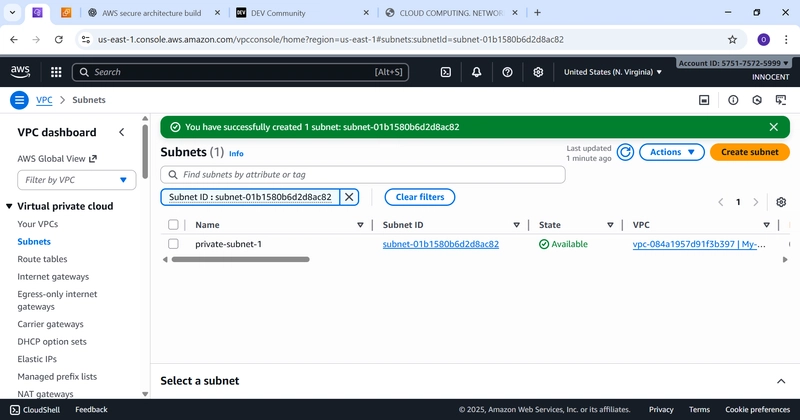
o Create Private Subnet:
▪ Click “Create subnet” again.

▪ Subnet name: private-subnet-1
▪ Availability Zone: Pick the same zone (e.g., us-east-1a).
▪ IPv4 CIDR block: 10.0.2.0/24
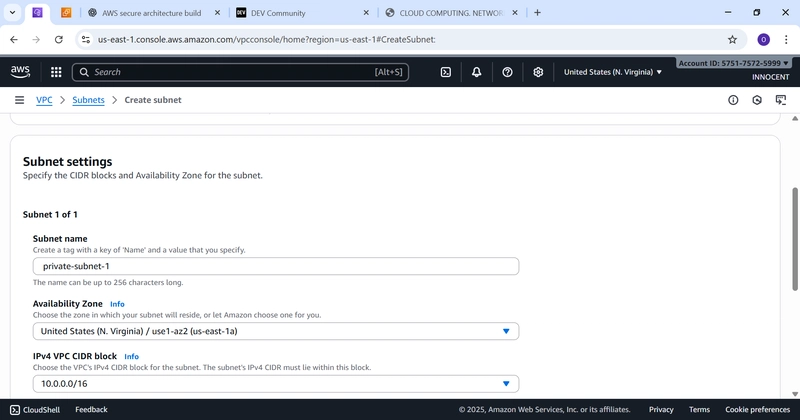
▪ Click Create subnet.

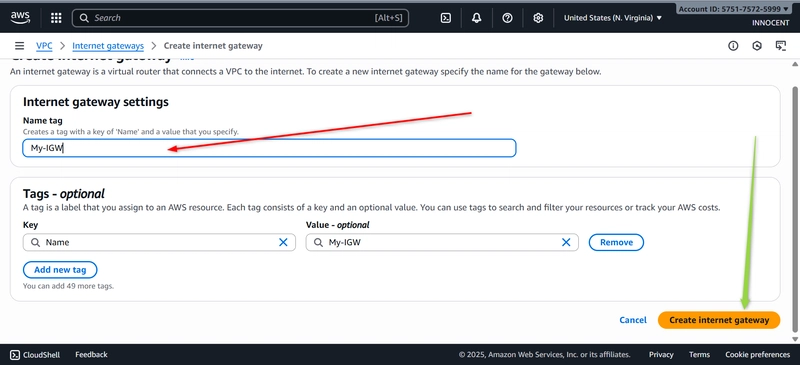
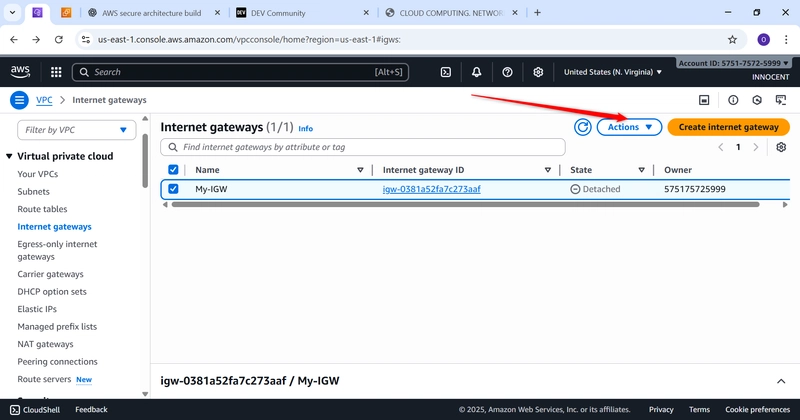
- Create an Internet Gateway (Your Front Door to the Internet)
o Go to: Internet Gateways -> Create internet gateway.

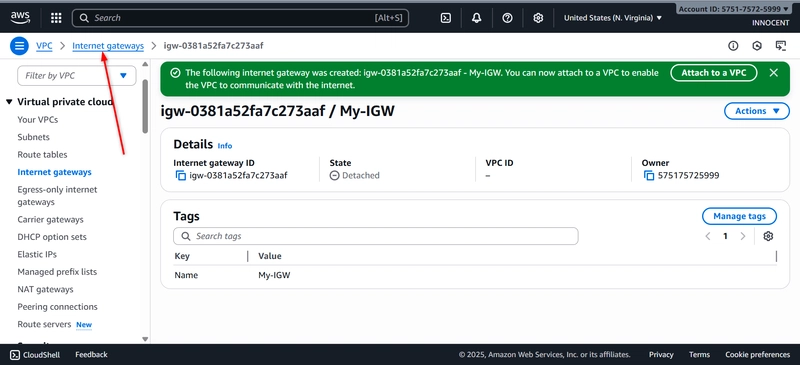
o Name tag: My-IGW
o Click Create.
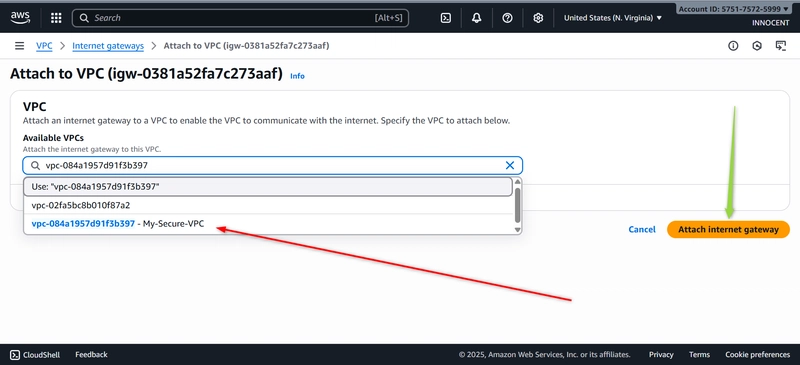
o Now, ATTACH it to your VPC: Select the My-IGW gateway, click Actions –
Attach to VPC. Select My-Secure-VPC and click Attach.

Phase 2: Routing & Security – Controlling Traffic
- Create a Route Table for the Public Subnet
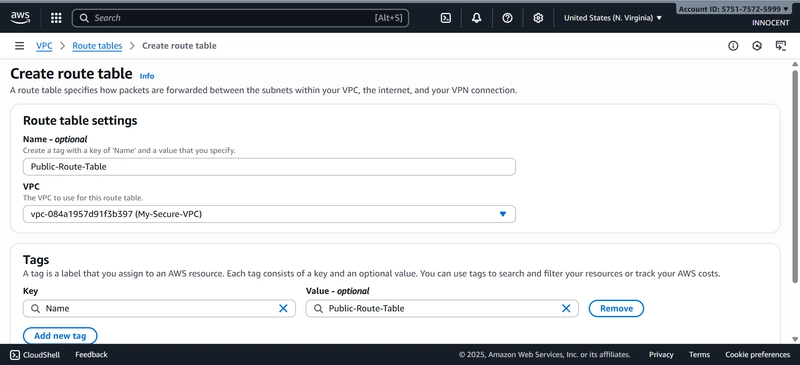
o Go to: Route Tables -> Create route table.
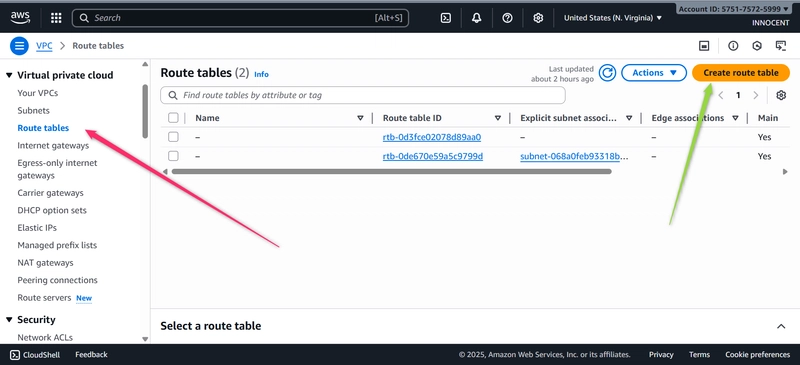
o Name: Public-Route-Table
o VPC: Select My-Secure-VPC
o Click Create.
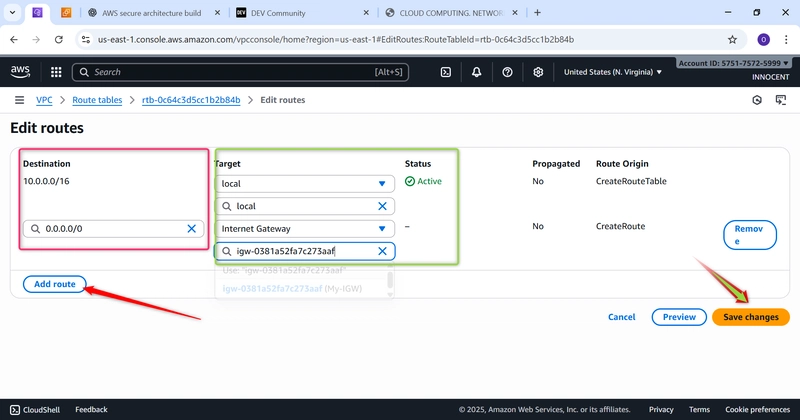
o Edit Routes: Select the new table, click the Routes tab -> Edit routes -> Add
route.

▪ Destination: 0.0.0.0/0 (This means “all internet traffic”).
▪ Target: Select Internet Gateway and choose My-IGW.
▪ Click Save changes.
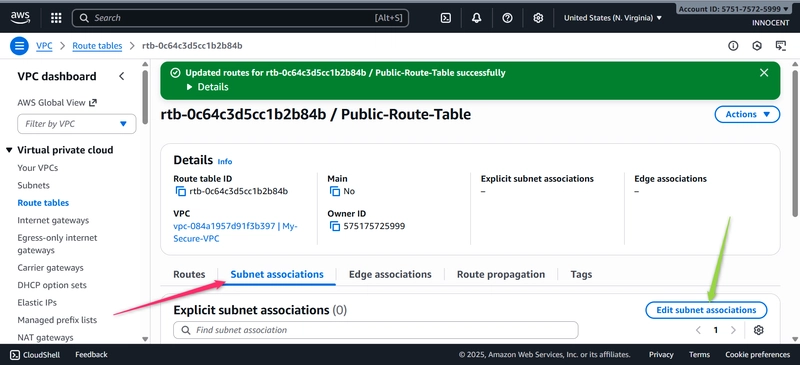
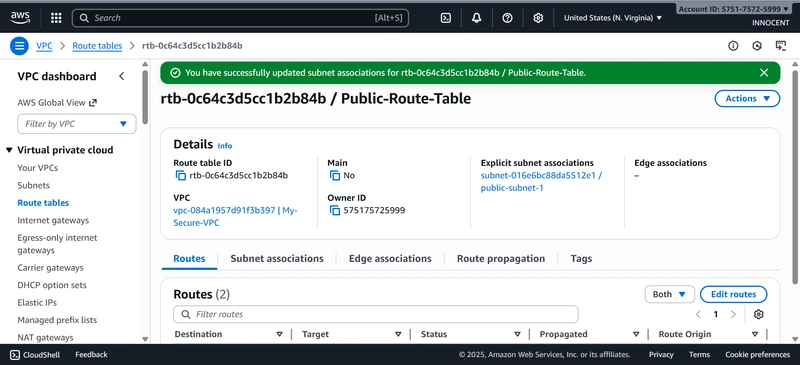
o Associate with Public Subnet: Click the Subnet associations tab -> Edit
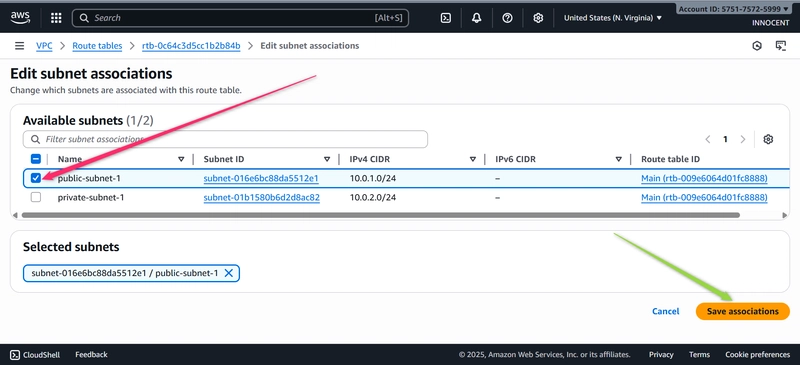
subnet associations. Check the box for public-subnet-1 and click Save
associations.
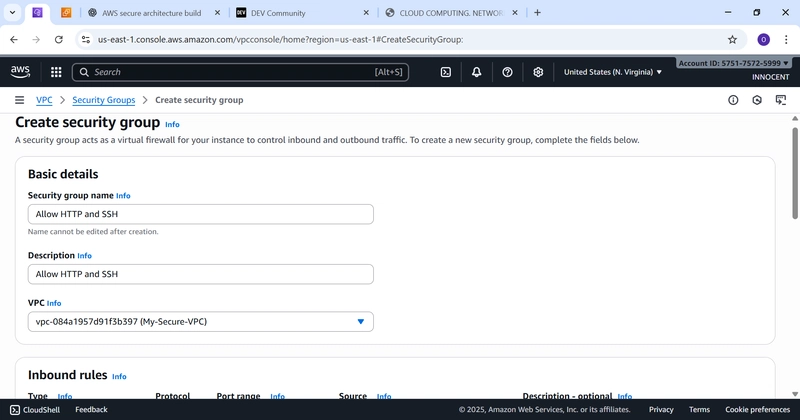
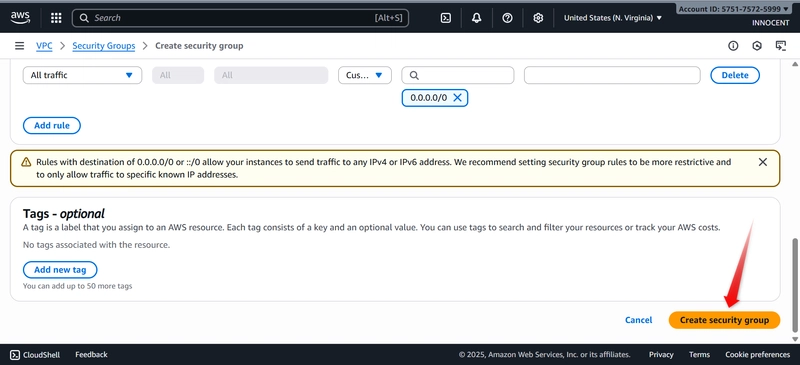
- Create a Security Group for the Web Server (The Firewall)
o Go to: Security Groups -> Create security group.
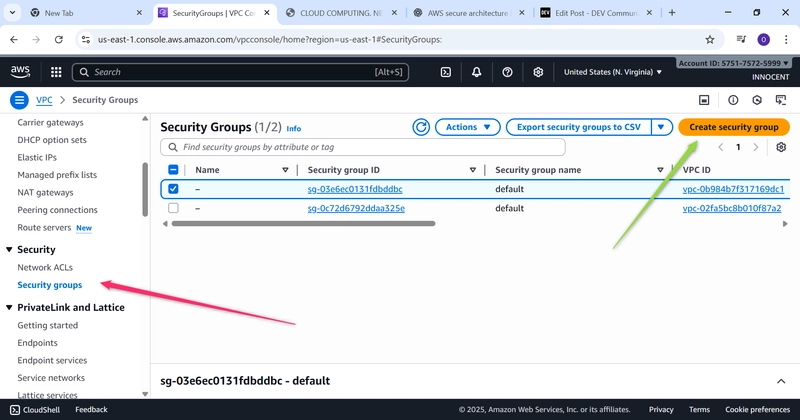
o Name: Web-Server-SG
o Description: Allow HTTP and SSH
o VPC: Select My-Secure-VPC
o Inbound Rules:
▪ Add rule: Type: HTTP, Source: Anywhere-IPv4 (0.0.0.0/0).
▪ Add rule: Type: SSH, Source: My IP (This automatically adds your
computer’s IP for security).
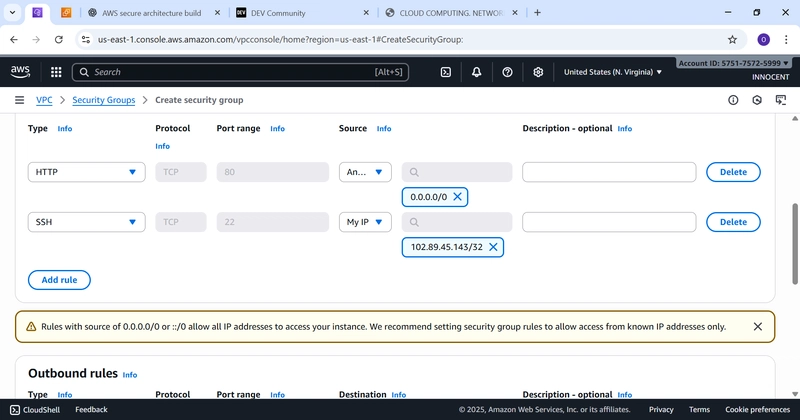
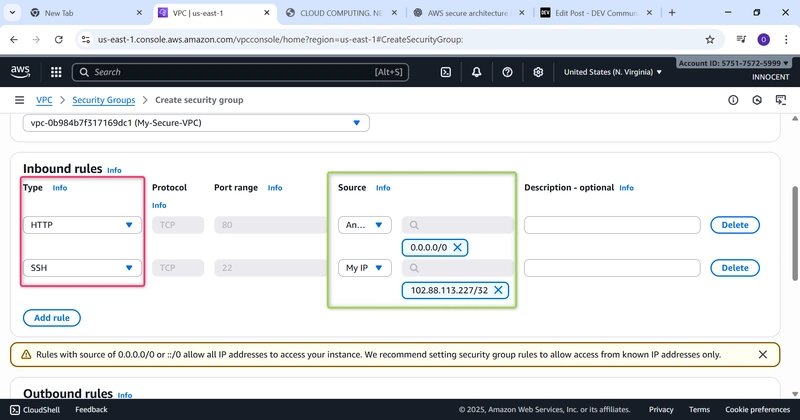
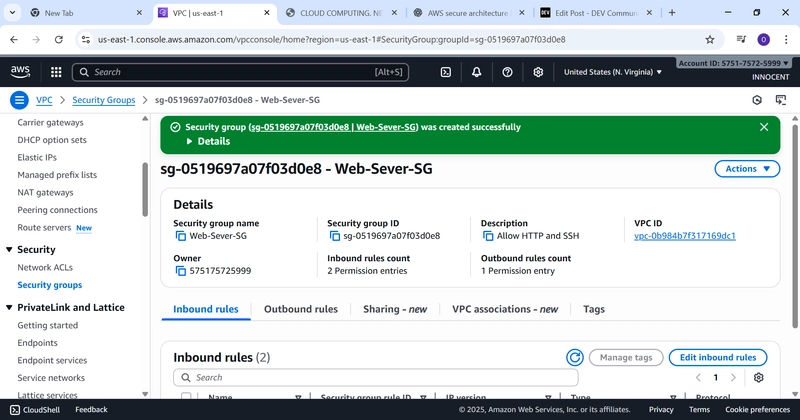
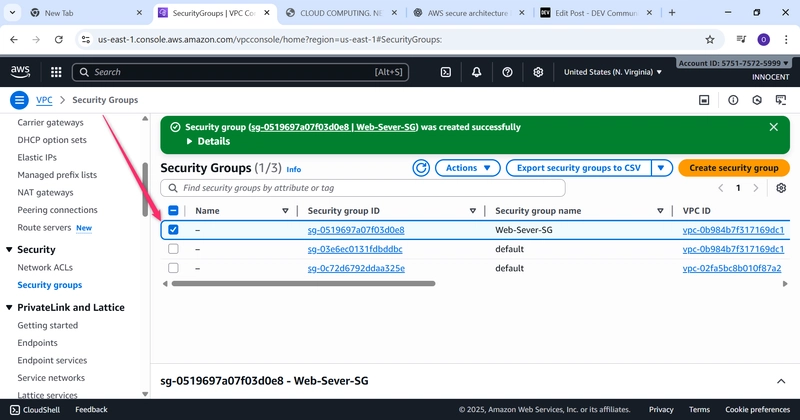
o Click Create security group.
Phase 3: NAT Gateway – Allowing Private Servers Outbound Internet
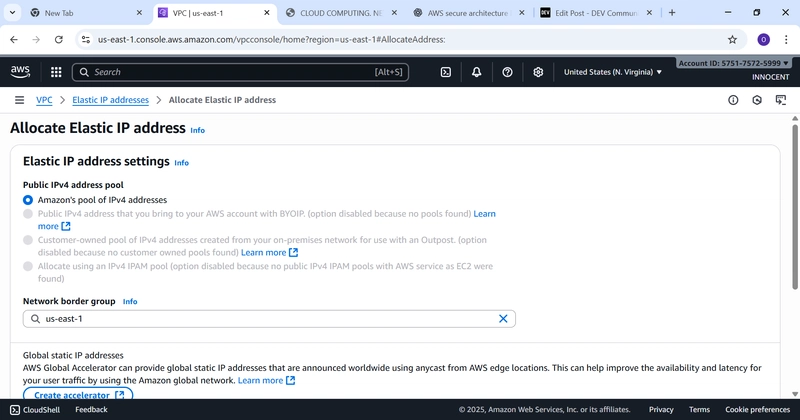
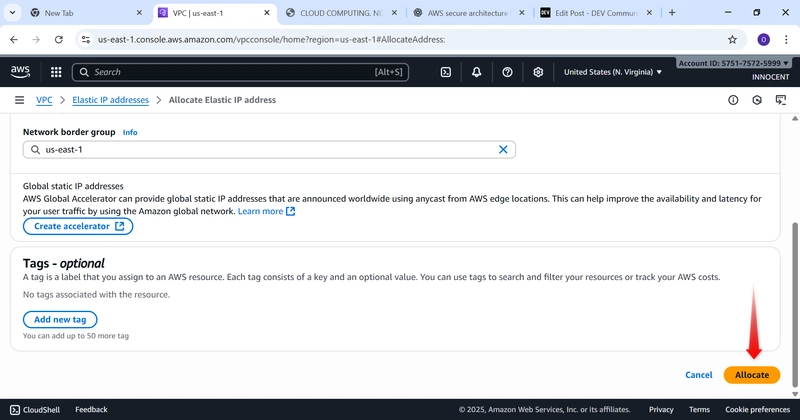
- Allocate an Elastic IP (A Static Public IP Address)
o Go to: Elastic IPs -> Allocate Elastic IP address.
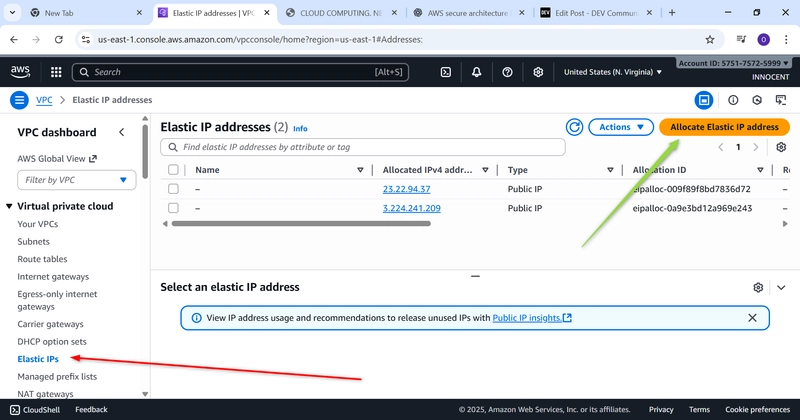
o Just click Allocate. AWS will give you a fixed public IP.
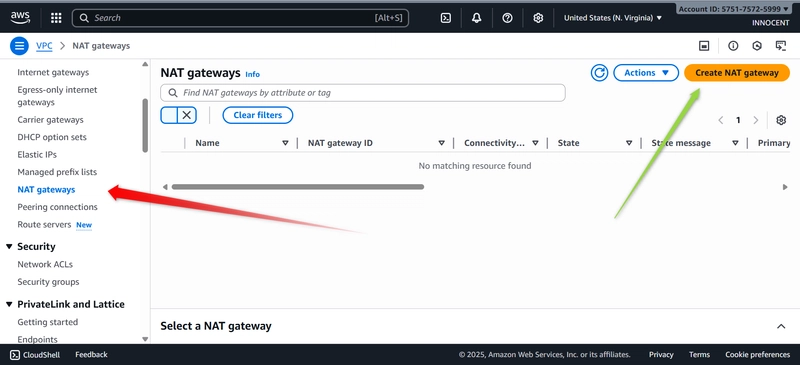
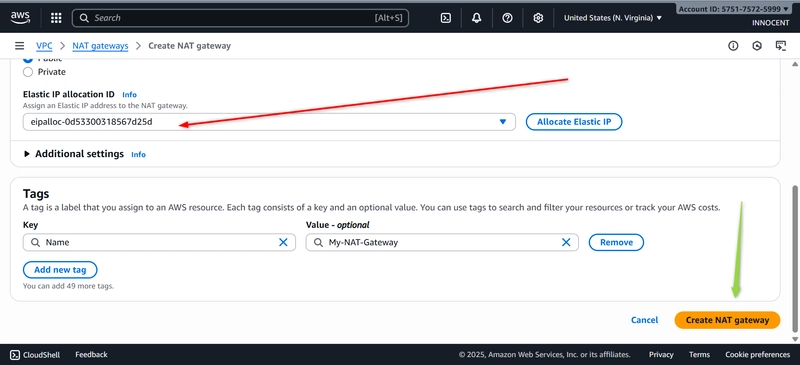
- Create the NAT Gateway
o Go to: NAT Gateways -> Create NAT Gateway.
o Name: My-NAT-Gateway
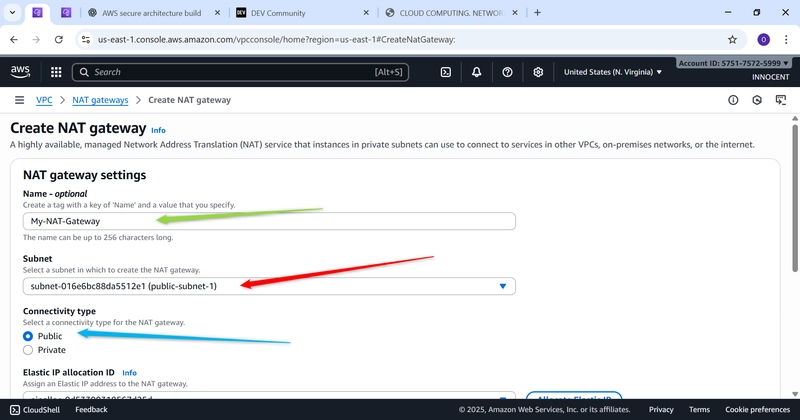
o Subnet: Choose public-subnet-1

o Elastic IP allocation ID: Click the dropdown and select the Elastic IP you
just created.
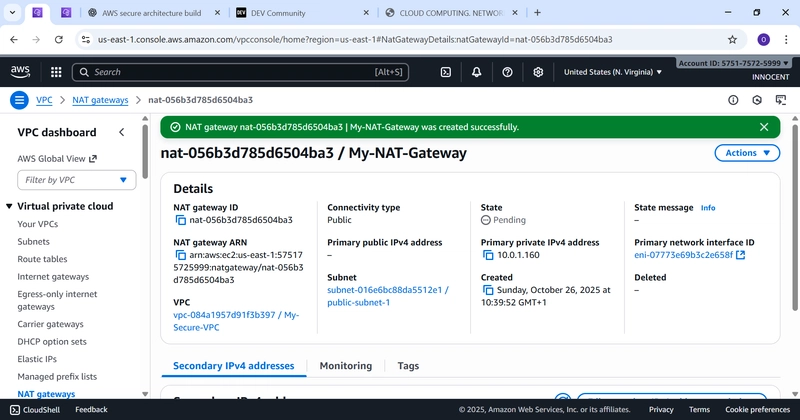
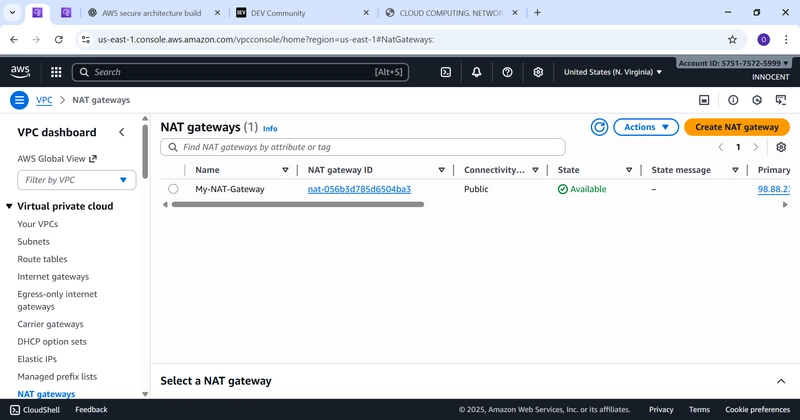
o Click Create NAT Gateway. Wait for the status to change
from Pending to Available. This takes a few minutes.
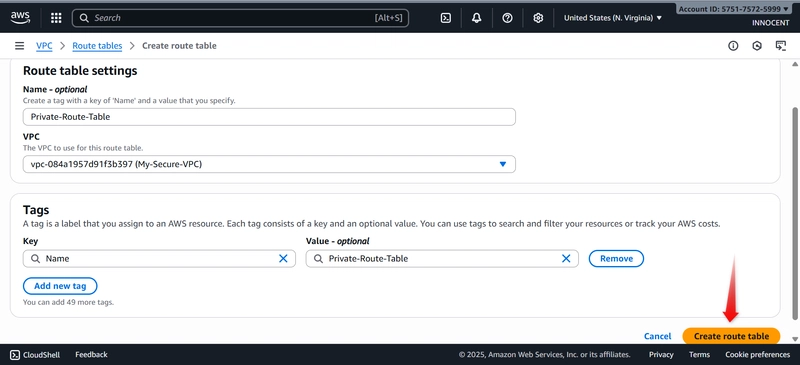
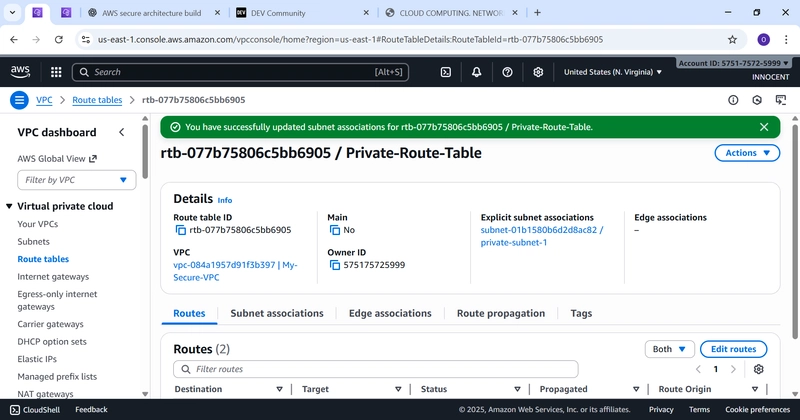
- Create a Route Table for the Private Subnet
o Go to: Route Tables -> Create route table.
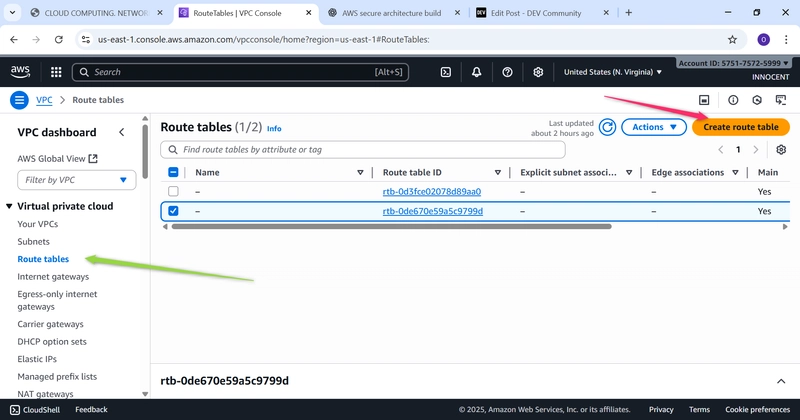
o Name: Private-Route-Table
o VPC: Select My-Secure-VPC
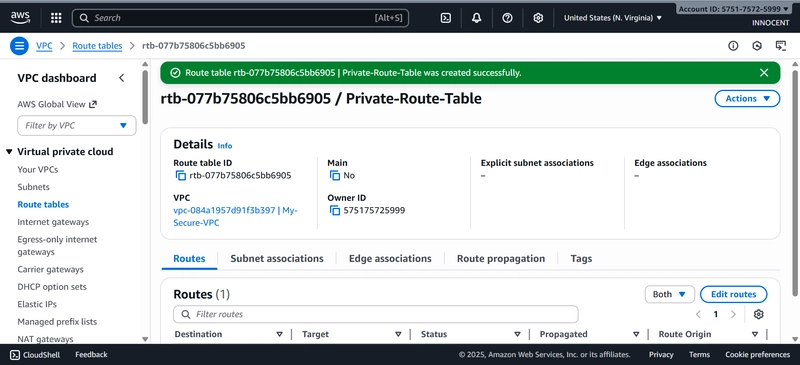
o Click Create.
o Edit Routes: Select this new private route table, click Edit routes -> Add
route.
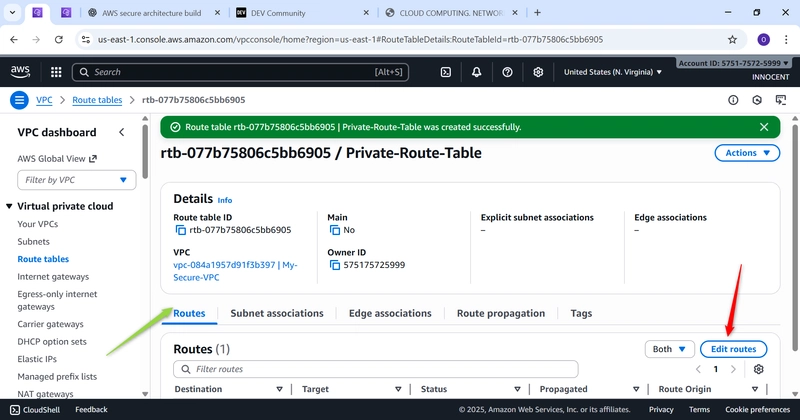
▪ Destination: 0.0.0.0/0 (Send all internet-bound traffic…)
▪ Target: Select NAT Gateway and choose My-NAT-Gateway (…to our
NAT Gateway).
▪ Click Save changes.

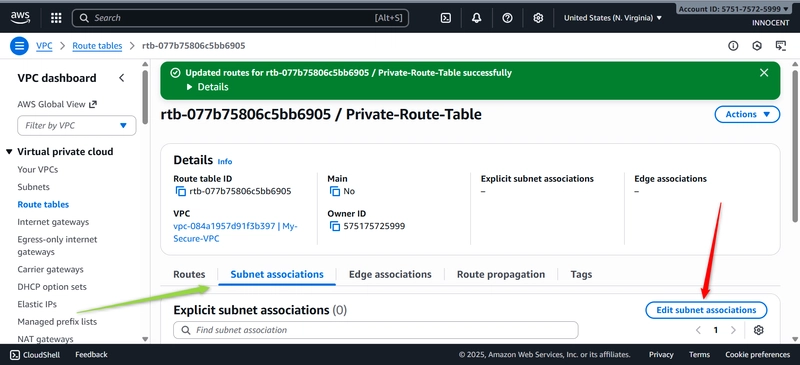
o Associate with Private Subnet: Click Subnet associations -> Edit subnet
associations. Check the box for private-subnet-1 and click Save
associations.

Phase 4: Resource Deployment – Launching Your Servers
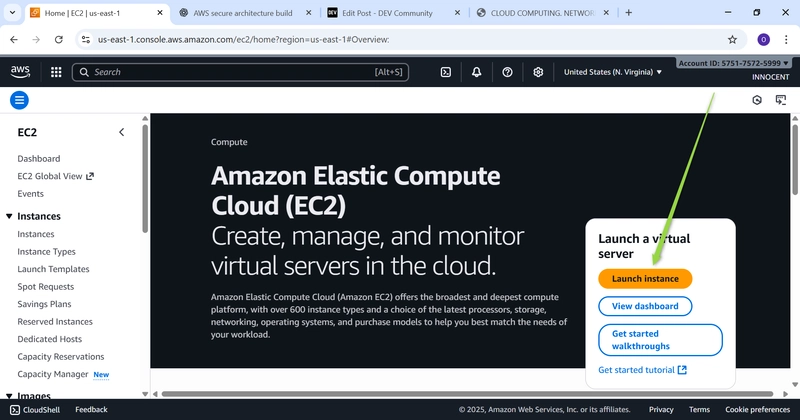
- Launch the Web Server (in the Public Subnet)
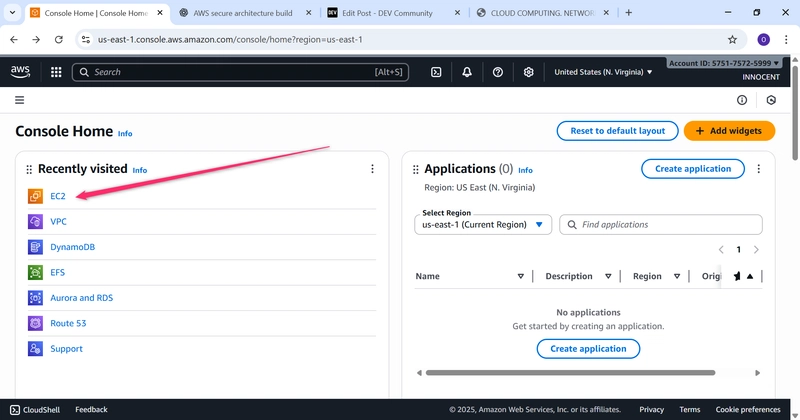
o Go to: EC2 -> Launch Instances.
o Name: Web-Server
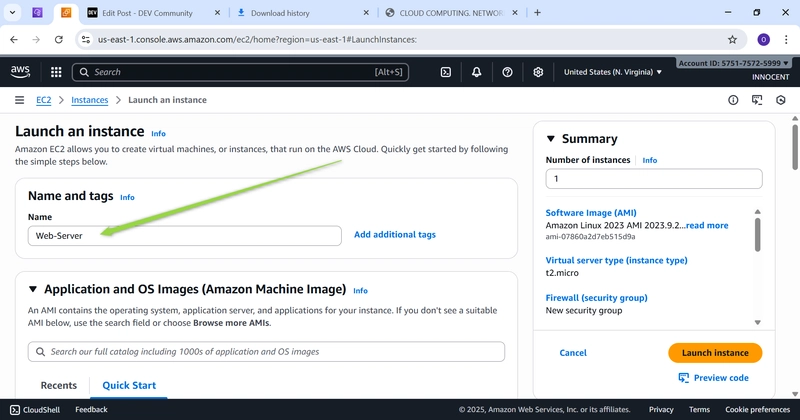
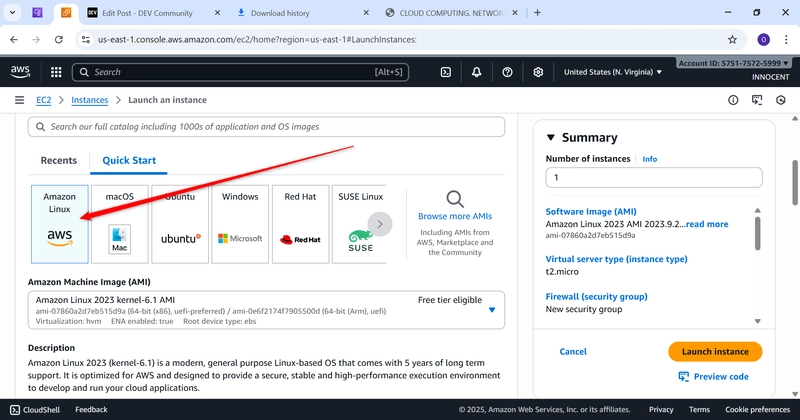
o AMI: Amazon linux
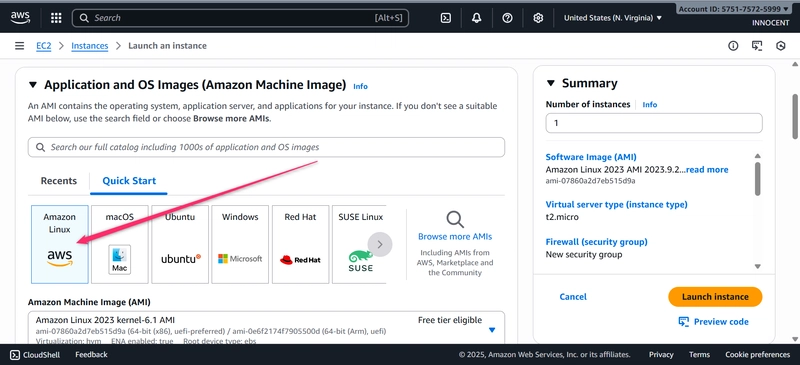
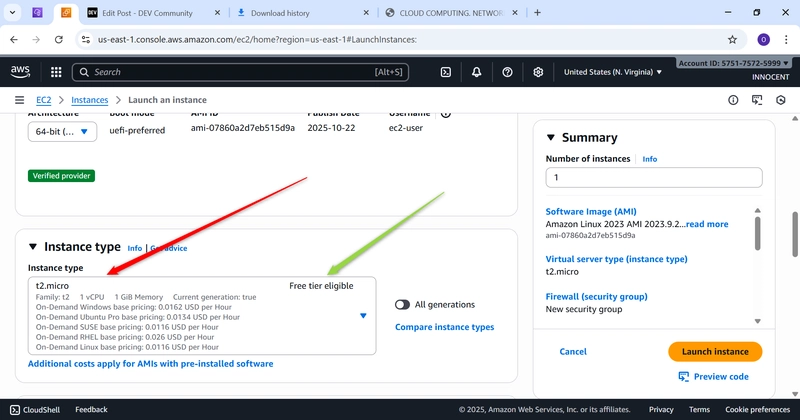
o Instance type: t2.micro (Free Tier)
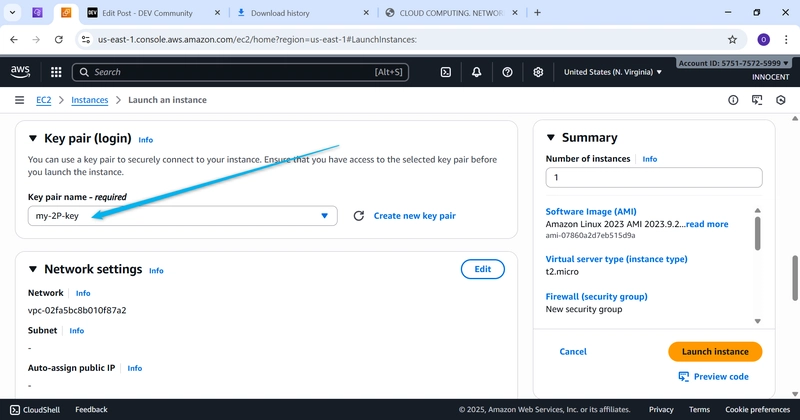
o Key pair: Create a new key pair or choose an existing one. DOWNLOAD
THE .pem KEY IF NEW
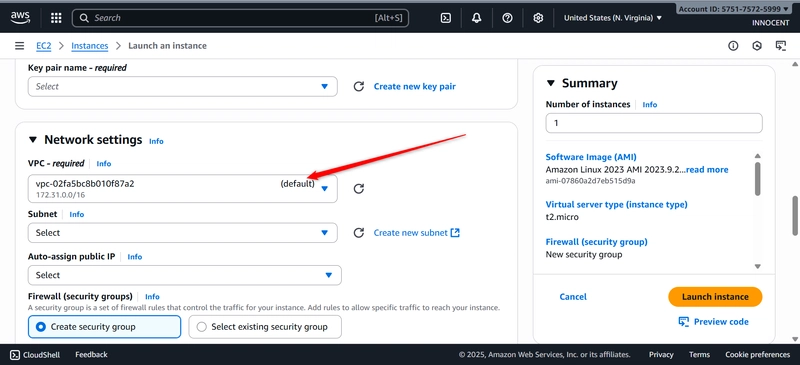
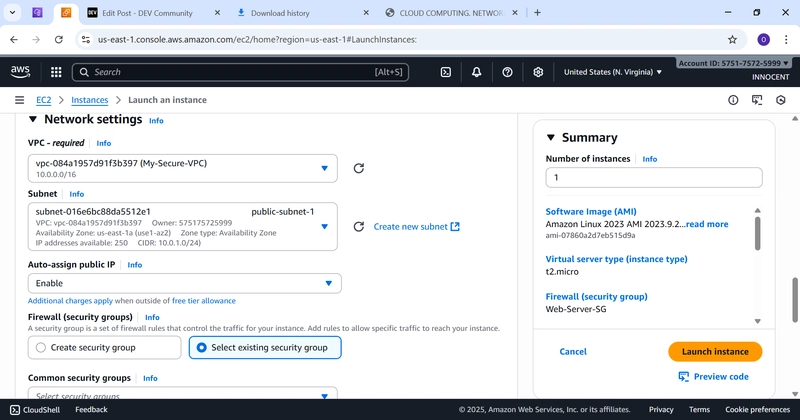
o Network Settings:
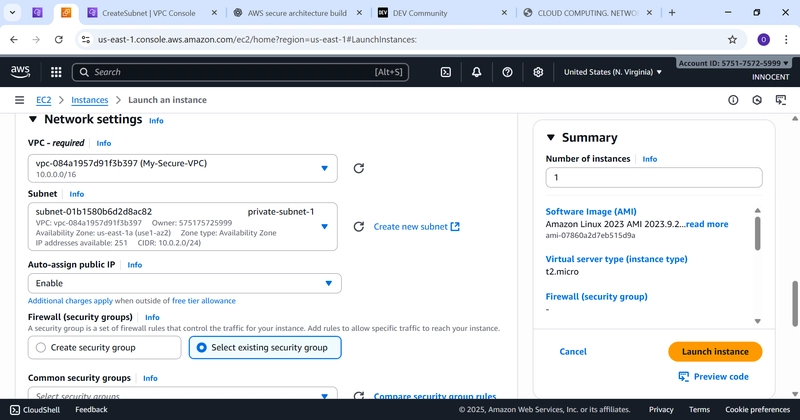
▪ VPC: My-Secure-VPC
▪ Subnet: public-subnet-1
▪ Auto-assign Public IP: Enable
▪ Firewall (Security Groups): Select existing security group WebServer-SG
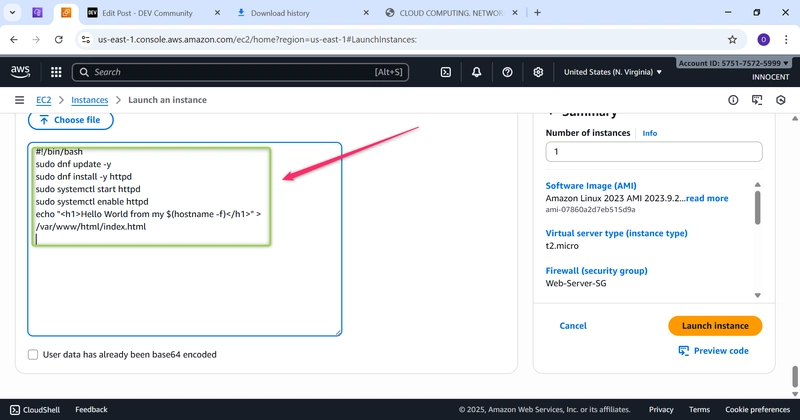
o Advanced details -> User data: Paste this script to install a web server on
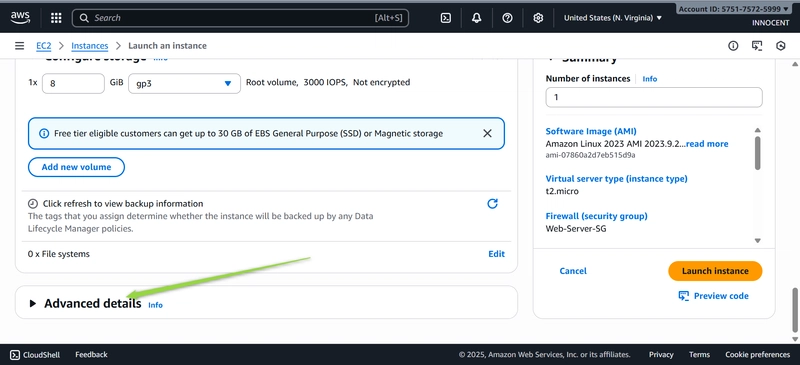
boot:
bash
!/bin/bash
sudo dnf update -y
sudo dnf install -y httpd
sudo systemctl start httpd
sudo systemctl enable httpd
echo “
Hello World from my $(hostname -f)
” > /var/www/html/index.html
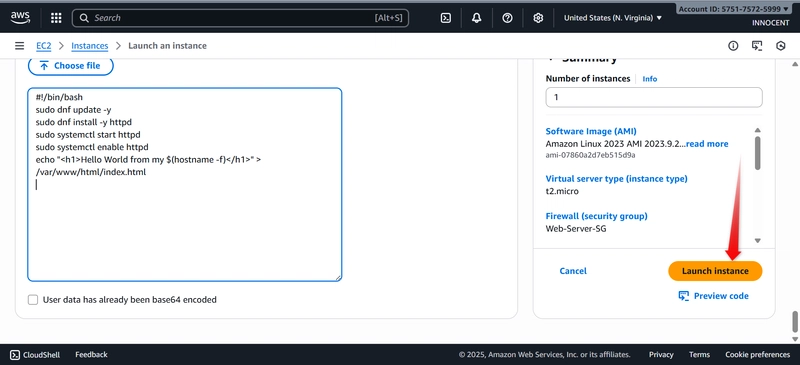
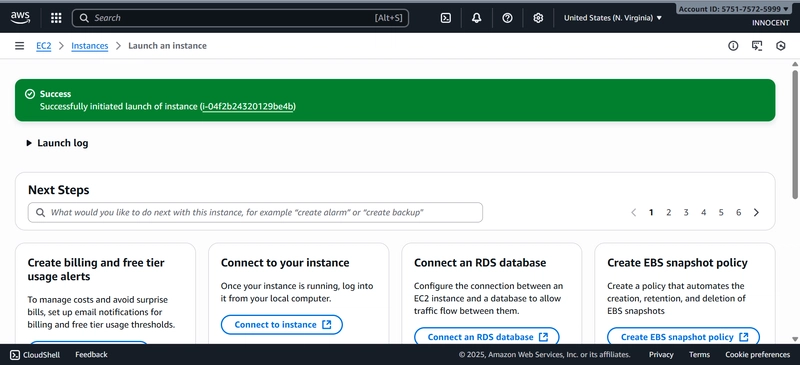
o Click Launch Instance.
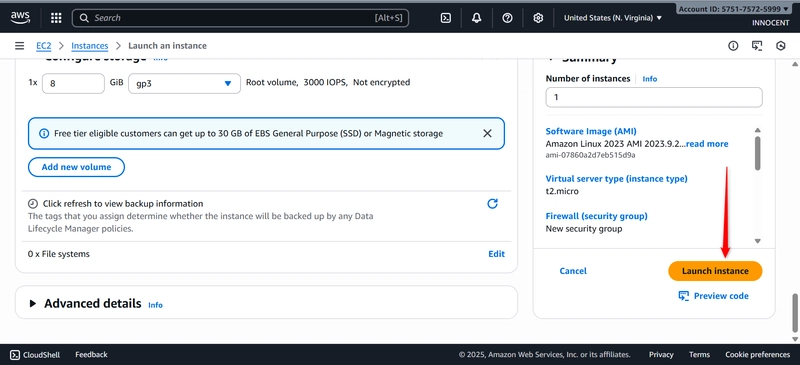
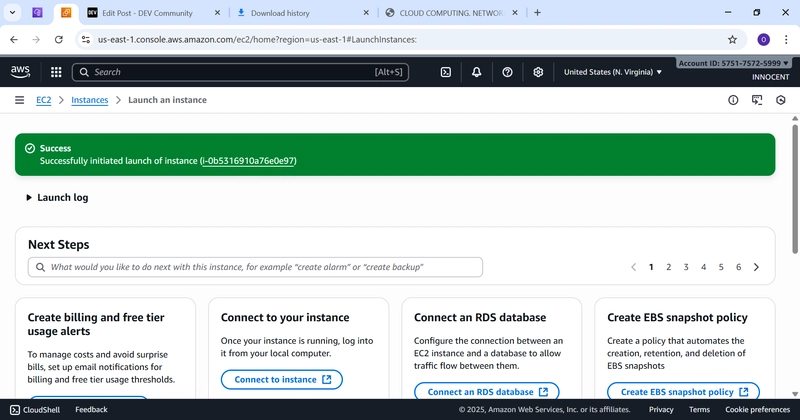
- Launch the Database Server (in the Private Subnet)
o Go to: EC2 -> Launch Instances
o Name: DB-Server
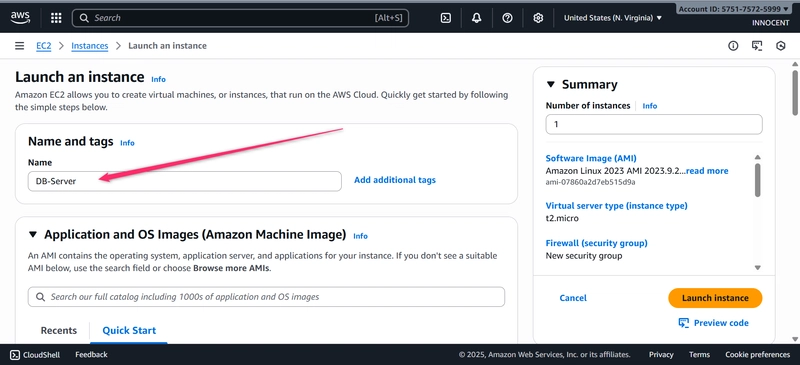
o AMI: Amazon Linux 2023 AMI
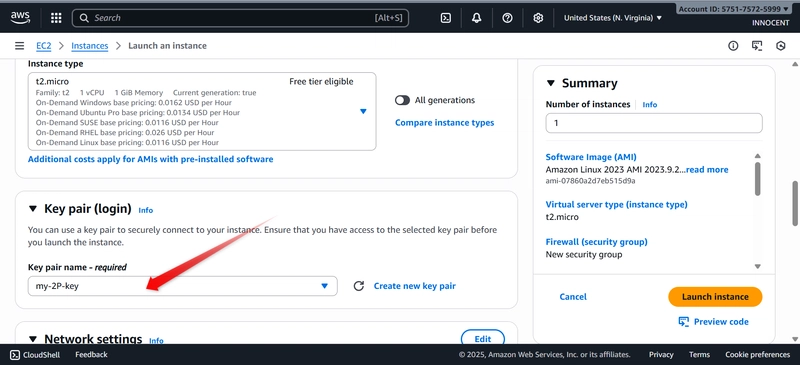
o Instance type: t2.micro (Free Tier)

o Key pair: Choose the same key pair you used for the Web Server.
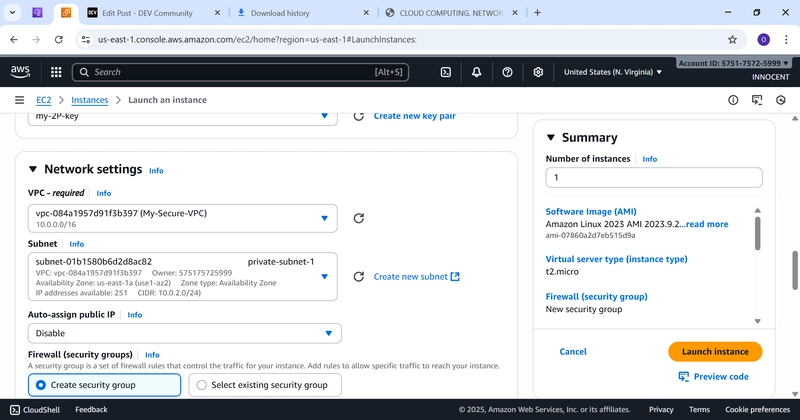
o Network Settings:
▪ VPC: My-Secure-VPC
▪ Subnet: private-subnet-1
▪ Auto-assign Public IP: Disable (This is key! It gets no public IP.)
o Click Launch Instance.
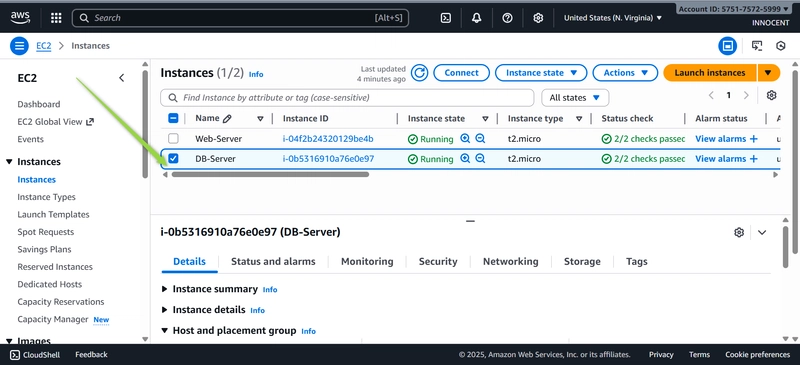

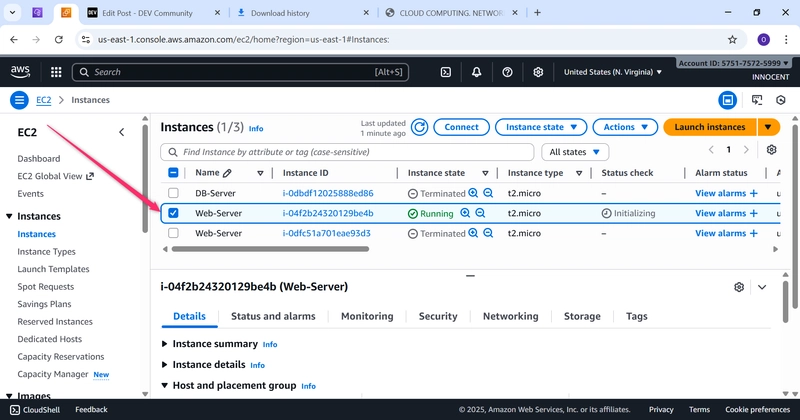
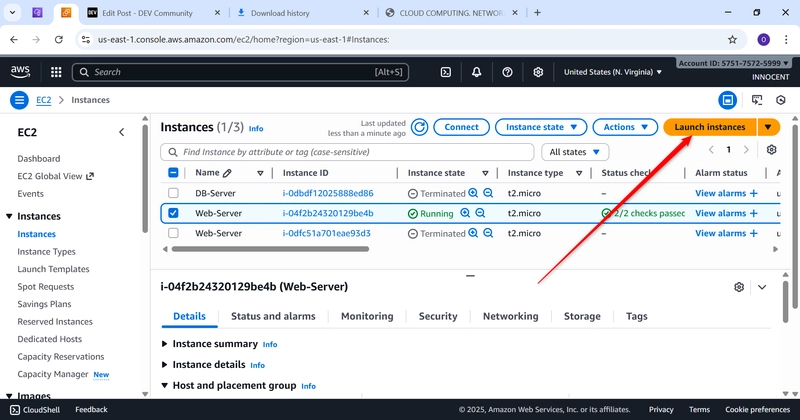
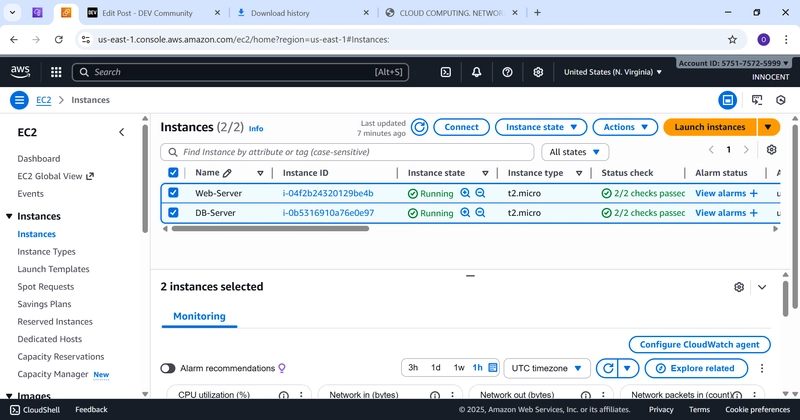
Web-Server EC2-Instance Running and DB-Server EC2-Instance Running
Phase 5: Validation – Testing Your Setup
- Test Web Access
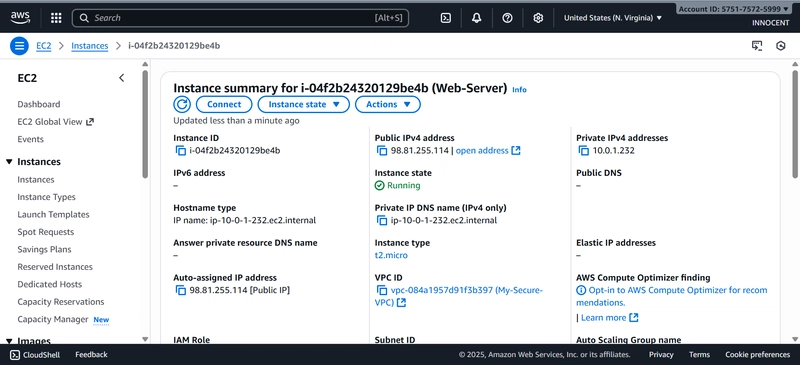
o In the EC2 console, find your Web-Server instance.
o Copy its Public IPv4 address.
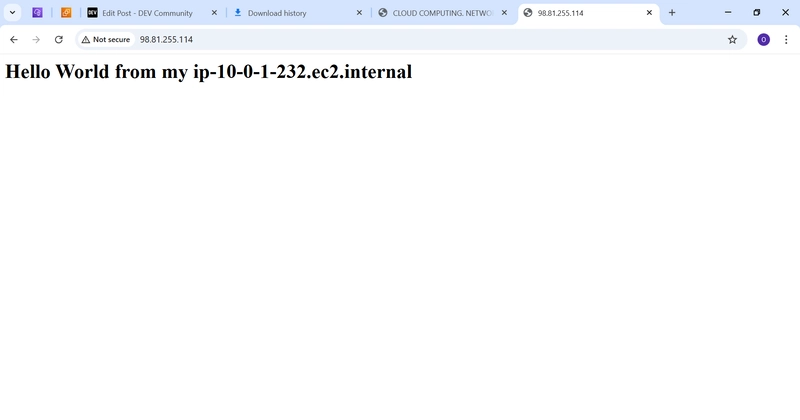
o Open a browser and paste the IP address. You should see “Hello World
from my …”.
o OR, use the terminal: curl http://
- Test Private Instance Internet Access (Via NAT)
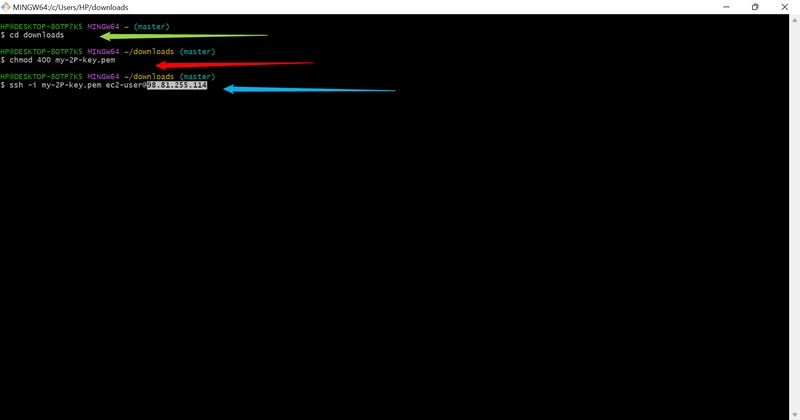
o SSH into your Web Server first (it’s public):
bash
ssh -i “your-key.pem” ec2-user@
o From inside your Web Server, try to SSH into the private Database Server:
▪ In the EC2 console, find your DB-Server and copy its Private IPv4
address (e.g., 10.0.2.50).
▪ Run:
bash
ssh -i “your-key.pem” ec2-user@
o Once logged into the private DB-Server, test if it can reach the internet:
bash
curl https://checkip.amazonaws.com
o This should RETURN THE ELASTIC IP OF YOUR NAT GATEWAY. This proves
your private server is using the NAT Gateway to access the internet!
Conclusion :
You have successfully built a secure, professional-grade network
architecture on AWS. Your web server is publicly accessible, but your database is securely
hidden in a private network, yet can still download updates.
