Building a Full Stack Web App from scratch: First Steps
Introduction
I am Constanza Díaz, Web developer, industrial designer, UX/UI enthusiast, aspiring entrepreneur, and self-taught digital product creator — currently building my own web application and documenting the process.
I’ve been working as a front end developer for the last 6 years and now I’m planning to develop my own web application named HandyFEM, a digital platform designed to connect women professionals in skilled trades with clients.
I am doing this as a way to learn by doing, as artificial intelligence is evolving so quickly and becoming a must for every developer and digital product creator and owner. At the same time, I will build my own personal project, which I am developing as a business project at Innoemprèn Sostenible, a program for entrepreneurs at Tecnocampus University in Barcelona, Spain.
Building this app will be a good way to create a very complete application where multiple features can be added — this is a very big challenge as a designer-developer-entrepreneur and a true one-woman band, but also a great way to show all my multiple skills in one place :D.
After a few attempts of “vibe coding” without a plan using Vercel v0 and Lovable, I realized my app is too ambitious to be done in only one prompt :D. So I decided to create a professional approach and document it, so that I can learn everything during the process and get feedback from other devs and designers.
I’m documenting every step — from mapping the app structure to experimenting with AI-driven prototyping.
For this project, I will start with Vercel v0 as an AI assistant for generating frontend components, with Supabase as the backend layer. This blog series will serve both as a technical journal and a record of decisions that shape the MVP.
Starting with a Map
AI tools like Vercel v0 can generate impressive amounts of code quickly. The risk? Losing track of fundamentals if the product lacks a clear structure.
To avoid gaps, I started by outlining the navigation map of HandyFEM: a high-level diagram of screens, user flows, and connections. This ensures that all the important features won’t be overlooked later.
HandyFEM Navigation Map (MVP)
Here’s the first structural map created in FigJam. It defines the scope of the MVP and keeps development aligned:
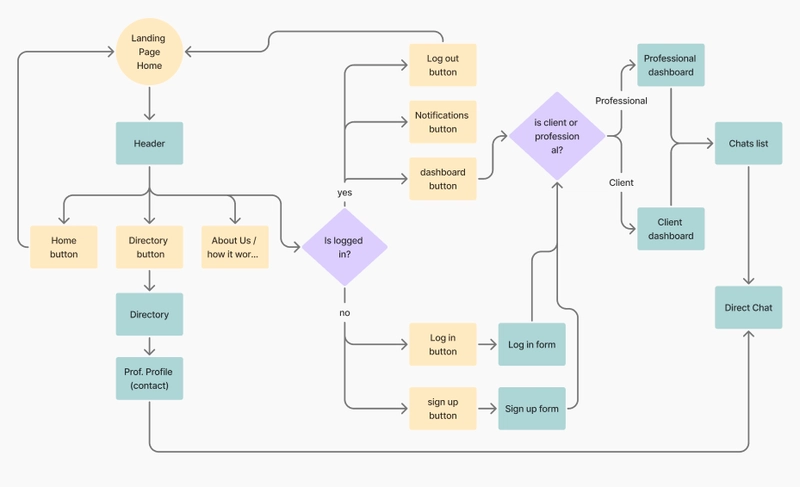
Caption: HandyFEM Navigation Map (MVP) — Yellow: buttons | Green: components (will develop more detail later).
Key sections:
- Landing Page: entry point with signup, login, and directory access.
- Auth: client and professional signup, plus login.
- Role-Based Dashboards: tailored panels for clients and professionals.
- Public Directory: searchable list of professionals with filters.
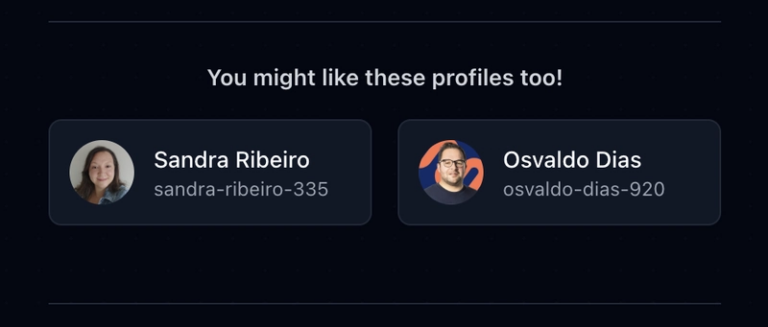
- Professional Profiles: detailed pages with contact options.
- Messaging System: list of conversations and direct chat.
Lessons from the Process
-
Dashboard ≠ Profile
Dashboards serve as control centers. Profiles are just editable data. Keeping them separate opens room for metrics, history, or verification in the future.
-
Roles must be explicit
Defining client vs. professional flows early makes the product scalable without major refactors.
-
Planning is leverage
One diagram clarified priorities and prevented the common trap of coding first and restructuring later.
What’s Next
The next step is translating this map into Jira epics and tasks, preparing a Sprint 0 focused on:
- Setting up Supabase tables and relationships.
- Configuring authentication (email + password).
- Establishing the initial Next.js + Tailwind architecture.
This structured approach allows me to integrate AI tools without sacrificing control or long-term scalability.
👉 This post opens the series on building HandyFEM from scratch. The upcoming entries will cover Jira planning, Sprint 0 setup, and the integration of Vercel v0 into the workflow. Follow the hashtag #HandyFEMapp if you don’t want to miss the progress!
📎 For those who want to dive deeper or leave comments on my board, the full navigation map is available here: Open FigJam Board
📚 HandyFEM App Series
🔗 Previous: none (this is the first post)
🔗 Next: Coming soon: From Diagrams to Tickets (Organizing HandyFEM with Jira)