[AWS]Hands-on: Building a Simple Web Server with CodeBuild + CodeDeploy (Sphinx)
Introduction
Thank you for reading my articles! I’m a mob engineer who has been working on understanding CodeBuild → CodeDeploy pipeline construction in my work. Since I was having some difficulties with this, I decided to create a hands-on article to improve my skills and share the knowledge.
I’ve written this article in simple terms so that even first-time readers can easily follow along. I hope you find it helpful!
Table of Contents
- Target Audience
- Completion Image
-
Hands-on Tutorial
- Step 0: Prerequisites
- Step 1: IAM Roles & S3 Setup
- Step 2: EC2 Construction (RHEL10)
- Step 3: CodeBuild Configuration
- Step 4: CodeDeploy Configuration
- Step 5: Execution Results
- Insights
Target Audience
This article is intended for those who have the following challenges:
- Those who feel intimidated by AWS pipelines
- Those who want to strengthen their pipeline-related skills
- Those who want to deepen their understanding of pipelines through hands-on experience
Completion Image
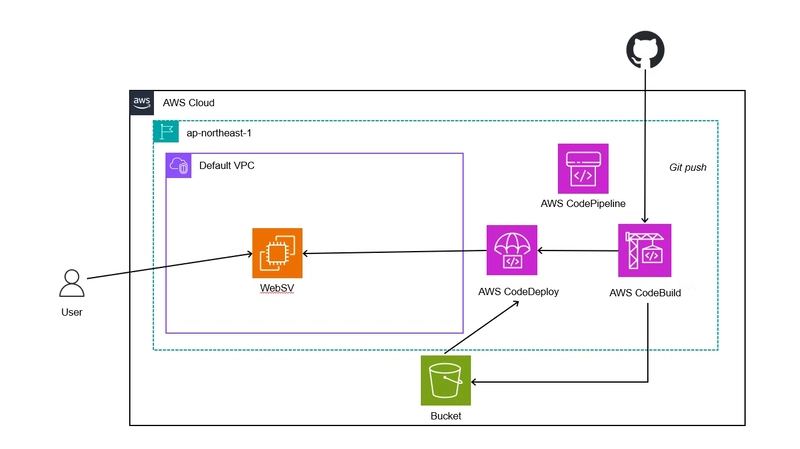
The completed architecture will look like this:
- GitHub: Frontend code management (Sphinx)
- CodeBuild: Build process (Sphinx generation)
- CodeDeploy: Deployment (deploy build artifacts to EC2)
- S3: Store build artifacts
Hands-on Tutorial
Step 0: Prerequisites
https://github.com/MASAKIOKUDA-eng/sphinx-aws-demo/blob/main/buildspec.yml
Please fork the sample code to your own GitHub account.
Step 1: IAM Roles & S3 Setup
First, let’s create an S3 bucket:
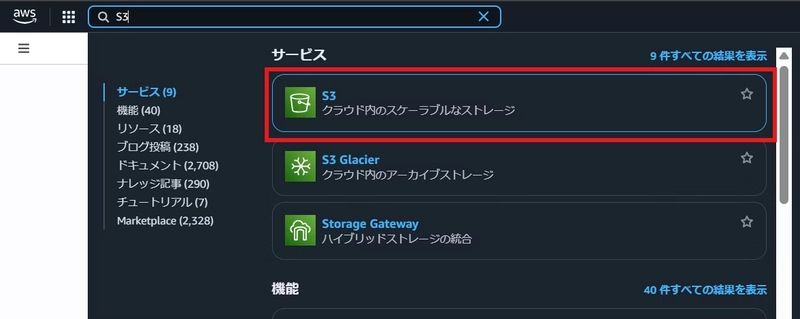

- Enter “S3” in the search box
- Click S3 from the search results
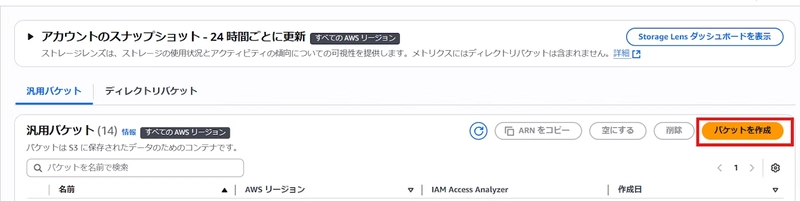
- Click the “Create bucket” button in the center of the screen
- Enter an arbitrary name for the bucket name
- Scroll to the bottom and click the “Create bucket” button
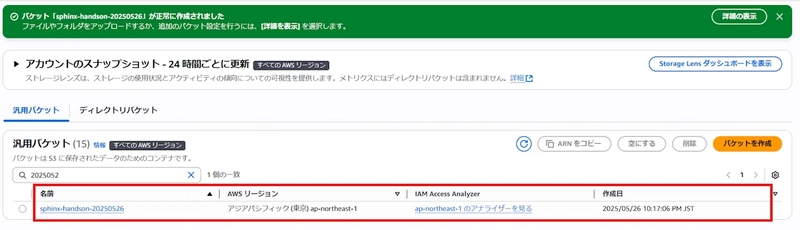
- Confirm that the created bucket is displayed
The S3 bucket creation is now complete.
Next, let’s create IAM roles and policies:
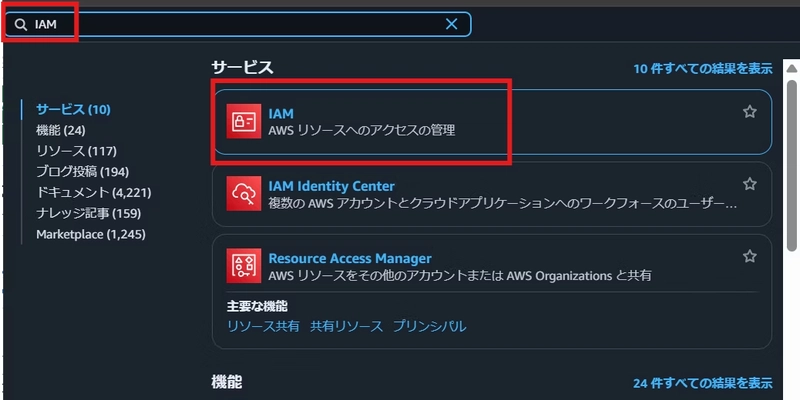
- Enter “IAM” in the search box
- Click IAM from the search results
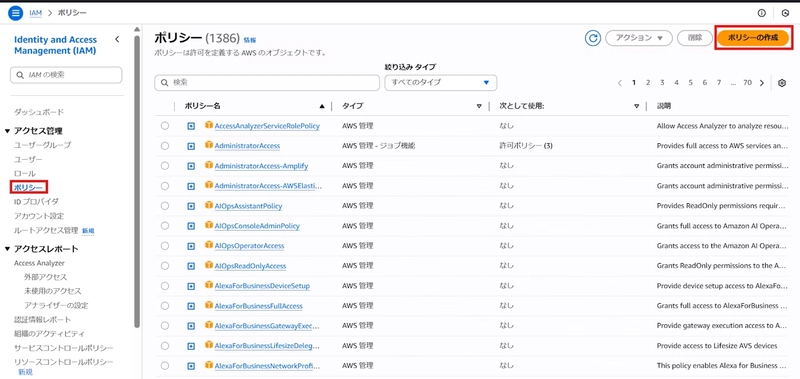
- Click “Policies” in the left pane
- Click “Create policy” on the right side of the screen
- Create the following policies from the policy creation screen:
AWSCodePipelineServiceRole Policy
{
  "Version": "2012-10-17",
  "Statement": [
    {
      "Effect": "Allow",
      "Action": [
        "s3:GetBucketAcl",
        "s3:GetBucketLocation",
        "s3:GetObject",
        "s3:GetObjectAcl",
        "s3:GetObjectVersion",
        "s3:ListBucket",
        "s3:PutObject",
        "s3:PutObjectAcl"
      ],
      "Resource": [
        "arn:aws:s3:::your-codepipeline-artifacts-bucket",
        "arn:aws:s3:::your-codepipeline-artifacts-bucket/*"
      ]
    },
    {
      "Effect": "Allow",
      "Action": [
        "codebuild:BatchGetBuilds",
        "codebuild:StartBuild"
      ],
      "Resource": "*"
    },
    {
      "Effect": "Allow",
      "Action": [
        "codedeploy:CreateDeployment",
        "codedeploy:GetApplication",
        "codedeploy:GetApplicationRevision",
        "codedeploy:GetDeployment",
        "codedeploy:GetDeploymentConfig",
        "codedeploy:RegisterApplicationRevision"
      ],
      "Resource": "*"
    },
    {
      "Effect": "Allow",
      "Action": [
        "codestar-connections:UseConnection"
      ],
      "Resource": "*"
    }
  ]
}
AWSCodeBuildServiceRole Policy
{
  "Version": "2012-10-17",
  "Statement": [
    {
      "Effect": "Allow",
      "Resource": "*",
      "Action": [
        "logs:CreateLogGroup",
        "logs:CreateLogStream",
        "logs:PutLogEvents"
      ]
    },
    {
      "Effect": "Allow",
      "Action": [
        "s3:GetObject",
        "s3:GetObjectVersion",
        "s3:PutObject"
      ],
      "Resource": [
        "arn:aws:s3:::your-codepipeline-artifacts-bucket",
        "arn:aws:s3:::your-codepipeline-artifacts-bucket/*"
      ]
    }
  ]
}
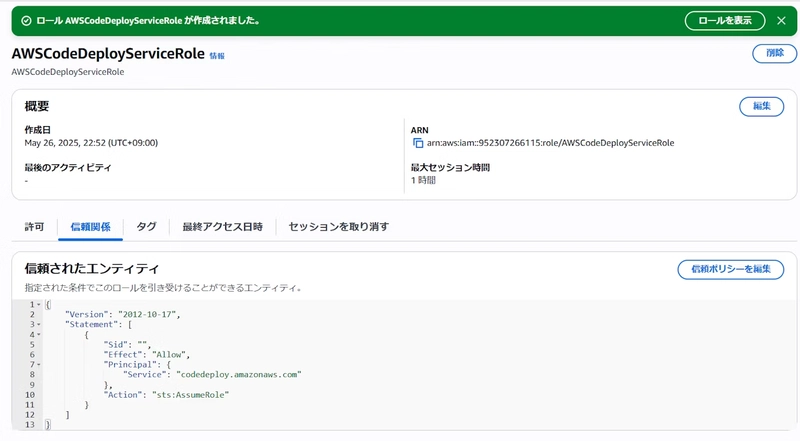
After creating the policies, create the following roles:
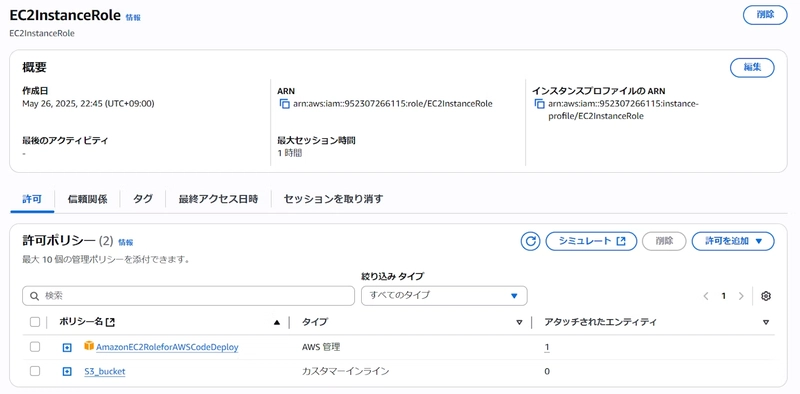
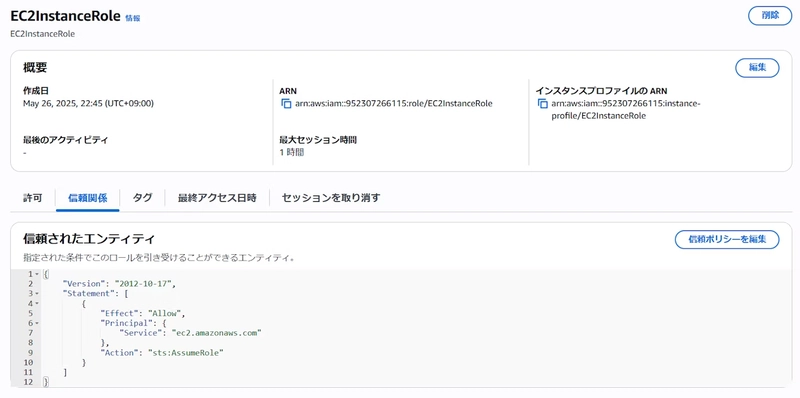
- EC2InstanceRole (for EC2 instances)
- AWSCodePipelineServiceRole (for CodePipeline)
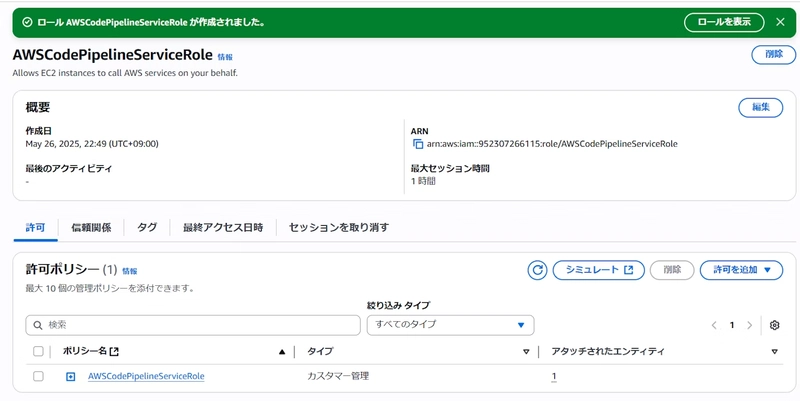
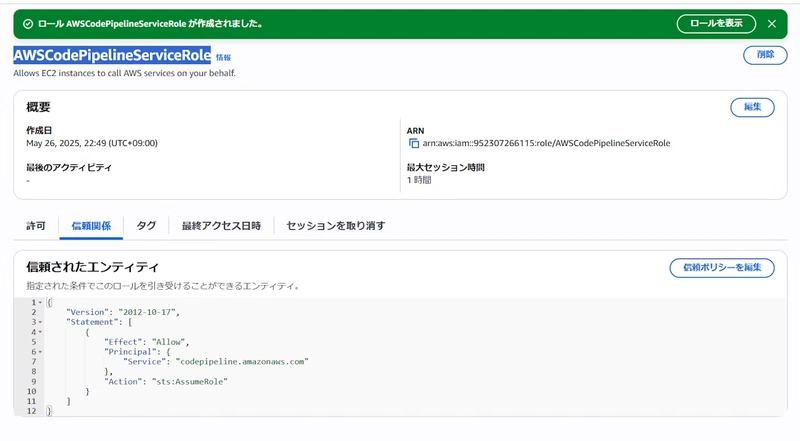
- AWSCodeBuildServiceRole (for CodeBuild)
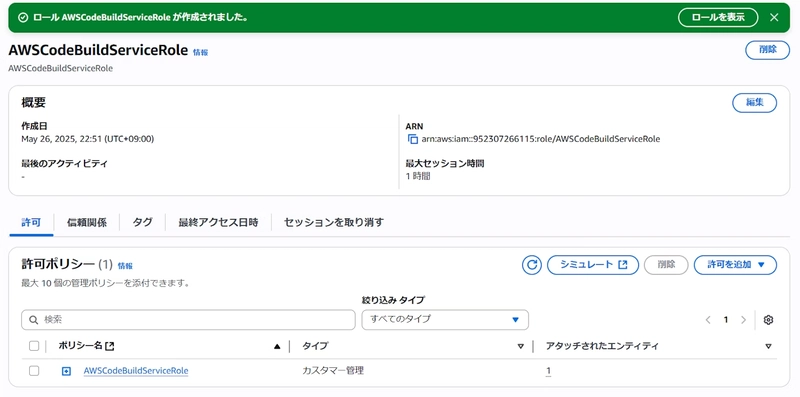
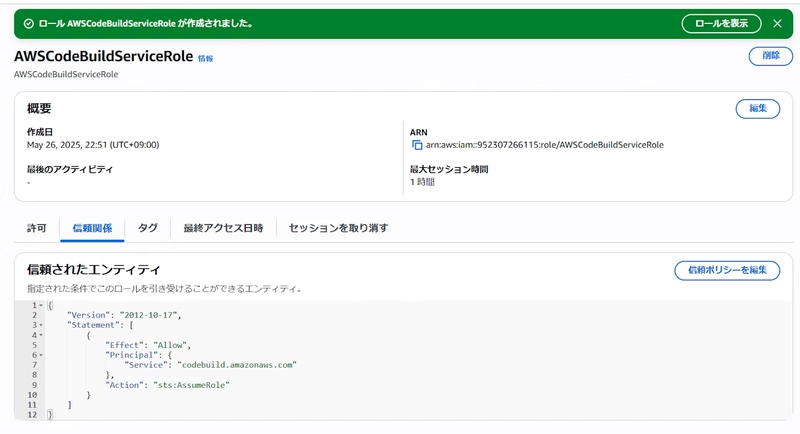
- AWSCodeDeployServiceRole (for CodeDeploy)

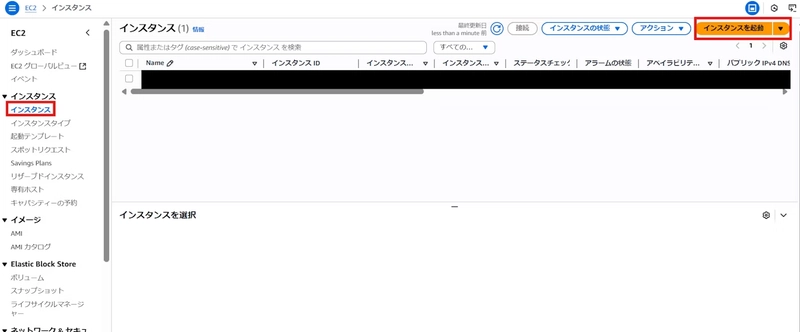
Step 2: EC2 Construction (RHEL10)
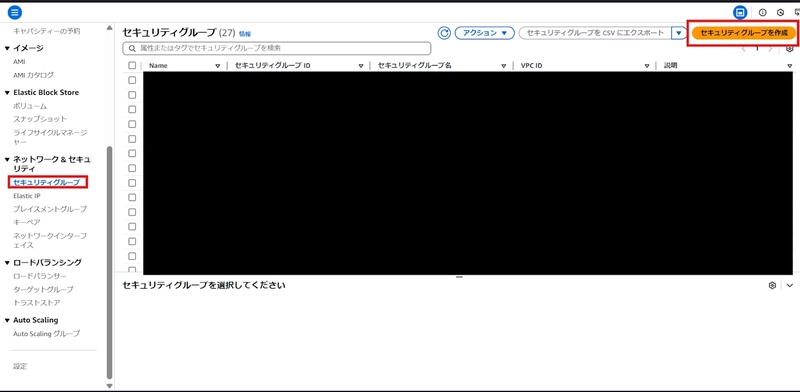
Before building EC2, let’s create a security group in advance:
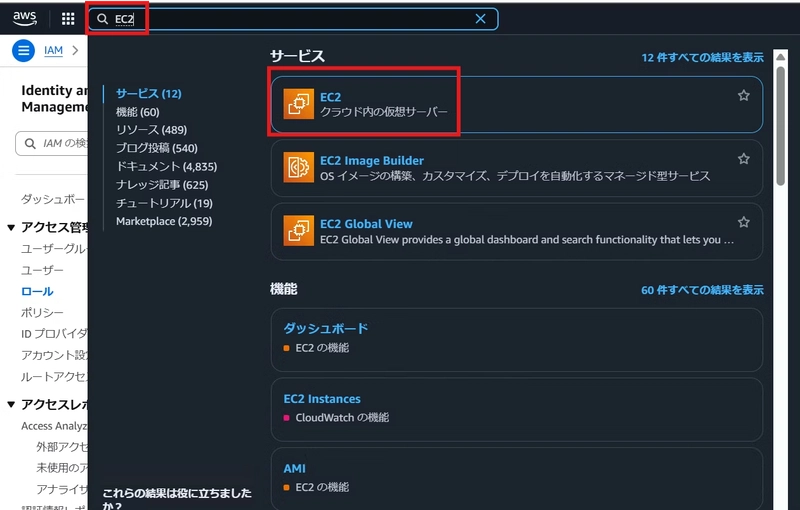

- Enter “EC2” in the search box
- Click EC2 from the search results
- Click “Security Groups” in the left pane
- Click the “Create security group” button on the right side
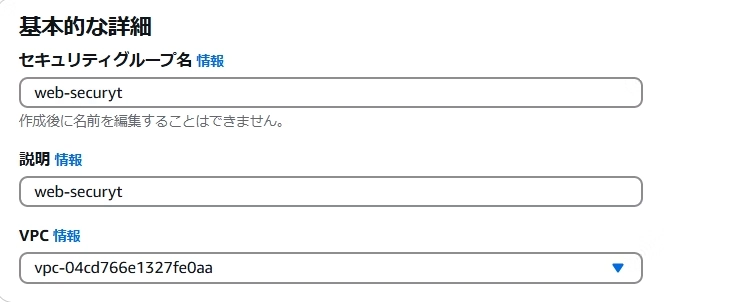
- Fill in arbitrary values on the security group creation screen
- Configure inbound and outbound rules as follows:
EC2 creation is mostly default except for the security group, so I’ll omit the detailed steps.
After launch completion, connect to the web server via Teraterm and execute the following commands:
sudo yum update -y
sudo yum install -y ruby wget httpd
cd /home/ec2-user
wget https://aws-codedeploy-ap-northeast-1.s3.ap-northeast-1.amazonaws.com/latest/codedeploy-agent.noarch.rpm
sudo yum install -y ./codedeploy-agent.noarch.rpm
sudo systemctl start codedeploy-agent
sudo systemctl status codedeploy-agent
sudo systemctl start httpd
sudo systemctl enable httpd
sudo systemctl status httpd
After configuration, please assign the EC2InstanceRole to the instance.
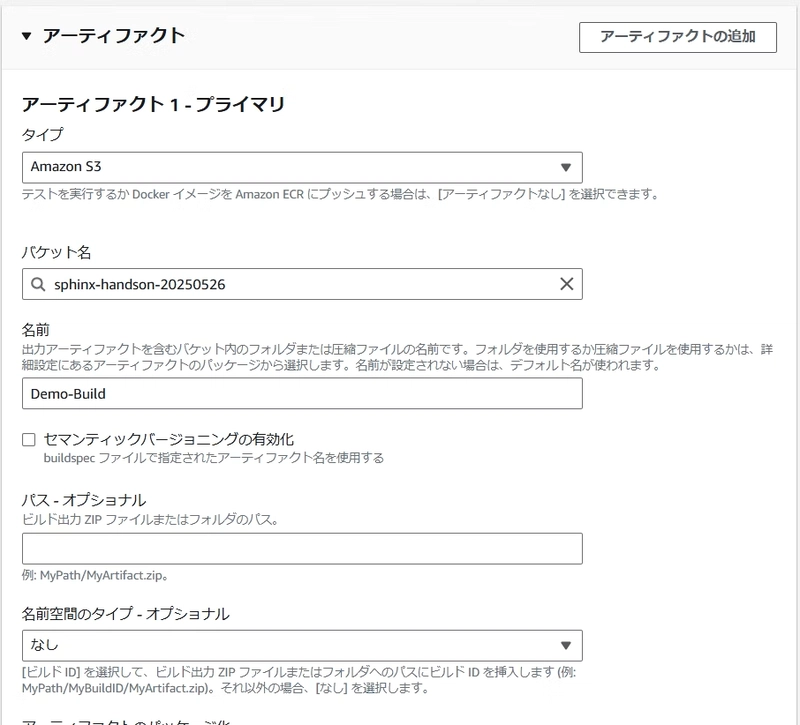
Step 3: CodeBuild Configuration
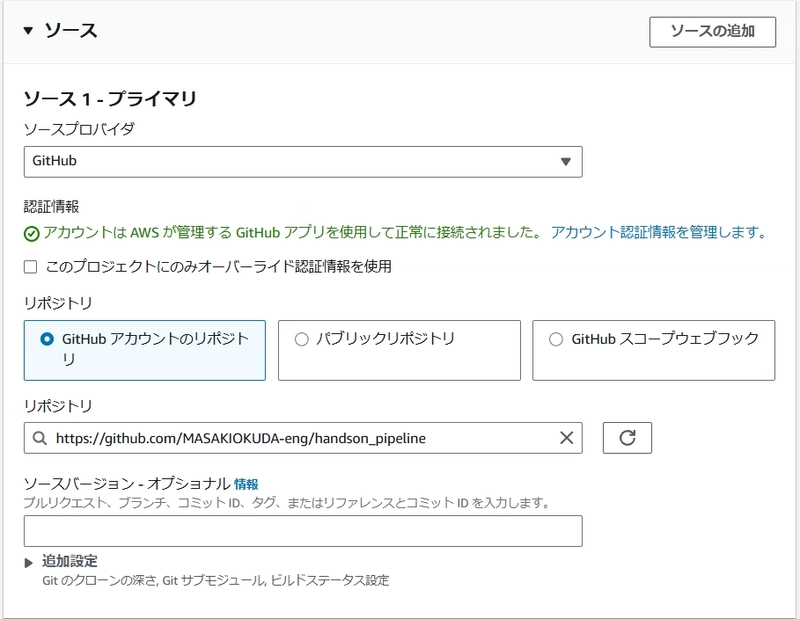
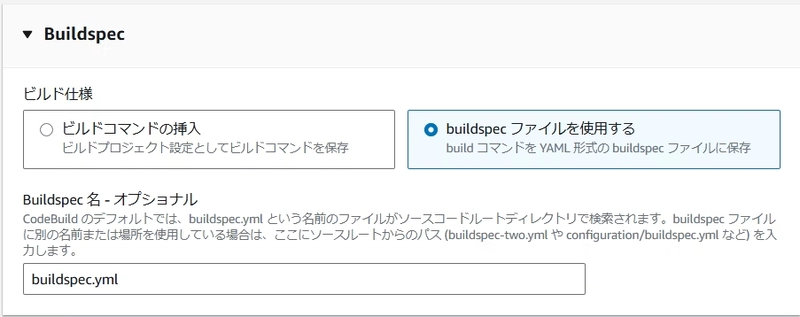
Configure CodeBuild with the following settings:
Step 4: CodeDeploy Configuration
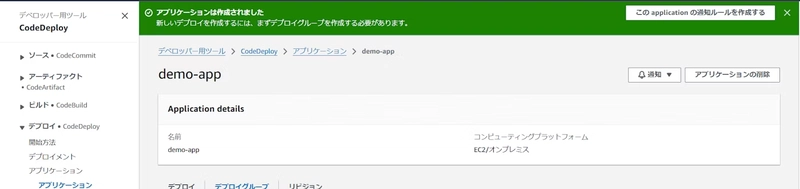
Create a CodeDeploy application as follows:
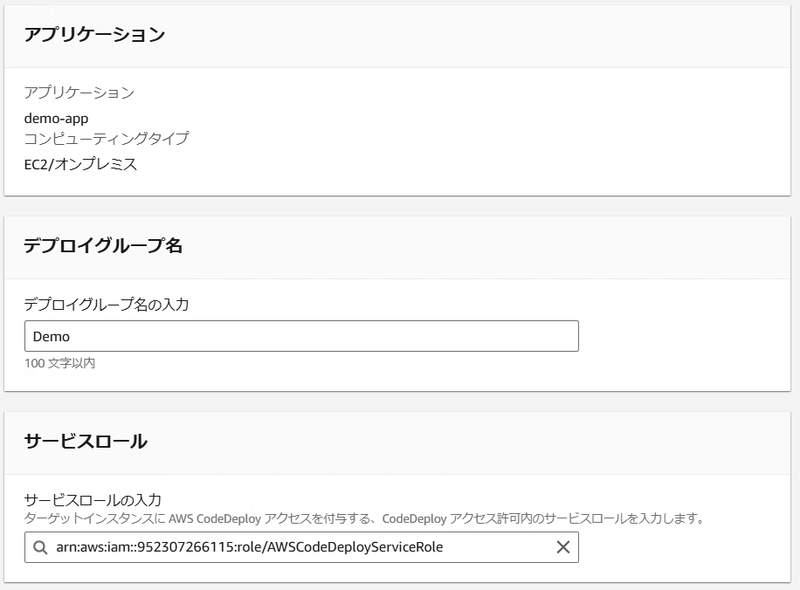
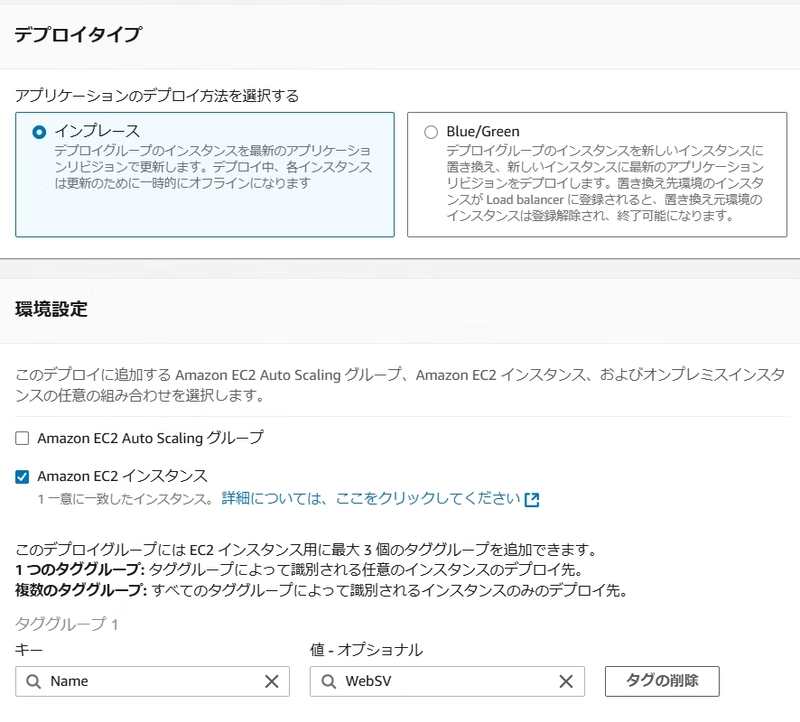
Create a deployment group as shown:
Step 5: Execution Results
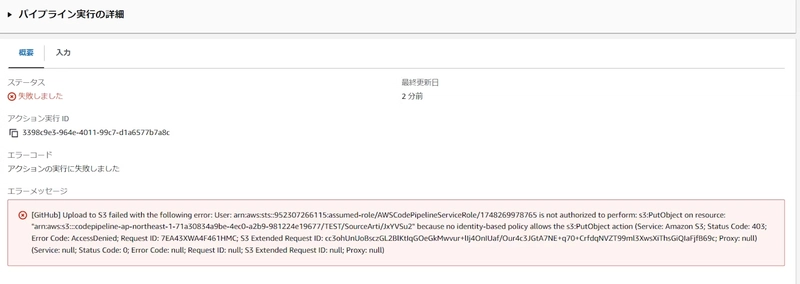
During execution, the following error appeared:
Issue 1: Policy Permission Shortage
I discovered insufficient policy permissions, so I added the following policy to AWSCodePipelineServiceRole:
{
  "Version": "2012-10-17",
  "Statement": [
    {
      "Effect": "Allow",
      "Action": [
        "s3:GetBucketAcl",
        "s3:GetBucketLocation",
        "s3:GetBucketVersioning",
        "s3:GetObject",
        "s3:GetObjectAcl",
        "s3:GetObjectVersion",
        "s3:ListBucket",
        "s3:PutObject",
        "s3:PutObjectAcl"
      ],
      "Resource": [
        "arn:aws:s3:::codepipeline-ap-northeast-1-71a30834a9be-4ec0-a2b9-981224e19677",
        "arn:aws:s3:::codepipeline-ap-northeast-1-71a30834a9be-4ec0-a2b9-981224e19677/*"
      ]
    }
  ]
}
Issue 2: EC2 Permission Error
During deployment, an EC2 permission shortage error occurred, so I added the following inline policy to EC2InstanceRole:
{
  "Version": "2012-10-17",
  "Statement": [
    {
      "Effect": "Allow",
      "Action": [
        "s3:GetObject",
        "s3:GetObjectVersion",
        "s3:ListBucket"
      ],
      "Resource": [
        "arn:aws:s3:::sphinx-handson-20250526",
        "arn:aws:s3:::sphinx-handson-20250526/*"
      ]
    },
    {
      "Effect": "Allow",
      "Action": [
        "codedeploy:CreateDeployment",
        "codedeploy:GetApplication",
        "codedeploy:GetDeployment",
        "codedeploy:GetDeploymentConfig",
        "codedeploy:ListApplications",
        "codedeploy:ListDeployments"
      ],
      "Resource": "*"
    },
    {
      "Effect": "Allow",
      "Action": [
        "ec2:DescribeInstances",
        "ec2:DescribeInstanceStatus"
      ],
      "Resource": "*"
    },
    {
      "Effect": "Allow",
      "Action": [
        "tag:GetResources"
      ],
      "Resource": "*"
    }
  ]
}
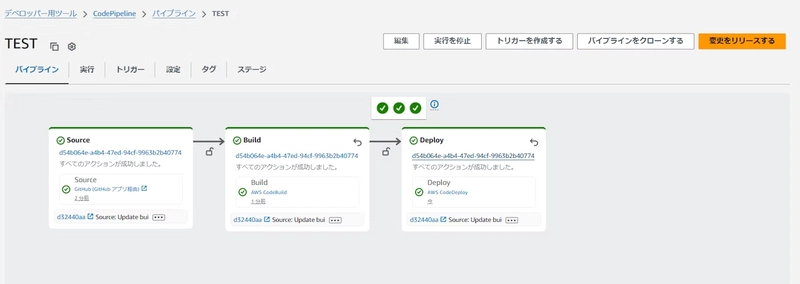
After re-execution, the errors were resolved.
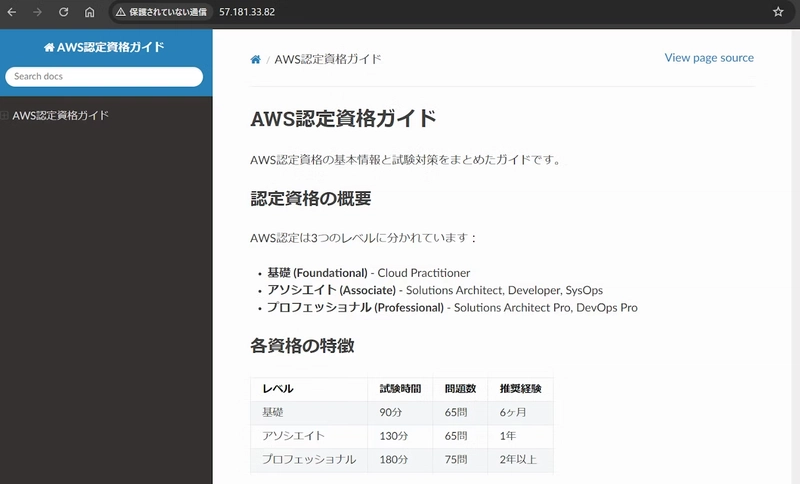
Let’s access the host! We were able to access it successfully.
The goal for this time has been achieved!
Insights
Personally, troubleshooting CodeDeploy errors took some time, but I got the impression that once you do it a few times, it can be implemented without much effort.
Moreover, since the case implemented this time is a minimal configuration, I felt that it could be operated with high scalability by combining it with other services.
I still feel that I need to catch up on pipeline-related topics, so I would like to continue outputting activities.
Key Takeaways
- IAM Permissions: Proper IAM role and policy configuration is crucial for successful pipeline execution
- Troubleshooting: CodeDeploy errors can be resolved systematically by checking permissions step by step
- Scalability: This minimal configuration can be extended with additional AWS services
- Learning: Hands-on practice is the best way to understand pipeline concepts
Next Steps
- Explore more complex pipeline configurations
- Integrate with other AWS services (Lambda, CloudWatch, etc.)
- Implement automated testing in the pipeline
- Set up monitoring and alerting
Thank you for reading this article to the end! Feel free to share your experiences with AWS pipelines in the comments below.
