Version 1.0.0 Released! My Repo Extraction Tool is now available on NPM!
🎉 Exciting News! My project, repoal, has just launched its first version on NPM! You can install it using:
npm install -g @whyang9701/repopal
or run it directly with:
npx @whyang9701/repopal
How I Published on NPM
-
Choosing a Name:
- I decided to use a scoped name for my project. This means it will be associated with my username.
- For example, an unscoped package like vue is just a project name and can’t be reused. In contrast, a scoped package like @vue/shared is linked to the Vue organization.
- I went with a scoped name to avoid confusion and connect it to me.
-
Automating the Publish Process:
- I used GitHub Actions to automate my publishing. GitHub has a tutorial that shows how to set this up.
- I modified the YAML file to trigger the publish process when I create a new git tag:
   name: Node.js Package

   on:
     push:
       tags:
         - 'v*'
   jobs:
     ...
- To update the version and push the tag, I run:
   npm version 1.0.0
   git push && git push --tags
- This automation will kick in every time I update the version.
-
Adding Provenance Statements:
- I also added a feature for provenance statements, which help verify where the package was built and who published it. This can enhance security.
- NPM provides a tutorial on how to do this.
- In my GitHub Actions YAML, I made two updates:
- Allow the runner to read the repo and use my ID token for verification:
 ...
     runs-on: ubuntu-latest
     permissions:
       contents: read
       id-token: write
     steps:
     ...
       - run: npm publish --provenance --access public
Visual Confirmation
Here’s a green check mark that shows my publish comes with provenance statements!
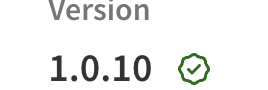
This check mark indicates that my package has verified information, improving supply-chain security.