How to Migrate from Sanity to Strapi: Complete Step-by-Step Guide
Introduction
Sanity and Strapi are both headless CMSs, but that’s where the similarities end. Moving from Sanity’s schema-first approach with GROQ queries to Strapi’s collection-based CMS with built-in admin panels isn’t as straightforward as exporting and importing data.
Brief Summary
This guide covers the complete migration process from Sanity to Strapi using real-world examples.
We’ll work through migrating a typical blog and e-commerce setup with posts, authors, categories, pages, and products to show you what a real Sanity-to-Strapi migration actually looks like.
Goal
By the end of this tutorial, readers will have successfully migrated a complete Sanity project to Strapi, including all content types, entries, relationships, and media assets.
The tutorial provides practical experience with headless CMS migrations and establishes best practices for maintaining data integrity.
Understanding Sanity vs Strapi
Key Architectural Differences
Sanity and Strapi are both headless CMSs, but that’s where the similarities end. Here are the fundamental differences:
Sanity’s Approach:
- Schema-first with JavaScript/TypeScript schema definitions
- GROQ queries for data fetching
- Real-time collaboration and live preview
- Document-based content structure
- Sanity Studio for content editing
Strapi’s Approach:
- Collection-based CMS with JSON schema definitions
- REST/GraphQL APIs for data access
- Plugin ecosystem and built-in admin panels
- Relational database approach
- Built-in admin interface
When to Consider Migration
Based on recent migration requests, the reasons usually fall into these categories:
- Team familiarity: Your team is more comfortable with traditional CMS structures
- Plugin ecosystem: Strapi’s extensive plugin library matches your needs better
- Self-hosting requirements: You need full control over your infrastructure
- Cost considerations: Different pricing models might work better for your scale
- Integration needs: Your tech stack aligns better with Strapi’s architecture
Sanity to Strapi Migration Benefits and Challenges
Benefits:
- More traditional CMS experience for content editors
- Extensive plugin ecosystem
- Built-in user management and permissions
- Self-hosting flexibility
- Strong REST and GraphQL APIs
Challenges:
- Schema structures require complete transformation
- Query patterns change from GROQ to REST/GraphQL
- Asset handling uses different CDN approaches
- Relationship resolution works completely differently
- Custom functionality needs rebuilding
Prerequisites
Before starting this migration, ensure you have:
Technical Requirements:
- Node.js 18+ installed
- Access to your Sanity project with admin permissions
- Sanity CLI installed globally
- Basic knowledge of both Sanity and Strapi
- Command line familiarity
Required Tools:
# Install global CLI tools
npm install -g @sanity/cli @strapi/strapi
Recommended Knowledge:
- Understanding of headless CMS concepts
- Basic JavaScript/TypeScript knowledge
- Experience with database relationships
- Familiarity with REST APIs
Migration Overview
This migration process consists of six main phases:
- Pre-Migration Assessment – Analyze your current setup and plan transformations
- Environment Setup – Prepare tools and create a fresh Strapi instance
- Data Export – Extract all content and assets from Sanity
- Schema Transformation – Convert Sanity schemas to Strapi content types
- Content Import – Migrate data while preserving relationships
- Testing & Deployment – Validate migration and update frontend integration
We’ll use a custom CLI tool that automates much of the heavy lifting while providing detailed reports and error handling throughout the process.
Phase 1: Pre-Migration Assessment
Analyzing Your Current Sanity Setup
Before touching any code, we need to audit what we’re working with. This step is critical for understanding the scope and complexity of your migration.
Content Type Inventory
First, let’s examine your Sanity schemas. Navigate to your Sanity studio project and create an analysis script – ./listSchemas.ts:
// ./listSchemas.ts
import {createClient} from '@sanity/client'
import {schemaTypes} from './schemaTypes'

const client = createClient({
  projectId: 'your-project-id', // Replace with your project ID
  dataset: 'production', // or your dataset name
  useCdn: false,
  apiVersion: '2023-05-03',
})

console.log('Schema Analysis:')
console.log('================')

schemaTypes.forEach((schema) => {
  console.log(`nSchema: ${schema.name}`)
  console.log(`Type: ${schema.type}`)

  if ('fields' in schema && schema.fields) {
    console.log('Fields:')
    schema.fields.forEach((field) => {
      console.log(`  - ${field.name}: ${field.type}`)

      const fieldAny = field as any

      if (fieldAny.of) {
        console.log(`    of: ${JSON.stringify(fieldAny.of, null, 4)}`)
      }
      if (fieldAny.to) {
        console.log(`    to: ${JSON.stringify(fieldAny.to, null, 4)}`)
      }
      if (fieldAny.options) {
        console.log(`    options: ${JSON.stringify(fieldAny.options, null, 4)}`)
      }
    })
  }
})

// Optional: Get document counts
async function getDocumentCounts() {
  console.log('nDocument Counts:')
  console.log('================')

  for (const schema of schemaTypes) {
    try {
      const count = await client.fetch(`count(*[_type == "${schema.name}"])`)
      console.log(`${schema.name}: ${count} documents`)
    } catch (error) {
      const errorMessage = error instanceof Error? error.message : 'Unknown error'
      console.log(`${schema.name}: Error getting count - ${errorMessage}`)
    }
  }
}

getDocumentCounts()
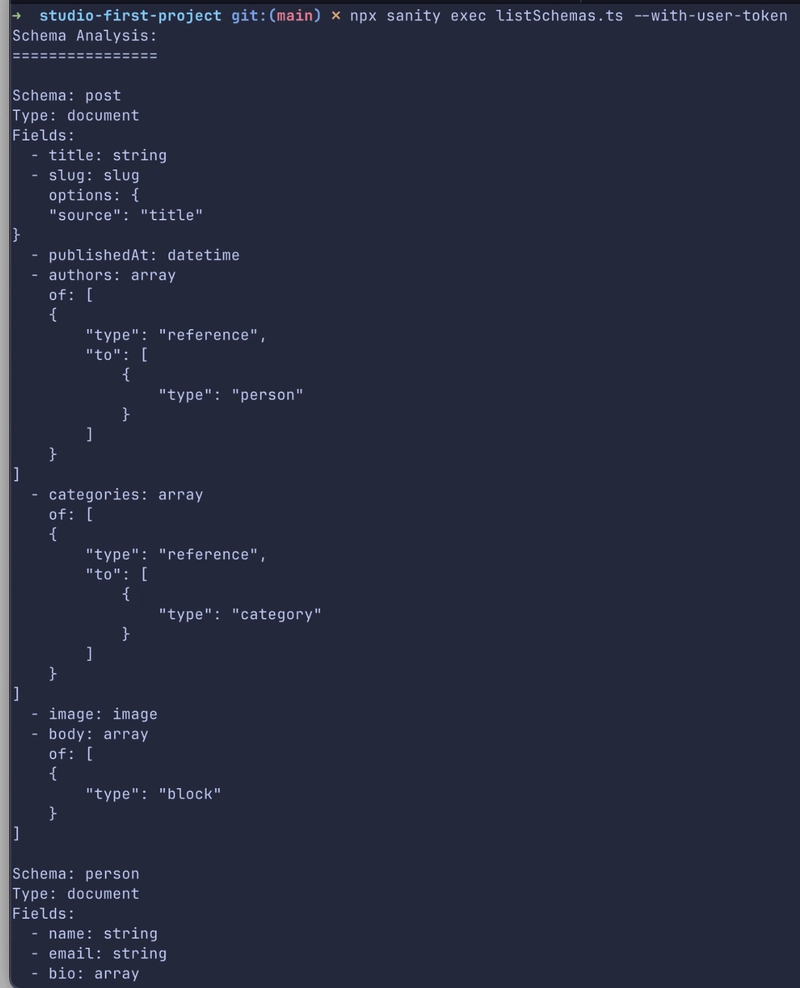
The code above inspects our Sanity schemaTypes by printing each schema’s name, type, and field details (including of, to, and options), then queries the Sanity API to log document counts per schema.
Run the analysis:
npx sanity exec listSchemas.ts --with-user-token
We should have something like this:
Identifying Content Types and Relationships
Next, we’ll create a comprehensive relationship analyzer that works with any schema structure – ./analyzeRelationships.ts:
// ./analyzeRelationships.ts
import {createClient} from '@sanity/client'
import {schemaTypes} from './schemaTypes'

const client = createClient({
  projectId: 'your-project-id',
  dataset: 'production',
  useCdn: false,
  apiVersion: '2023-05-03'
})

interface RelationshipInfo {
  fieldName: string
  fieldType: string
  targetType?: string
  isArray: boolean
  isReference: boolean
  isAsset: boolean
}

interface SchemaAnalysis {
  typeName: string
  relationships: RelationshipInfo[]
  documentCount: number
}

async function analyzeRelationships() {
  console.log('Analyzing Content Relationships:')
  console.log('================================n')

  try {
    const analysisResults: SchemaAnalysis[] = []

    for (const schema of schemaTypes) {
      const analysis = await analyzeSchemaType(schema)
      analysisResults.push(analysis)
    }

    generateRelationshipReport(analysisResults)
    await sampleContentAnalysis(analysisResults)

  } catch (error) {
    console.error('Error analyzing relationships:', error)
  }
}

async function analyzeSchemaType(schema: any): Promise<SchemaAnalysis> {
  const relationships: RelationshipInfo[] = []

  if (schema.type !== 'document') {
    return {
      typeName: schema.name,
      relationships: [],
      documentCount: 0
    }
  }

  const documentCount = await client.fetch(`count(*[_type == "${schema.name}"])`)

  if ('fields' in schema && schema.fields) {
    schema.fields.forEach((field: any) => {
      const relationshipInfo = analyzeField(field)
      if (relationshipInfo) {
        relationships.push(relationshipInfo)
      }
    })
  }

  return {
    typeName: schema.name,
    relationships,
    documentCount
  }
}

function analyzeField(field: any): RelationshipInfo | null {
  const fieldAny = field as any
  let relationshipInfo: RelationshipInfo | null = null

  if (field.type === 'reference') {
    relationshipInfo = {
      fieldName: field.name,
      fieldType: 'reference',
      targetType: fieldAny.to?.[0]?.type || 'unknown',
      isArray: false,
      isReference: true,
      isAsset: false
    }
  }
  else if (field.type === 'array') {
    const arrayItemType = fieldAny.of?.[0]
    if (arrayItemType?.type === 'reference') {
      relationshipInfo = {
        fieldName: field.name,
        fieldType: 'array of references',
        targetType: arrayItemType.to?.[0]?.type || 'unknown',
        isArray: true,
        isReference: true,
        isAsset: false
      }
    } else if (arrayItemType?.type === 'image' || arrayItemType?.type === 'file') {
      relationshipInfo = {
        fieldName: field.name,
        fieldType: `array of ${arrayItemType.type}`,
        isArray: true,
        isReference: false,
        isAsset: true
      }
    }
  }
  else if (field.type === 'image' || field.type === 'file') {
    relationshipInfo = {
      fieldName: field.name,
      fieldType: field.type,
      isArray: false,
      isReference: false,
      isAsset: true
    }
  }
  else if (field.type === 'object') {
    const nestedFields = fieldAny.fields || []
    const hasNestedAssets = nestedFields.some((f: any) => f.type === 'image' || f.type === 'file')
    const hasNestedReferences = nestedFields.some((f: any) => f.type === 'reference')

    if (hasNestedAssets || hasNestedReferences) {
      relationshipInfo = {
        fieldName: field.name,
        fieldType: 'object with nested relationships',
        isArray: false,
        isReference: hasNestedReferences,
        isAsset: hasNestedAssets
      }
    }
  }

  return relationshipInfo
}

function generateRelationshipReport(analyses: SchemaAnalysis[]) {
  console.log('RELATIONSHIP MAPPING SUMMARY:')
  console.log('=============================n')

  analyses.forEach(analysis => {
    if (analysis.relationships.length === 0 && analysis.documentCount === 0) return

    console.log(`📋 ${analysis.typeName.toUpperCase()} (${analysis.documentCount} documents)`)
    console.log('─'.repeat(50))

    if (analysis.relationships.length === 0) {
      console.log('  No relationships found')
    } else {
      analysis.relationships.forEach(rel => {
        let description = `  ${rel.fieldName}: ${rel.fieldType}`
        if (rel.targetType) {
          description += ` → ${rel.targetType}`
        }
        if (rel.isArray) {
          description += ' (multiple)'
        }
        console.log(description)
      })
    }
    console.log('')
  })
}

async function sampleContentAnalysis(analyses: SchemaAnalysis[]) {
  console.log('SAMPLE CONTENT ANALYSIS:')
  console.log('========================n')

  for (const analysis of analyses) {
    if (analysis.documentCount === 0 || analysis.relationships.length === 0) continue

    console.log(`Sampling ${analysis.typeName} content...`)

    try {
      const relationshipFields = analysis.relationships.map(rel => {
        if (rel.isReference && rel.isArray) {
          return `${rel.fieldName}[]->{ _id, _type }`
        } else if (rel.isReference) {
          return `${rel.fieldName}->{ _id, _type }`
        } else if (rel.isAsset) {
          return rel.fieldName
        } else {
          return rel.fieldName
        }
      }).join(',n    ')

      const query = `*[_type == "${analysis.typeName}"][0...3]{
        _id,
        _type,
        ${relationshipFields}
      }`

      const sampleDocs = await client.fetch(query)

      sampleDocs.forEach((doc: any, index: number) => {
        console.log(`  Sample ${index + 1}:`)

        analysis.relationships.forEach(rel => {
          const value = doc[rel.fieldName]
          let display = 'None'

          if (value) {
            if (rel.isReference && Array.isArray(value)) {
              display = `${value.length} references`
            } else if (rel.isReference && value._type) {
              display = `1 reference to ${value._type}`
            } else if (rel.isAsset && Array.isArray(value)) {
              display = `${value.length} assets`
            } else if (rel.isAsset) {
              display = '1 asset'
            } else {
              display = 'Has data'
            }
          }

          console.log(`    ${rel.fieldName}: ${display}`)
        })
        console.log('')
      })

    } catch (error) {
      console.log(`    Error sampling ${analysis.typeName}:`, error)
    }
  }
}

analyzeRelationships()
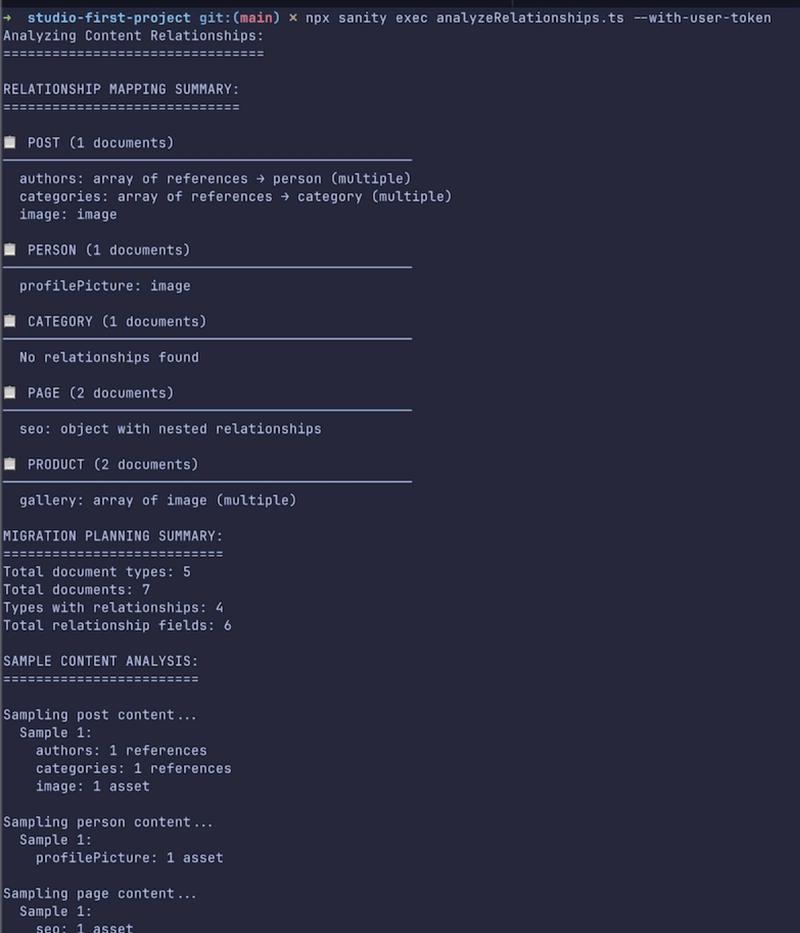
The code above scans our Sanity schemaTypes to detect and summarize relationships (references, arrays, assets, nested in objects), fetches per-type document counts, and samples a few documents to report what related data each field actually contains.
Planning Schema Transformations
From our example schemas, here’s what we’re working with:
- Posts → Authors (array of references to person type)
- Posts → Categories (array of references to category type)
- Posts → Images (image assets)
- Pages → SEO Images (nested image assets)
- Products → Gallery Images (array of image assets)
Run the relationship analyzer:
npx sanity exec analyzeRelationships.ts --with-user-token
With that, we should have something like this:
Asset Inventory and Preparation
Finally, let’s create a comprehensive asset audit – ./auditAssets.ts:
// ./auditAssets.ts
import {createClient} from '@sanity/client'

const client = createClient({
  projectId: 'your-project-id',
  dataset: process.env.SANITY_STUDIO_DATASET || 'production',
  useCdn: false,
  apiVersion: '2023-05-03',
  token: process.env.SANITY_API_TOKEN,
})

interface AssetInfo {
  _id: string
  _type: string
  url: string
  originalFilename: string
  size: number
  mimeType: string
  extension: string
  metadata?: {
    dimensions?: {
      width: number
      height: number
    }
  }
}

async function auditAssets() {
  console.log('Starting asset audit...')
  console.log('========================n')

  try {
    const assets = await client.fetch<AssetInfo[]>(`
      *[_type in ["sanity.imageAsset", "sanity.fileAsset"]] {
        _id,
        _type,
        url,
        originalFilename,
        size,
        mimeType,
        extension,
        metadata
      }
    `)

    console.log(`Found ${assets.length} total assetsn`)

    const imageAssets = assets.filter((asset) => asset._type === 'sanity.imageAsset')
    const fileAssets = assets.filter((asset) => asset._type === 'sanity.fileAsset')

    console.log('ASSET BREAKDOWN:')
    console.log('================')
    console.log(`Images: ${imageAssets.length}`)
    console.log(`Files: ${fileAssets.length}`)

    const totalSize = assets.reduce((sum, asset) => sum + (asset.size || 0), 0)
    const totalSizeMB = (totalSize / 1024 / 1024).toFixed(2)
    console.log(`Total size: ${totalSizeMB} MBn`)

    if (imageAssets.length > 0) {
      console.log('IMAGE ANALYSIS:')
      console.log('===============')

      const withDimensions = imageAssets.filter((img) => img.metadata?.dimensions)
      const avgWidth = withDimensions.reduce((sum, img) => sum + (img.metadata?.dimensions?.width || 0), 0) / withDimensions.length
      const avgHeight = withDimensions.reduce((sum, img) => sum + (img.metadata?.dimensions?.height || 0), 0) / withDimensions.length

      console.log(`Images with dimensions: ${withDimensions.length}/${imageAssets.length}`)
      if (withDimensions.length > 0) {
        console.log(`Average dimensions: ${Math.round(avgWidth)}x${Math.round(avgHeight)}`)
      }

      const imageTypes = imageAssets.reduce((acc, img) => {
        const type = img.mimeType || 'unknown'
        acc[type] = (acc[type] || 0) + 1
        return acc
      }, {} as Record<string, number>)

      console.log('Image types:')
      Object.entries(imageTypes).forEach(([type, count]) => {
        console.log(`  ${type}: ${count}`)
      })
      console.log('')
    }

    await analyzeAssetUsage(assets)
    await generateAssetInventory(assets)

    console.log('Asset audit complete!')
  } catch (error) {
    console.error('Error during asset audit:', error)
  }
}

async function analyzeAssetUsage(assets: AssetInfo[]) {
  console.log('ASSET USAGE ANALYSIS:')
  console.log('=====================')

  let unusedAssets = 0
  let usedAssets = 0

  for (const asset of assets) {
    const referencingDocs = await client.fetch(`
      *[references("${asset._id}")] {
        _id,
        _type
      }
    `)

    if (referencingDocs.length > 0) {
      usedAssets++
    } else {
      unusedAssets++
    }
  }

  console.log(`Used assets: ${usedAssets}`)
  console.log(`Unused assets: ${unusedAssets}`)
  console.log('')
}

async function generateAssetInventory(assets: AssetInfo[]) {
  const inventory = {
    generatedAt: new Date().toISOString(),
    summary: {
      totalAssets: assets.length,
      totalImages: assets.filter((a) => a._type === 'sanity.imageAsset').length,
      totalFiles: assets.filter((a) => a._type === 'sanity.fileAsset').length,
      totalSizeBytes: assets.reduce((sum, asset) => sum + (asset.size || 0), 0),
    },
    assets: assets.map((asset) => ({
      id: asset._id,
      type: asset._type,
      filename: asset.originalFilename,
      url: asset.url,
      size: asset.size,
      mimeType: asset.mimeType,
      extension: asset.extension,
      dimensions: asset.metadata?.dimensions,
    })),
  }

  const fs = require('fs')
  fs.writeFileSync('assets-inventory.json', JSON.stringify(inventory, null, 2))
  console.log('Asset inventory saved to assets-inventory.json')
}

auditAssets()
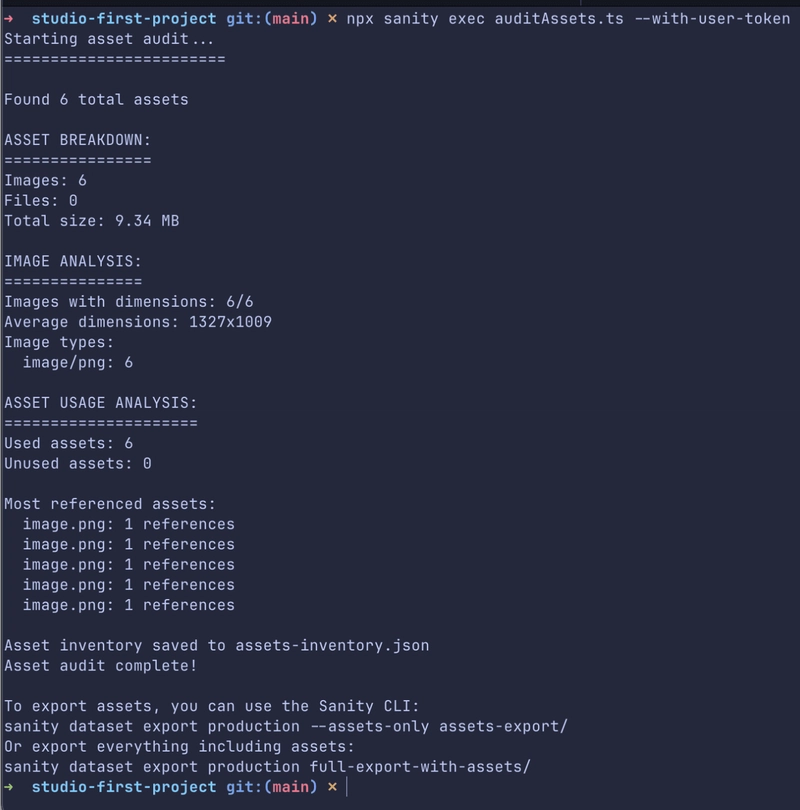
The code above fetches all Sanity image/file assets, reports counts/size/types and average image dimensions, checks which assets are referenced vs unused, and writes a detailed assets-inventory.json export.
Run the asset audit:
npx sanity exec auditAssets.ts --with-user-token
With that, we should have something like this:
And we can inspect the newly created ./assets-inventory.json file generated, here’s mine:
{
  "generatedAt": "2025-08-28T12:32:29.993Z",
  "summary": {
    "totalAssets": 6,
    "totalImages": 6,
    "totalFiles": 0,
    "totalSizeBytes": 9788624
  },
  "assets": [
    {
      "id": "image-87d44663b620c92e956dbfbd3080a6398589c289-1080x1080-png",
      "type": "sanity.imageAsset",
      "filename": "image.png",
      "url": "<https://cdn.sanity.io/images/lhmeratw/production/87d44663b620c92e956dbfbd3080a6398589c289-1080x1080.png>",
      "size": 1232943,
      "mimeType": "image/png",
      "extension": "png",
      "dimensions": {
        "_type": "sanity.imageDimensions",
        "aspectRatio": 1,
        "height": 1080,
        "width": 1080
      }
    },
  ]
}
Phase 2: Setting Up the Migration Environment
Installing the Sanity-to-Strapi CLI Tool
Create a dedicated workspace for this migration:
# Create migration workspace
mkdir sanity-to-strapi-migration
cd sanity-to-strapi-migration

# Set up directories
mkdir sanity-export      # For exported Sanity data
mkdir strapi-project     # New Strapi instance
mkdir migration-scripts  # Custom migration code
mkdir logs              # Migration logs and reports
Configuring Your Development Environment
Install the required tools:
# Install global CLI tools
npm install -g @sanity/cli @strapi/strapi

# Initialize package.json for migration scripts
npm init -y

# Install migration-specific packages
npm install @sanity/client axios fs-extra path csvtojson
Setting Up a Fresh Strapi Instance
Create and configure your new Strapi project:
# Create new Strapi project
npx create-strapi-app@latest strapi-project --quickstart
With that, we’ll install Strapi.
# Start Strapi server

cd strapi-project
npm run develop
And start the Strapi server.
Set up an admin account:
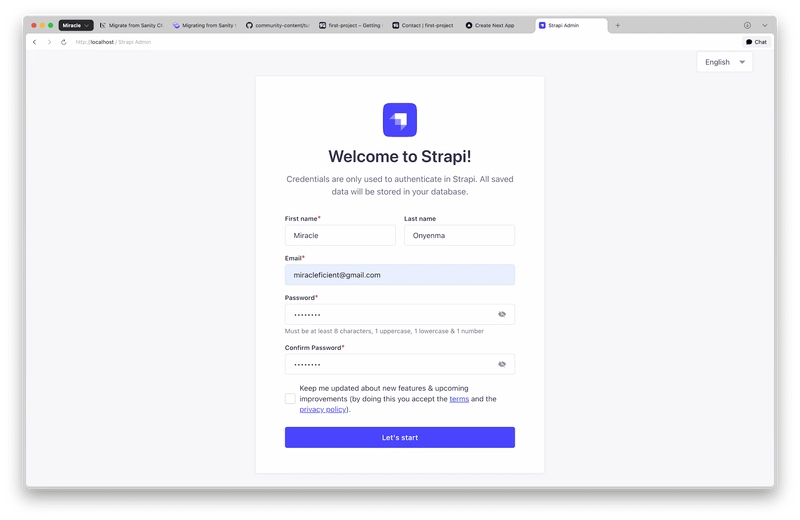
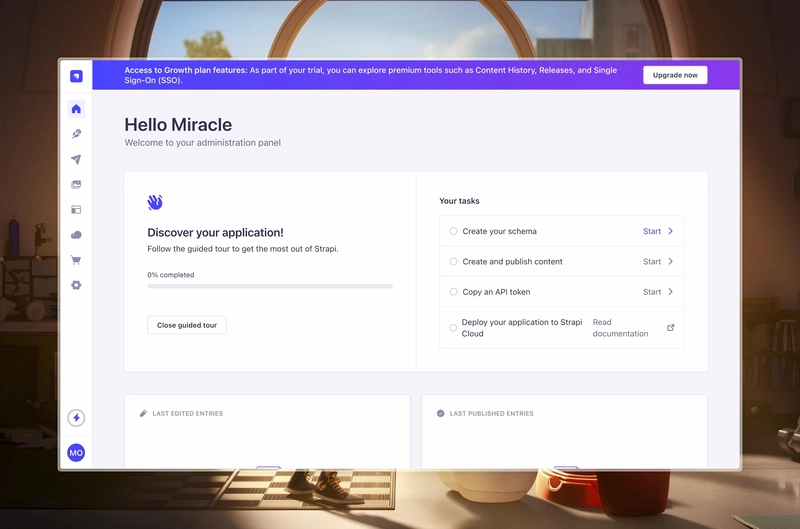
After successful account creation, you should see the admin dashboard:
Obtain API token
Let’s quickly get and save our API token so we can make authenticated requests to our Strapi API. Navigate to Settings > API Tokens
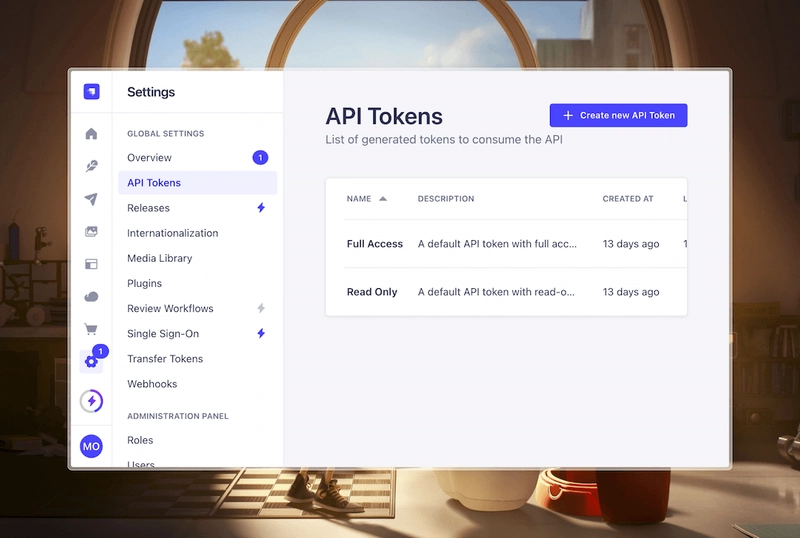
Once you’re here, click on Full Access > View Token > Copy

Save your token, we’ll need it later.
Backup Strategies and Safety Measures
Critical: Always back up before migration!
For Sanity backups (run from your existing Sanity project):
cd path/to/your/sanity-studio
sanity dataset export production backup-$(date +%Y%m%d).tar.gz
For Strapi backups (if you already have a Strapi project):
# SQLite (development)
cp .tmp/data.db .tmp/data-backup.db

# PostgreSQL (production)
pg_dump your_strapi_db > strapi-backup-$(date +%Y%m%d).sql
Phase 3: Exporting from Sanity
Using Sanity’s Export Capabilities
Sanity provides built-in export capabilities that we’ll leverage for our migration.
Important: Run these commands from your existing Sanity studio project directory:
# Make sure you're in your Sanity project directory
cd path/to/your/sanity-studio
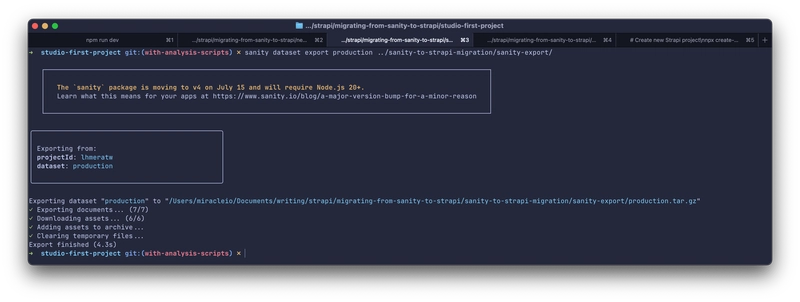
# Export everything to your migration workspace
sanity dataset export production ../sanity-to-strapi-migration/sanity-export/
# For specific document types (optional)
sanity dataset export production --types post,person,category,page,product ../sanity-to-strapi-migration/sanity-export/filtered-export
Understanding the Exported Data Structure
The export creates a compressed .tar.gz file. Let’s examine its structure:
# Navigate to migration workspace
cd sanity-to-strapi-migration
# Extract the export
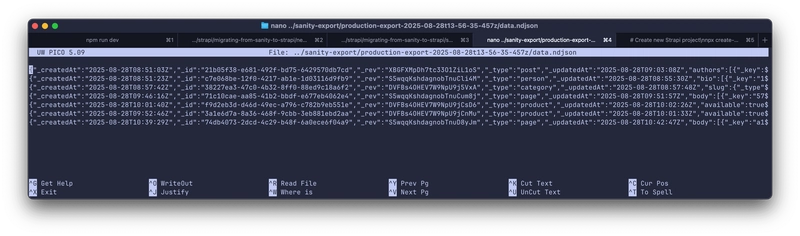
tar -xvzf sanity-export/production.tar.gz -C sanity-export
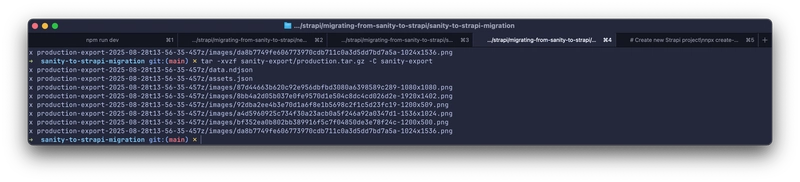
This creates a data.ndjson file where each line is a JSON document representing your content.
Handling Large Datasets and Assets
For large datasets, you might want to export in batches. Create this analysis script – ./sanity-to-strapi-migration/migration-scripts/analyze-export.js:
// migration-scripts/analyze-export.js
const fs = require('fs')
const readline = require('readline')

async function analyzeExport() {
  const fileStream = fs.createReadStream('../sanity-export/data.ndjson')
  const rl = readline.createInterface({
    input: fileStream,
    crlfDelay: Infinity
  })

  const typeCount = {}
  const sampleDocs = {}

  for await (const line of rl) {
    const doc = JSON.parse(line)

    // Count document types
    typeCount[doc._type] = (typeCount[doc._type] || 0) + 1

    // Store samples for known types
    if (['post', 'person', 'category', 'page', 'product'].includes(doc._type)) {
      if (!sampleDocs[doc._type]) {
        sampleDocs[doc._type] = doc
      }
    }
  }

  console.log('Document type counts:', typeCount)

  // Save analysis results
  fs.writeFileSync('export-analysis.json', JSON.stringify({
    typeCount,
    sampleDocs
  }, null, 2))
}

analyzeExport()
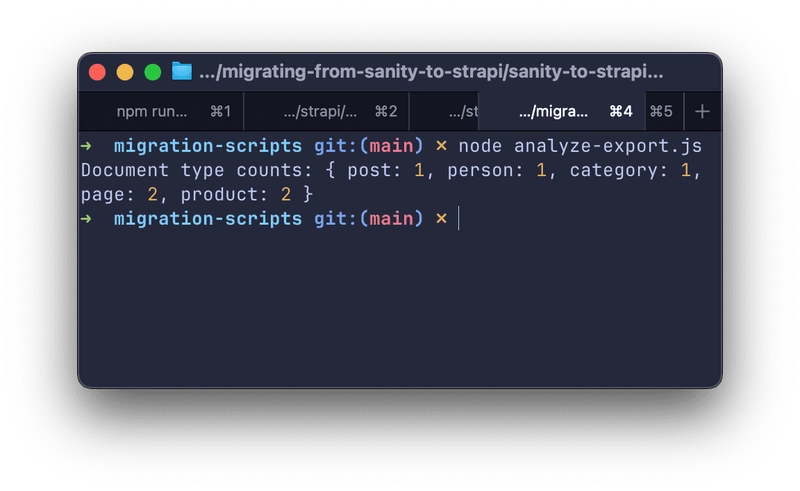
The code above reads a Sanity NDJSON export, tallies document counts per _type, saves one sample doc for key types, logs the counts, and writes everything to export-analysis.json.
Run the analysis:
cd migration-scripts
node analyze-export.js
We should have something like this:
Validation and Quality Checks
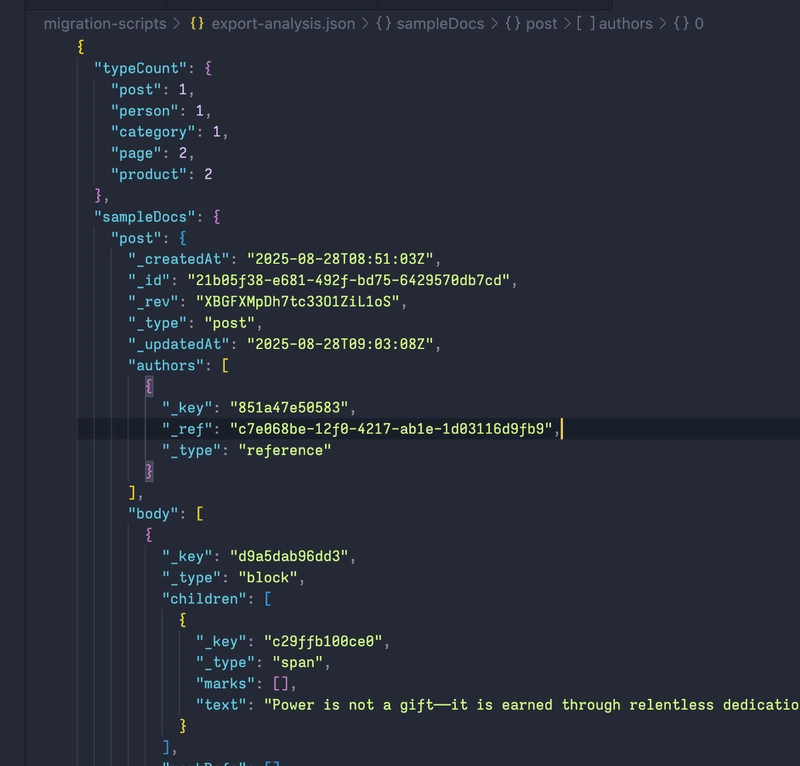
Review the generated export-analysis.json to understand your data structure and ensure all content types are present.
Phase 4: Schema and Content Transformation
Running the CLI Tool for Schema Mapping
Now we’ll use the automated CLI tool to handle the complex schema transformation process:
Basic Schema Generation
# Generate schemas only
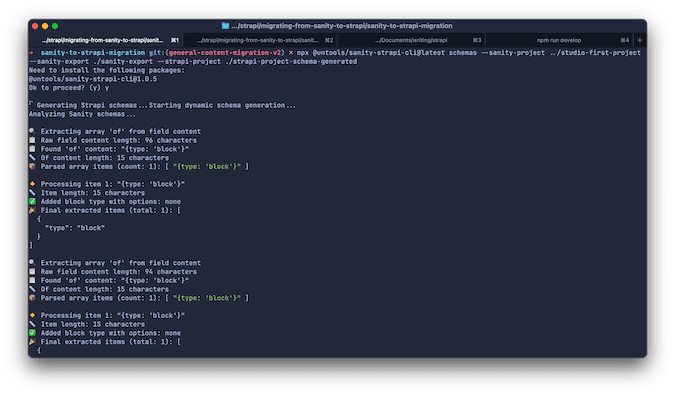
npx @untools/sanity-strapi-cli@latest schemas
--sanity-project ../studio-first-project
--sanity-export ./sanity-export
--strapi-project ./strapi-project
Content Type Generation in Strapi
The CLI creates a complete Strapi project structure:
strapi-project/src/
├── api/
│   ├── post/
│   │   ├── content-types/post/schema.json
│   │   ├── controllers/post.ts
│   │   ├── routes/post.ts
│   │   └── services/post.ts
│   ├── person/
│   └── category/
└── components/
    ├── blocks/
    └── media/
Example transformation – A Sanity post schema:
// sanity/schemaTypes/post.js
export default {
  name: 'post',
  type: 'document',
  fields: [
    { name: 'title', type: 'string', validation: Rule => Rule.required() },
    { name: 'slug', type: 'slug', options: { source: 'title' } },
    { name: 'author', type: 'reference', to: [{ type: 'person' }] },
    { name: 'categories', type: 'array', of: [{ type: 'reference', to: [{ type: 'category' }] }] },
    { name: 'body', type: 'array', of: [{ type: 'block' }] },
    { name: 'publishedAt', type: 'datetime' }
  ]
}
Becomes this Strapi schema:
{
  "kind": "collectionType",
  "collectionName": "posts",
  "info": {
    "singularName": "post",
    "pluralName": "posts",
    "displayName": "Post"
  },
  "attributes": {
    "title": {
      "type": "string",
      "required": true
    },
    "slug": {
      "type": "uid",
      "targetField": "title"
    },
    "author": {
      "type": "relation",
      "relation": "manyToOne",
      "target": "api::person.person",
      "inversedBy": "posts"
    },
    "categories": {
      "type": "relation",
      "relation": "manyToMany",
      "target": "api::category.category",
      "mappedBy": "posts"
    },
    "body": {
      "type": "blocks"
    },
    "publishedAt": {
      "type": "datetime"
    }
  }
}
Data Transformation and Relationship Mapping
The CLI automatically handles:
- Type mapping: String → string, reference → relation, etc.
- Relationship analysis: Detects bidirectional relationships
- Component creation: Complex objects become reusable components
- Asset transformation: Images and files are properly mapped
Asset Processing and Migration
Once schemas are ready, migrate your actual content and media assets.
Prerequisites:
- Strapi server running with generated schemas
- Strapi API token with full permissions
# Start your Strapi server first
cd strapi-project && npm run develop
# In another terminal, run content migration
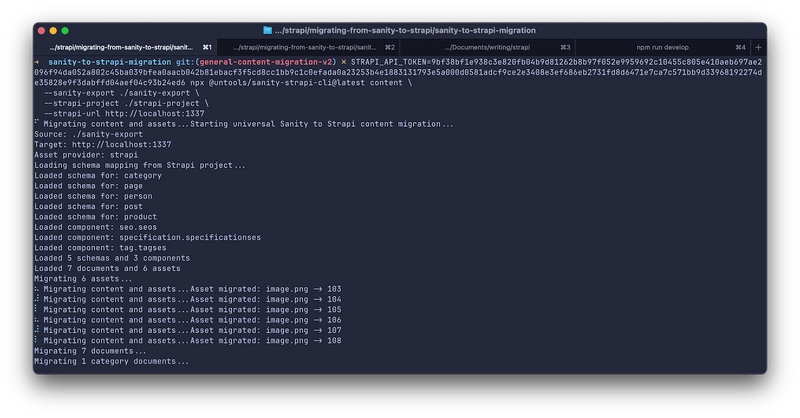
STRAPI_API_TOKEN=your_full_access_token npx @untools/sanity-strapi-cli@latest content
--sanity-export ./sanity-export
--strapi-project ./strapi-project
--strapi-url http://localhost:1337
Choose your asset strategy:
Option 1: Strapi Native Media (Default)
STRAPI_API_TOKEN=your_token npx @untools/sanity-strapi-cli@latest content
  --sanity-export ./sanity-export
  --strapi-project ./strapi-project
  --asset-provider strapi
Option 2: Cloudinary Integration
CLOUDINARY_CLOUD_NAME=your_cloud
CLOUDINARY_API_KEY=your_key
CLOUDINARY_API_SECRET=your_secret
STRAPI_API_TOKEN=your_token npx @untools/sanity-strapi-cli@latest content
  --sanity-export ./sanity-export
  --strapi-project ./strapi-project
  --asset-provider cloudinary
Phase 5: Importing into Strapi
Batch Importing Transformed Content
For a complete end-to-end migration, run:
# Complete migration (schemas + content)
STRAPI_API_TOKEN=your_token npx @untools/sanity-strapi-cli@latest migrate
  --sanity-project ../studio-first-project
  --sanity-export ./sanity-export
  --strapi-project ./strapi-project
  --strapi-url http://localhost:1337
Verifying Data Integrity
The migration generates detailed reports:
- schema-generation-report.json – Schema creation details
- universal-migration-report.json – Content migration results
Interactive Mode (Recommended)
For a guided setup experience that will handle both schema generation and content migration:
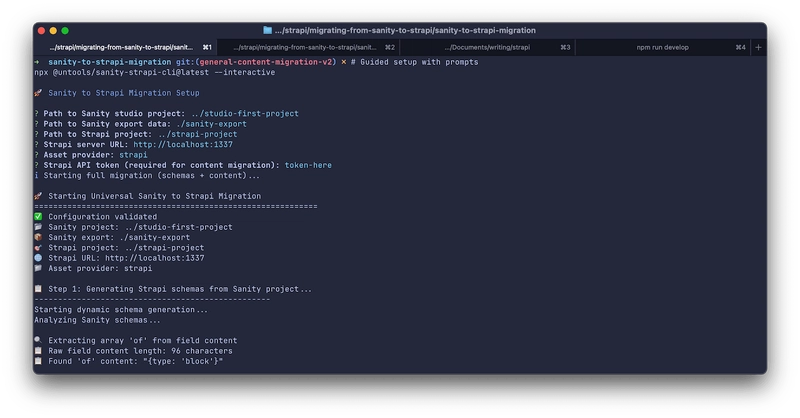
# Guided setup with prompts
npx @untools/sanity-strapi-cli@latest --interactive
This will prompt you for:
- Path to Sanity studio project
- Path to Sanity export data
- Path to Strapi project
- Strapi server URL
- Asset provider preference (Strapi native or Cloudinary)
A successful migration will show:
Migration Summary:
Assets: 6/6 (0 failed)
Entities: 7/7 (0 failed)
Relationships: 3/3 (0 failed)
Total errors: 0
Schemas used: 5
Components used: 3
✅ Content migration completed

🎉 Universal migration completed successfully!

📋 Next Steps:
1. Review generated files:
   - Check schema-generation-report.json for schema analysis
   - Review generated schemas in your Strapi project
   - Check universal-migration-report.json for migration results

2. Start your Strapi server:
   cd ../strapi-project && npm run develop

3. Review migrated content in the Strapi admin panel

4. Adjust content types and components as needed
✓
Full migration completed successfully!
ℹ Generated files:
ℹ   - schema-generation-report.json
ℹ   - universal-migration-report.json
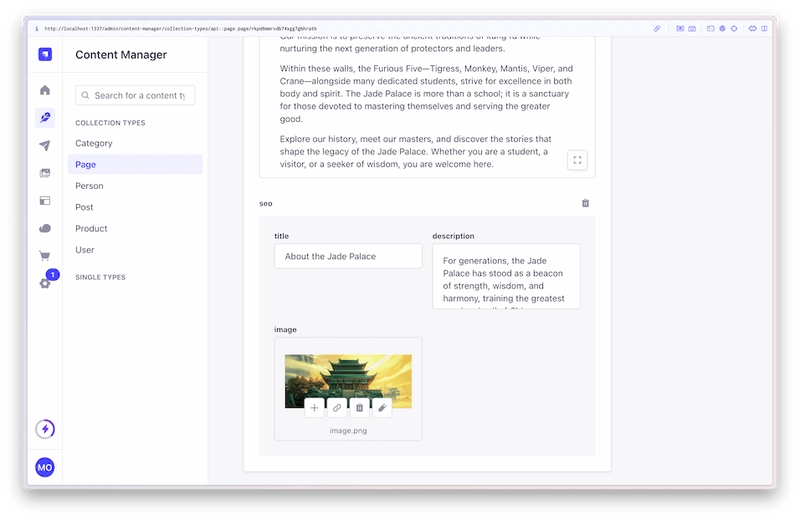
And if we visit our Strapi Admin Dashboard, we should see our content.
Handling Import Errors and Retries
The CLI includes automatic retry logic and error handling. If issues occur:
- Check the migration logs for specific errors
- Verify your Strapi server is running
- Ensure API tokens have proper permissions
- Review schema conflicts in the generated reports
Post-Import Validation
After migration, verify your content in the Strapi admin dashboard:
- Check that all content types are present
- Verify relationships are properly connected
- Ensure assets are uploaded and accessible
- Test API endpoints for data consistency
Phase 6: Testing and Going Live
Content Comparison and Validation
Before going live, perform thorough validation:
- Content freeze: Stop updates in Sanity during final testing
- Data comparison: Spot-check content between systems
- Relationship testing: Verify all references work correctly
- Asset verification: Ensure all media files are accessible
Frontend Integration Updates
Your frontend code will need systematic updates to work with Strapi’s API structure. This section walks through migrating a real Next.js project from Sanity to Strapi integration.
Project Overview
We’ll migrate an example Next.js site with:
- Original (Sanity): Main branch
- Migrated (Strapi): migrate-to-strapi branch
Step 1: Replace Sanity Client with Strapi API Client
Before – src/sanity/client.ts:
import { createClient } from "next-sanity";

export const client = createClient({
  projectId: "lhmeratw",
  dataset: "production",
  apiVersion: "2024-01-01",
  useCdn: false,
});
After – Create src/lib/strapi-client.ts:
const STRAPI_URL =
  process.env.NEXT_PUBLIC_STRAPI_URL || "http://localhost:1337";
const STRAPI_TOKEN = process.env.STRAPI_API_TOKEN;

export async function strapiRequest(
  endpoint: string,
  options: RequestInit = {}
) {
  const url = `${STRAPI_URL}/api/${endpoint}`;

  const response = await fetch(url, {
    headers: {
      "Content-Type": "application/json",
      ...(STRAPI_TOKEN && { Authorization: `Bearer ${STRAPI_TOKEN}` }),
      ...options.headers,
    },
    ...options,
  });

  if (!response.ok) {
    throw new Error(`Strapi request failed: ${response.statusText}`);
  }

  return response.json();
}
Step 2: Create Data Adapters
Create src/utils/strapi-adapter.ts:
/* eslint-disable @typescript-eslint/no-explicit-any */
// ./src/utils/strapi-adapter.ts

const STRAPI_URL =
  process.env.NEXT_PUBLIC_STRAPI_URL || "http://localhost:1337";

export interface StrapiResponse<T = any> {
  data: T;
  meta?: {
    pagination?: {
      page: number;
      pageSize: number;
      pageCount: number;
      total: number;
    };
  };
}

export interface StrapiEntity {
  id?: string | number;
  documentId?: string | number;
  [key: string]: any;
}

/* -------------------------
   Helpers
------------------------- */

// Standardized slug adapter
const adaptSlug = (slug?: string) => ({ current: slug ?? "" });

// Standardized image adapter
const adaptImage = (img?: StrapiEntity) => img?.data ?? null;

// Standardized authors adapter
const adaptAuthors = (authors?: { data?: StrapiEntity[] }) =>
  authors?.data?.map(({ name, profilePicture }) => ({
    name,
    profilePicture: adaptImage(profilePicture),
  })) ?? [];

// Standardized categories adapter
const adaptCategories = (categories?: { data?: StrapiEntity[] }) =>
  categories?.data?.map(({ title, slug }) => ({
    title,
    slug: adaptSlug(slug),
  })) ?? [];

// Standardized gallery adapter
const adaptGallery = (gallery?: { data?: StrapiEntity[] }) =>
  gallery?.data?.map((img) => ({
    ...img,
    asset: { _ref: `image-${img.id}` }, // Sanity-like reference
  })) ?? [];

/* -------------------------
   Adapters
------------------------- */

export function adaptStrapiPost(post: StrapiEntity): any {
  return {
    _id: String(post.documentId),
    slug: adaptSlug(post.slug),
    image: adaptImage(post.image),
    authors: adaptAuthors(post.authors),
    categories: adaptCategories(post.categories),
    ...post, // spread last so overrides don't break critical fields
  };
}

export function adaptStrapiProduct(product: StrapiEntity): any {
  return {
    _id: String(product.documentId),
    specifications: {
      ...product.specifications, // spread instead of manual copy
    },
    gallery: adaptGallery(product.gallery),
    ...product,
  };
}

export function adaptStrapiPage(page: StrapiEntity): any {
  return {
    _id: String(page.documentId),
    slug: adaptSlug(page.slug),
    seo: {
      ...page.seo,
      image: adaptImage(page.seo?.image),
    },
    ...page,
  };
}

/* -------------------------
   Image URL builder
------------------------- */
export function getStrapiImageUrl(
  imageAttributes: any,
  baseUrl = STRAPI_URL
): string | null {
  const url = imageAttributes?.url;
  if (!url) return null;
  return url.startsWith("http") ? url : `${baseUrl}${url}`;
}
These utility functions transform Strapi responses into a Sanity-like format for consistent, frontend-friendly data handling.
Step 3: Update Navigation Logic
Before – src/lib/navigation.ts:
import { client } from "@/sanity/client";

const PAGES_QUERY = `*[_type == "page" && defined(slug.current)]|order(title asc){
  _id, title, slug
}`;

export interface NavigationPage {
  _id: string;
  title: string;
  slug: { current: string };
}

export async function getNavigationPages(): Promise<NavigationPage[]> {
  const options = { next: { revalidate: 60 } };
  return client.fetch<NavigationPage[]>(PAGES_QUERY, {}, options);
}
After – Update src/lib/navigation.ts:
import { strapiRequest } from "./strapi-client";
import {
  adaptStrapiPage,
  type StrapiResponse,
  type StrapiEntity,
} from "@/utils/strapi-adapter";

export interface NavigationPage {
  _id: string;
  title: string;
  slug: { current: string };
}

export async function getNavigationPages(): Promise<NavigationPage[]> {
  try {
    const response: StrapiResponse<StrapiEntity[]> = await strapiRequest(
      "pages?fields[0]=title&fields[1]=slug&sort=title:asc",
      { next: { revalidate: 60 } }
    );

    return response.data.map(adaptStrapiPage)
  } catch (error) {
    console.error("Failed to fetch navigation pages:", error);
    return [];
  }
}

// Keep your existing navigation constants
export const MAIN_NAV_SLUGS = ["about", "contact"];
export const FOOTER_QUICK_LINKS_SLUGS = ["about", "contact"];
export const FOOTER_SUPPORT_SLUGS = ["help", "shipping", "returns", "privacy"];
export const FOOTER_LEGAL_SLUGS = ["terms", "privacy", "cookies"];
Step 4: Update Homepage
Before – src/app/page.tsx:
import { client } from "@/sanity/client";

const POSTS_QUERY = `*[
  _type == "post"
  && defined(slug.current)
]|order(publishedAt desc)[0...3]{_id, title, slug, publishedAt, image}`;

const PRODUCTS_QUERY = `*[
  _type == "product"
  && available == true
]|order(_createdAt desc)[0...4]{_id, name, price, gallery}`;

const options = { next: { revalidate: 30 } };

export default async function HomePage() {
  const [posts, products] = await Promise.all([
    client.fetch<SanityDocument[]>(POSTS_QUERY, {}, options),
    client.fetch<SanityDocument[]>(PRODUCTS_QUERY, {}, options),
  ]);
After – Update src/app/page.tsx:
/* eslint-disable @typescript-eslint/no-explicit-any */
// ./src/app/page.tsx (improved with design system)
import { strapiRequest } from "@/lib/strapi-client";
import {
  adaptStrapiPost,
  adaptStrapiProduct,
  getStrapiImageUrl,
} from "@/utils/strapi-adapter";
import Image from "next/image";
import Link from "next/link";

const options = { next: { revalidate: 30 } };

export default async function HomePage() {
  const [postsResponse, productsResponse] = await Promise.all([
    strapiRequest(
      "posts?populate=*&sort=publishedAt:desc&pagination[limit]=3",
      options
    ),
    strapiRequest(
      "products?populate=*&filters[available][$eq]=true&sort=createdAt:desc&pagination[limit]=4",
      options
    ),
  ]);

  const posts = postsResponse.data.map(adaptStrapiPost);
  const products = productsResponse.data.map(adaptStrapiProduct);
Update Image Handling in the same file:
// Replace urlFor() with getStrapiImageUrl()
{products.map((product) => {
  const imageUrl = product.gallery?.[0]
    ? getStrapiImageUrl(product.gallery[0])
    : null;

  return (
    <Link key={product._id} href={`/products/${product._id}`}>
      {imageUrl && (
        <Image
          src={imageUrl}
          alt={product.name}
          width={300}
          height={200}
        />
      )}
      {/* Rest of component */}
    </Link>
  );
})}
Step 5: Update Products Page
Before – src/app/products/page.tsx:
const PRODUCTS_QUERY = `*[
  _type == "product"
]|order(name asc){_id, name, price, available, tags, gallery}`;

export default async function ProductsPage() {
  const products = await client.fetch<SanityDocument[]>(
    PRODUCTS_QUERY,
    {},
    options
  );
After – Update the data fetching:
export default async function ProductsPage() {
  const response = await strapiRequest(
    "products?populate=*&sort=name:asc",
    options
  );
  const products = response.data.map(adaptStrapiProduct);
Step 6: Update Blog Pages
Blog Index – src/app/blog/page.tsx:
// Before
const POSTS_QUERY = `*[
  _type == "post"
  && defined(slug.current)
]|order(publishedAt desc){
  _id, title, slug, publishedAt, image,
  authors[]->{ name },
  categories[]->{ title }
}`;

// After
export default async function BlogPage() {
  const response = await strapiRequest(
    "posts?populate=*&sort=publishedAt:desc",
    options
  );

  const posts = response.data.map(adaptStrapiPost);
}
Blog Post Detail – src/app/blog/[slug]/page.tsx:
// Before
const POST_QUERY = `*[_type == "post" && slug.current == $slug][0]`;

export default async function PostPage({
  params,
}: {
  params: Promise<{ slug: string }>;
}) {
  const post = await client.fetch<SanityDocument>(
    POST_QUERY,
    await params,
    options
  );

// After
export default async function PostPage({
  params,
}: {
  params: Promise<{ slug: string }>;
}) {
  const { slug } = await params;

  const response = await strapiRequest(
    `posts?populate=*&filters[slug][$eq]=${slug}`,
    options
  );

  const post = response.data[0] ? adaptStrapiPost(response.data[0]) : null;

  if (!post) {
    notFound();
  }
Step 7: Update Dynamic Pages
Before – src/app/(pages)/[slug]/page.tsx:
const PAGE_QUERY = `*[_type == "page" && slug.current == $slug][0]{
  _id, title, slug, body, seo
}`;

export default async function DynamicPage({
  params,
}: {
  params: Promise<{ slug: string }>;
}) {
  const { slug } = await params;
  const page = await client.fetch<SanityDocument>(
    PAGE_QUERY,
    { slug },
    options
  );
After:
export default async function DynamicPage({
  params,
}: {
  params: Promise<{ slug: string }>;
}) {
  const { slug } = await params;

  const response = await strapiRequest(
    `pages?populate=*&filters[slug][$eq]=${slug}`,
    options
  );

  const page = response.data[0] ? adaptStrapiPage(response.data[0]) : null;

  if (!page) {
    notFound();
  }
Step 8: Replace Rich Text Renderer
Install Strapi Blocks Renderer:
npm install @strapi/blocks-react-renderer
Before – Using Sanity’s PortableText:
import { PortableText } from "next-sanity";

// In component
<div className="prose prose-lg prose-emerald max-w-none">
  {Array.isArray(post.body) && <PortableText value={post.body} />}
</div>
After – Using Strapi’s BlocksRenderer:
import { BlocksRenderer, type BlocksContent } from '@strapi/blocks-react-renderer';

// In component
<div className="prose prose-lg prose-emerald max-w-none">
  {post.body && <BlocksRenderer content={post.body as BlocksContent} />}
</div>
Step 9: Update Environment Variables
Before – .env.local:
NEXT_PUBLIC_SANITY_PROJECT_ID=lhmeratw
NEXT_PUBLIC_SANITY_DATASET=production
SANITY_API_TOKEN=your-token
After – .env.local:
NEXT_PUBLIC_STRAPI_URL=http://localhost:1337
STRAPI_API_TOKEN=your-full-access-token
Step 10: Error Handling and Fallbacks
Create src/lib/strapi-client.ts with robust error handling:
export async function strapiRequest(endpoint: string, options: RequestInit = {}) {
  try {
    const url = `${STRAPI_URL}/api/${endpoint}`

    const response = await fetch(url, {
      headers: {
        'Content-Type': 'application/json',
        ...(STRAPI_TOKEN && { Authorization: `Bearer ${STRAPI_TOKEN}` }),
        ...options.headers,
      },
      ...options,
    })

    if (!response.ok) {
      console.error(`Strapi API Error: ${response.status} ${response.statusText}`)

      // Return empty data structure for graceful fallback
      return { data: [], meta: {} }
    }

    return response.json()
  } catch (error) {
    console.error('Strapi request failed:', error)
    return { data: [], meta: {} }
  }
}
With that, we have a fully migrated site, from Sanity to Strapi 🎊

GitHub Source Code
-
Strapi Project – branch
generated-schema-structure-from-v4 - Sanity Project
- NextJS Site (Sanity)
-
NextJS Site (Strapi) – branch
migrate-to-strapi - Sanity to Strapi Migration Workspace – Containing the migration scripts and example sanity export
Sanity vs Strapi: Key Differences Summary
| Aspect | Sanity | Strapi |
|---|---|---|
| Query Language | GROQ | REST with query parameters |
| Data Structure | Flat documents | Flat documents |
| Relationships |
-> references |
populate parameter |
| Images |
urlFor() builder |
Direct URL |
| Rich Text | PortableText | Blocks renderer |
| Filtering | GROQ expressions | filters[field][$eq]=value |
| Sorting | order(field desc) |
sort=field:desc |
| Limiting | [0...3] |
pagination[limit]=3 |
Testing Your Migration
- Start both systems during transition:
# Terminal 1: Start Strapi
cd strapi-project && npm run develop
# Terminal 2: Start Next.js
cd frontend && npm run dev
- Compare outputs by temporarily logging both data structures:
console.log('Sanity data:', sanityPosts)
console.log('Strapi data:', strapiPosts)
- Validate all pages load without errors
- Check image rendering and links work correctly
- Test rich text content displays properly
This systematic approach ensures your frontend continues working seamlessly after the CMS migration while maintaining the same user experience.
Performance Testing
Monitor these key metrics during the transition:
- API response times: Strapi’s performance characteristics differ from Sanity
- Content editor experience: Ensure your team adapts well to Strapi’s interface
- Build times: Static generation patterns may change
- CDN cache hit rates: Asset serving patterns will be different
Final Deployment Considerations
Pre-Launch Checklist:
- Content freeze: Stop all content updates in Sanity
- Final sync: Run one last migration to catch any changes
- DNS preparation: Have CDN/DNS changes ready to deploy
- Rollback plan: Document exactly how to revert if things go wrong
- Team notification: Make sure everyone knows the switch is happening
Going Live Process:
- Deploy your updated frontend with Strapi integration
- Deploy your Strapi project to Strapi Cloud.
- Update environment variables to point to production Strapi
- Test all critical user flows
- Monitor error rates and performance metrics
- Have your rollback plan ready to execute if needed
Key Success Factors:
- Plan extensively – The more you understand your current setup, the smoother the migration
- Validate everything – Don’t trust that the migration worked until you’ve verified it
- Have rollback ready – Things can go wrong, and you need to be able to recover quickly
- Train your team – The best technical migration is worthless if your content creators can’t use the new system
What You’ve Accomplished:
By following this guide, you’ve successfully:
- Analyzed your existing Sanity schema and content relationships
- Transformed complex schema structures into Strapi-compatible formats
- Migrated all content while preserving data integrity and relationships
- Set up proper asset handling for your media files
- Updated your frontend integration to work with Strapi’s API structure
- Established monitoring and rollback procedures for a safe production deployment
Benefits Achieved:
- Team familiarity: Content editors now work with a more traditional CMS interface
- Plugin ecosystem: Access to Strapi’s extensive plugin library
- Self-hosting control: Full control over your content infrastructure
- Flexible APIs: Both REST and GraphQL endpoints for your frontend
- Built-in features: User management, permissions, and admin interface out of the box
Ongoing Maintenance:
Your new Strapi setup requires different maintenance considerations:
- Regular plugin updates and security patches
- Database backup strategies for your chosen database system
- Performance monitoring as your content scales
- Team training on Strapi’s content management workflows
Most importantly, don’t rush the process. Take time to test thoroughly, and your future self will thank you. The patterns shown here handle the most common content types you’ll encounter – posts with authors and categories, product catalogs with image galleries, static pages with SEO metadata, and user profiles. These examples provide a solid foundation to adapt to your specific schema and content structure.
Team Training Guide:
Your content team will need guidance on Strapi’s interface:
## Quick Strapi Guide for Content Editors

### Creating a Blog Post
1. Navigate to Content Manager → Posts
2. Click "Create new entry"
3. Fill in title (slug will auto-generate)
4. Set published date
5. Select authors from the dropdown (multiple selection available)
6. Choose categories
7. Upload a featured image
8. Write content in the rich text editor
9. Save & Publish

### Managing Authors (People)
1. Go to Content Manager → People
2. Add name and email
3. Write bio using the rich text editor
4. Upload profile picture
5. Save & Publish

### Creating Products
1. Navigate to Content Manager → Products
2. Enter product name and price
3. Set availability status
4. Add tags as JSON array: ["tag1", "tag2"]
5. Upload multiple images to the gallery
6. Fill in specifications (weight, dimensions, material)
7. Save & Publish
Final Thoughts
Migrating from Sanity to Strapi is no small task – you’re essentially rebuilding your entire content infrastructure. When done carefully with proper planning, validation, and rollback strategies, it can be a smooth transition that opens up new possibilities for your content management workflow.
We have coverd the complete migration process from Sanity to Strapi using real-world examples. Here are the next steps:
- Deploy your new Strapi project in just few clicks to Strapi cloud.
- Visit the Strapi marketplace to install plugins to power up your Strapi application.
- Check out the Strapi documentation to learn more about Strapi.
Remember: this migration is a journey, not a destination. Your new Strapi setup should be the foundation for even better content management experiences ahead.