How to Delete and Recover a Virtual Machine Using OS Disk
When you create a Virtual Machine (VM) in Azure, several resources are provisioned in the background—compute, networking, and storage. One of the most important of these is the OS Disk.
What is an OS Disk in Azure?
An OS Disk (Operating System Disk) is the virtual hard disk (VHD) that contains:
- The operating system (Linux or Windows).
- Boot files needed to start the VM.
- Any system-level configurations or installed software.
Think of it as the hard drive inside your computer—even if you remove the computer (the VM), the disk still has all your data. _Note: Its should not be compared as a flash drive or external hard drive. _
How the OS Disk Works
When you deploy a VM, Azure attaches an OS disk (usually created from an image like Ubuntu, Windows Server, etc.).
By default, the OS disk is C: for Windows or /dev/sda for Linux machines. The VM boots from this disk whenever you start it. Yes, the disk drive plays a vital role on the speed of VM.
If you delete the VM (which I unknowingly did!!!) the Goodnews is that if the OS disk available, that VM can be recovered, you can later attach it to a new VM and recover everything.
HOw Can you do so?
Let’s start with teaching you how to delete your VM safely.
Step 1: Deleting the VM Safely
Sometimes you delete a VM to save costs or reconfigure it. But if you might want to restore it later, you need to** make sure the OS disk is preserved.**
In Azure Portal, go to resource, click on the resource group, then select the virtual machine and click delete. You can also achieve the same thing by going to going to Virtual Machines directly.
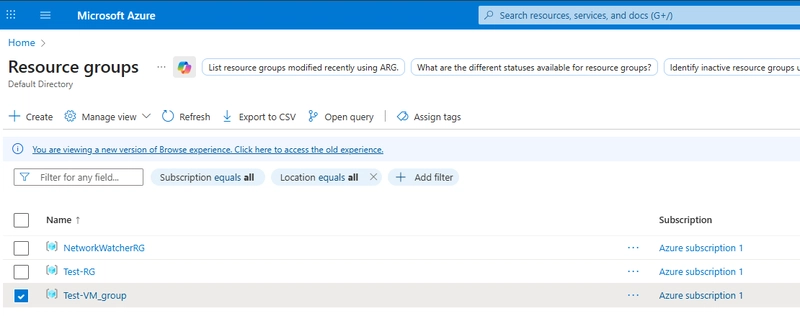
In the case below I would be recovering a deleted VM from the Test-RG.
On the confirmation page, you’ll see resources like:
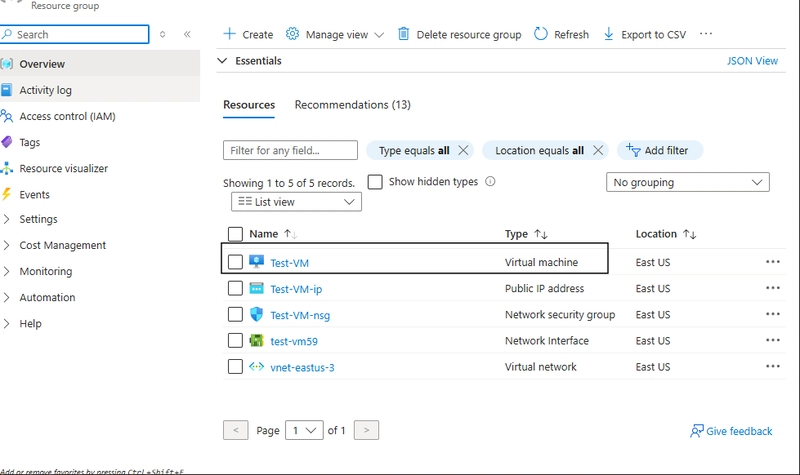
- VM (Click on the VM file and delete just it. Uncheck the OS Disk so it doesn’t get deleted. If required, you can force delete)
- Network Interface
- Public IP
- Network Security Group
- OS Disks
👉
🔹 Step 2: Go back to Resource and Locate the OS Disk as in the picture below:
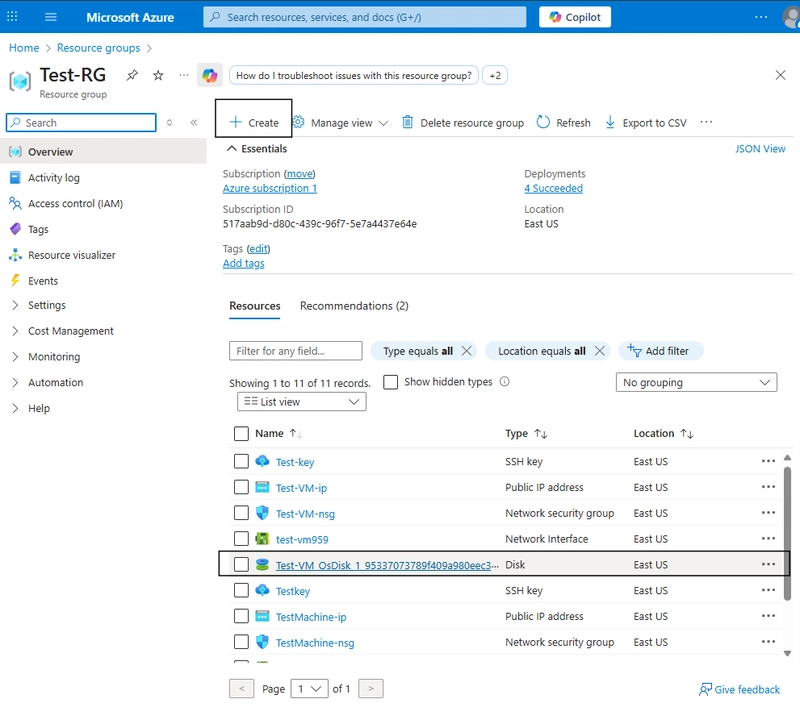
If you still have it there while the VM is gone, you safe and have appropriately deleted the VM.
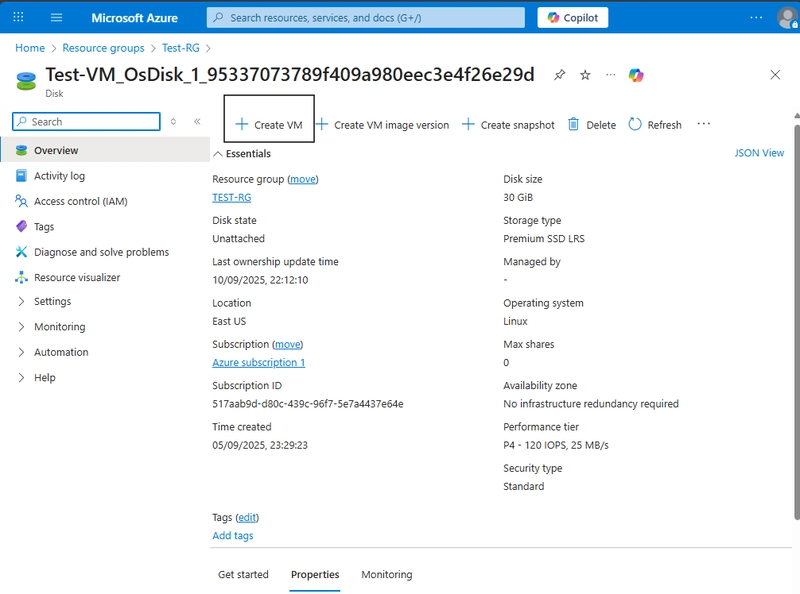
Step 3: let’s Recover the VM Using the OS Disk
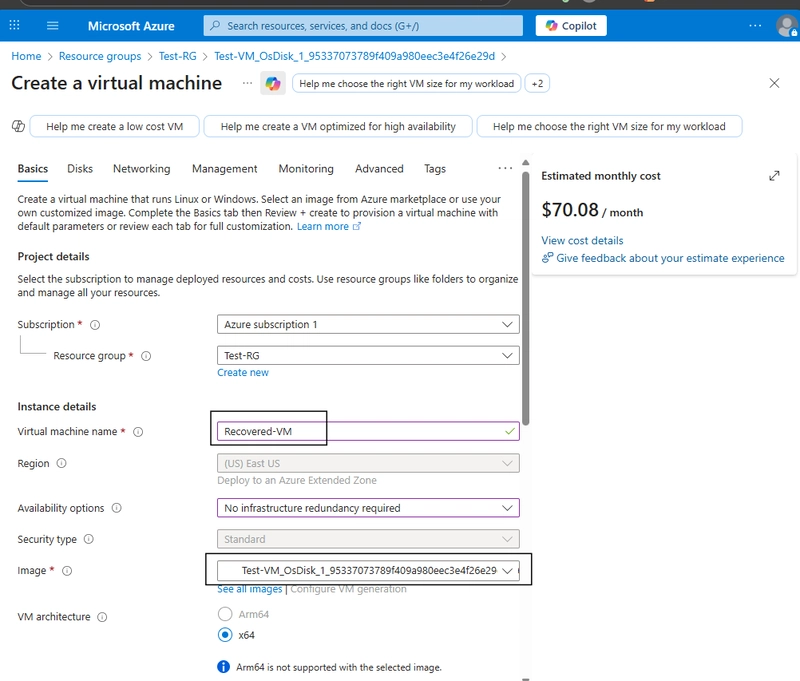
Open the OS disk resource. Click Create VM at the top.
In the Basics tab:
Enter a VM name.
Choose a subscription and resource group.
Configure size, authentication (SSH key/password), and networking.
Make sure the Image you are selecting the OS Disk of the previous VM created. Then you are on the right path of recovery.
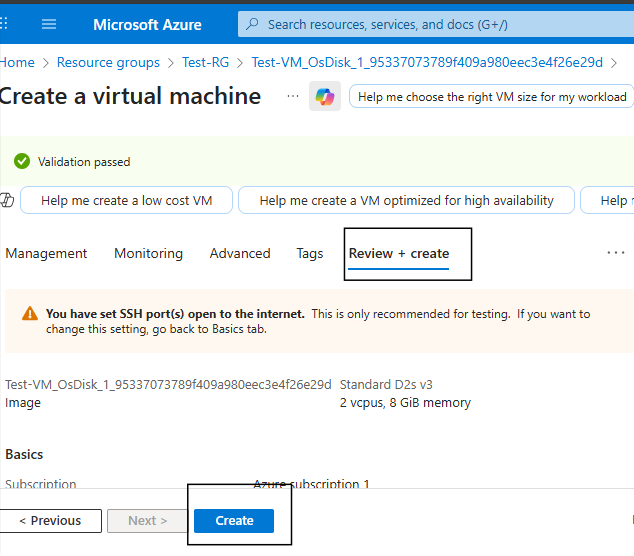
Then Click Review + Create.
Azure will deploy a new VM using the preserved OS disk.
After the review, click on create.
🔹 Step 4: Verify Recovery. Click on Go to Resource, then Go to Virtual Machines in the portal.
Open the newly created VM.
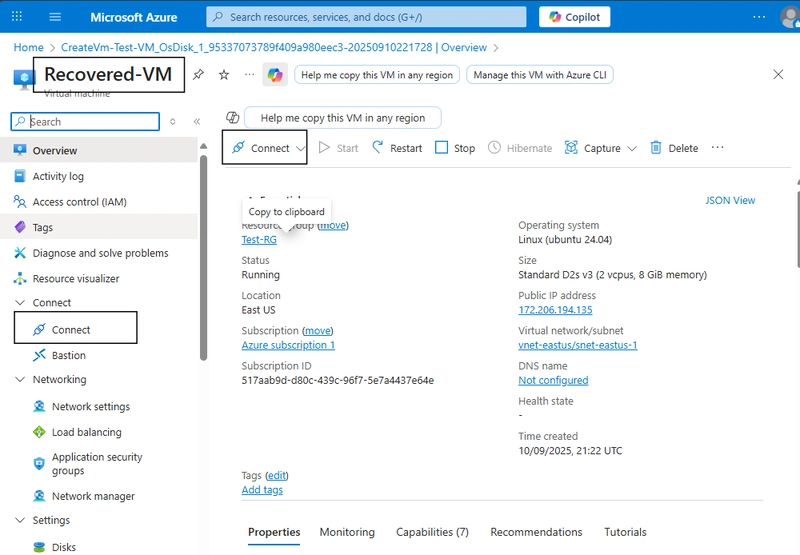
Connect via SSH (Linux) or Download RDP (Windows).
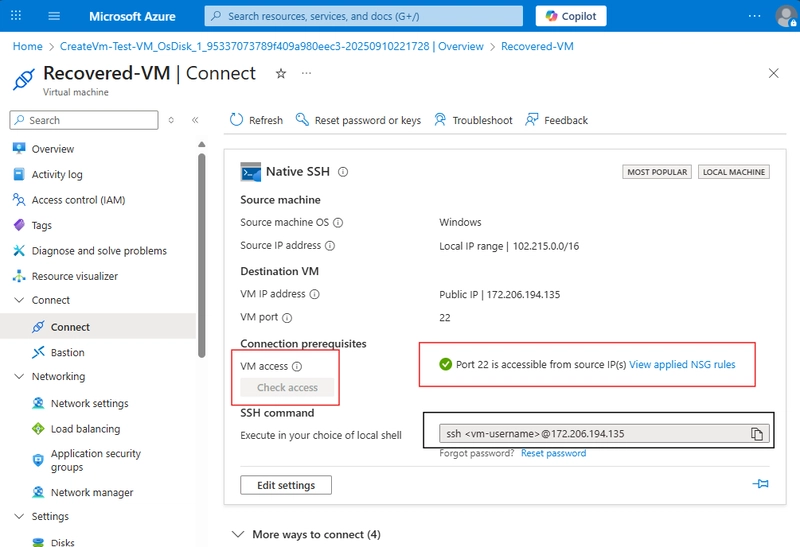
Check Access, if it checks, you have done the right thing. Congratulations. 🎉 You can now proceed to deploy you VM.
ENDNOTE: OS disk is the heart of your VM in Azure. By understanding how it works, you can confidently delete VMs when needed—knowing that as long as you keep the OS disk, you can always recover your VM later.
This simple practice can save you from data loss, reinstallation hassles, and unexpected downtime.
