How to Set Up a Jenkins CI/CD Pipeline (Step-by-Step Guide)
When I first started experimenting with CI/CD, Jenkins was one of the names that kept popping up. At first, I thought it was “old school” and that maybe newer tools like GitHub Actions or GitLab CI/CD had fully replaced it. But after setting it up on a few projects, I realized why so many teams from scrappy startups to big enterprises still rely on Jenkins in 2025.
It’s not the prettiest tool out there, but it’s insanely powerful and flexible. If you want to control exactly how your build, test, and deploy process runs, Jenkins is still one of the best.
In this post, I’ll walk you through how to set up a Jenkins CI/CD pipeline from scratch, explain its core building blocks, and even share a real-world Node/React pipeline example you can adapt to your own projects.
What is Jenkins & Why Use It?
Jenkins is an open-source automation server that helps you automate repetitive parts of your software development lifecycle mainly building, testing, and deploying your code.
Think of it as your team’s tireless bot that does the boring stuff so you don’t have to.
Why Jenkins is still useful in 2025:
- Flexibility – It runs on almost anything: local machines, servers, Docker, Kubernetes.
- Massive ecosystem – Jenkins has over 1,800 plugins that integrate with GitHub, GitLab, Docker, Slack, AWS, and more.
- Battle-tested – It’s been around since 2011 and still powers thousands of production systems.
- Pipeline-as-code – Pipelines are defined in code (Jenkinsfile), so you can version-control your CI/CD.
- Scales with you – Works for small projects but can handle enterprise-sized pipelines.
So if you want something free, mature, and endlessly customizable, Jenkins is worth learning.
Core Building Blocks of Jenkins
Before diving into setup, let’s get comfortable with the terms you’ll hear a lot:
- Pipeline → The full CI/CD workflow, written as code in a Jenkinsfile.
- Stages → High-level phases of the pipeline (like build, test, deploy).
- Steps → The actual commands Jenkins executes inside a stage.
- Agents → Where your pipeline runs (local node, Docker container, or cloud agent).
- Plugins → Add-ons that extend Jenkins (GitHub triggers, Docker builds, Slack notifications, etc.).
If you’re familiar with GitLab CI/CD or GitHub Actions, this should feel pretty familiar.
Getting Started with Jenkins
Here’s how to get Jenkins up and running:
Prerequisites:
- Java 11+ installed (Jenkins runs on Java).
- Git installed.
- Optional: Docker (if you want to run Jenkins inside a container).
Step 1: Install Jenkins
On macOS or Linux, you can install via package managers, or you can just run it in Docker:
docker run -p 8080:8080 -p 50000:50000 jenkins/jenkins:lts
Now open your browser and head to:
http://localhost:8080
Step 2: Unlock Jenkins
The first time you run Jenkins, it’ll ask for an admin password. Run:
cat /var/jenkins_home/secrets/initialAdminPassword
…and paste that into the UI.
Step 3: Install Plugins
Jenkins will suggest a set of recommended plugins. Go ahead and install those — you can always add more later.
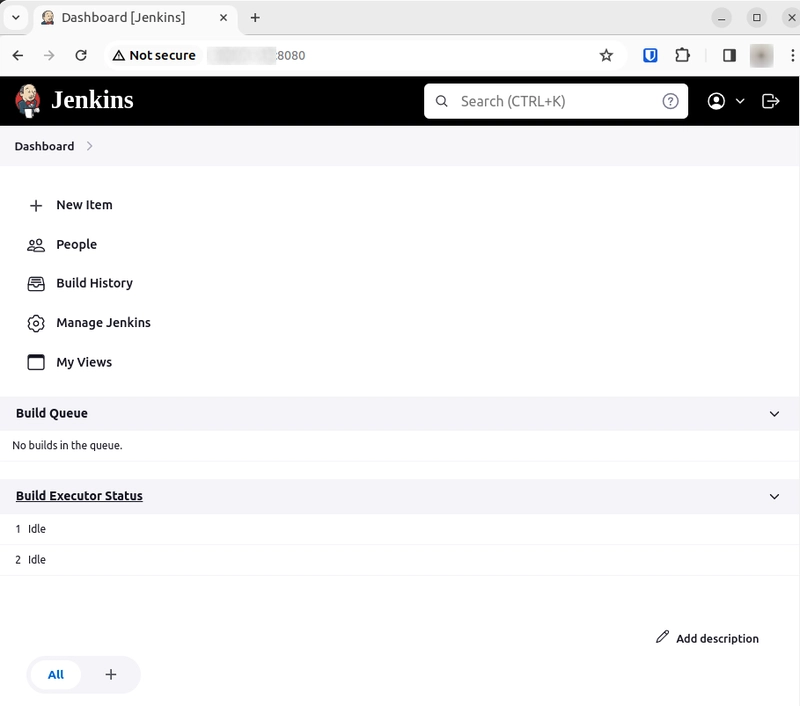
Step 4: Create Your First Job
From the dashboard, click New Item → choose Pipeline → give it a name. This is where we’ll connect our Jenkinsfile.
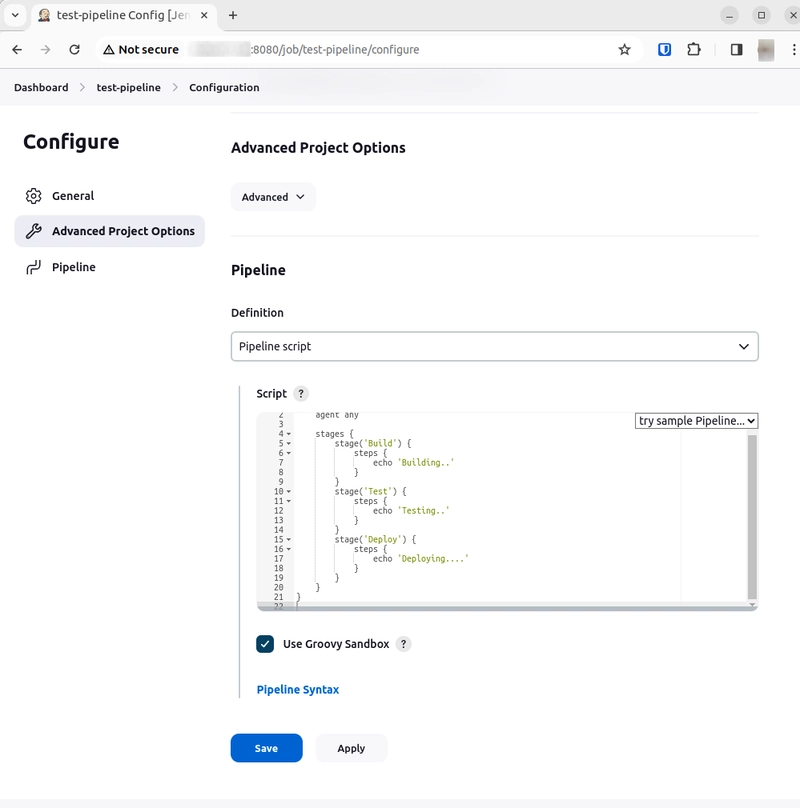
Create a Jenkinsfile (Pipeline as Code)
Instead of clicking around in the UI to define steps, Jenkins uses a file called Jenkinsfile in your repository.
Here’s the simplest possible pipeline:
pipeline {
    agent any
    stages {
        stage('Build') {
            steps {
                echo 'Building...'
            }
        }
        stage('Test') {
            steps {
                echo 'Running tests...'
            }
        }
        stage('Deploy') {
            steps {
                echo 'Deploying...'
            }
        }
    }
}
Breaking it down:
-
agent any→ run on any available Jenkins node. -
stages→ we define three: Build, Test, Deploy. -
steps→ the actual shell commands to run.
This is Jenkins at its simplest. Next, let’s see what it looks like in a real project.
A Real-World Example: Node/React App
Let’s say you have a React frontend app in your repo. You want Jenkins to:
- Install dependencies.
- Run unit tests.
- Build the production bundle.
- Deploy it somewhere (e.g., Netlify, Docker image, or server).
Here’s a Jenkinsfile you can adapt:
pipeline {
    agent {
        docker { image 'node:18' }
    }
    stages {
        stage('Install') {
            steps {
                sh 'npm install'
            }
        }
        stage('Test') {
            steps {
                sh 'npm test -- --watchAll=false'
            }
        }
        stage('Build') {
            steps {
                sh 'npm run build'
            }
        }
        stage('Deploy') {
            steps {
                echo 'Deploying React app...'
                // Example: sh 'scp -r build/* user@server:/var/www/app'
            }
        }
    }
}
Why this works well:
- The
agent dockerline runs everything inside a Node 18 container. - Each stage mirrors a typical frontend workflow.
- You can swap the deploy step for Docker, Kubernetes, or serverless deployment.
Developer Insights: Common Mistakes and Pro Tips
Over time, I’ve hit a few Jenkins gotchas. Here are the most common ones — and how to avoid them:
1. The Jenkins Agent Gotcha
Mistake: Forgetting to configure an agent. Without an agent, jobs won’t run.
Pro Tip: Use Docker agents for consistent builds (agent { docker { image 'node:18' } }).
2. Mismanaging Secrets
Mistake: Hardcoding API keys or passwords into pipelines.
Pro Tip: Store secrets in Jenkins Credentials Manager and reference them securely.
3. Overcomplicating Pipelines
Mistake: Writing giant pipelines with too many responsibilities.
Pro Tip: Keep pipelines modular. Break long jobs into smaller ones.
4. Not Using Plugins Wisely
Mistake: Installing every plugin you see (hello, maintenance nightmare).
Pro Tip: Only add plugins you actually need Docker, GitHub, Slack are usually enough to start.
5. Debugging in the Dark
Mistake: Struggling with silent failures.
Pro Tip: Add echo or sh 'printenv' to debug environment variables and stages.
Debugging Pipelines
When something breaks (and it will), here’s how I usually debug:
- Open the Console Output in Jenkins for detailed logs.
- Add
echostatements inside stages to trace progress. - Use
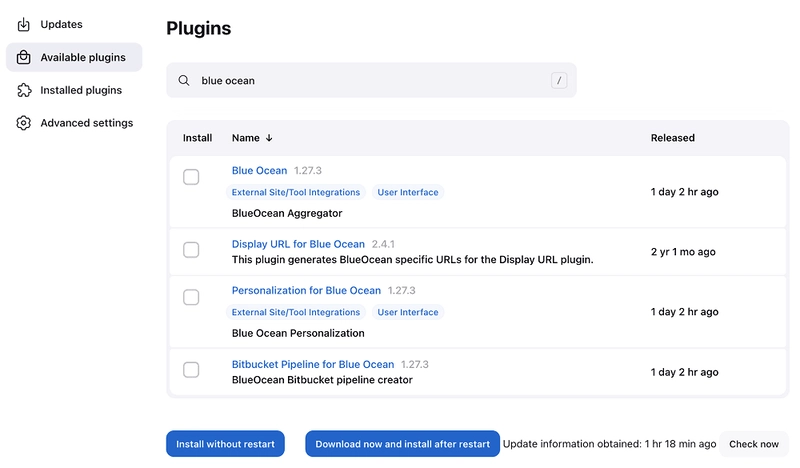
sh 'printenv'to inspect environment variables. - Try the Blue Ocean plugin for a cleaner visual pipeline view.
Scaling Jenkins Pipelines
Once you’re comfortable with basics, Jenkins can scale with your team:
- Run builds inside Docker for reproducibility.
- Add Jenkins agents to distribute workloads across machines.
- Integrate with Kubernetes for auto-scaling pipelines.
- Use shared libraries to reuse pipeline code across multiple projects.
Conclusion
While CI/CD pipelines are perfect for automating your builds and tests, DeepDocs is working hard to bring CI/CD automation to keep your documentation updated.
You see, updating docs is still a manual process, and it is often forgotten as it is seen as a boring or low value task. DeepDocs takes care of this keeping your docs automatically updated with your commits, and with no manual effort. it completely free to try on GitHub.
Jenkins isn’t the shiny new kid on the block, but that’s exactly why I still like it it’s stable, mature, and endlessly flexible. Whether you’re deploying a side project or setting up enterprise pipelines, Jenkins gives you the control you need.
If you’ve been meaning to try it, set aside an hour this week. Install Jenkins locally, write a simple Jenkinsfile, and run your first pipeline. Once you see your app build, test, and deploy automatically, you’ll never want to go back to manual workflows again.