Add Billing to Your SaaS in Under 10 Minutes (With Kinde)
Picture this…
You’re building your first real app. The MVP is finally working. Users are signing up. Your early testers are hyped.
Then your team lead hits you with:
“Hey, can you add billing before Friday?”
You smile, nod, open a new tab… and immediately regret your life choices.
Stripe is awesome — don’t get me wrong — but if you’ve tried implementing it raw, especially when you don’t have a lot of time, then you know the pain:
- Multiple docs to go through.
- Webhooks that break when left unmanaged.
- You’re wiring up pricing tables, syncing subscription states, building a billing UI and a customer portal… all from scratch.
- You copy a price ID into the wrong
.envfile and suddenly nobody can upgrade to Pro anymore.
It’s like you’re working with IKEA parts, but half the instructions are missing — and some are in Swedish.
While building Learnflow AI, a tool that helps developers learn coding by talking to voice-based AI tutors, I hit that exact wall.
I needed:
- A Free Plan with basic features.
- A Pro Plan with premium perks like AI memory and branding.
- A billing flow that just worked — with upgrades, and a self-serve portal.
Normally this would’ve taken a few days. But with Kinde Billing, I shipped the whole thing — login, plan setup, feature gating, billing UI — in under 10 minutes.
This guide is the walkthrough I wish I had: plain-English steps, real code, and screenshots to follow along.
What Is Kinde Billing?
Kinde Billing is your SaaS billing system — without the development pain.
It’s a new, built-in feature from Kinde that lets you manage subscriptions, process payments, and control what users can access, all in one place.
You can set up pricing plans, connect Stripe, and handle upgrades, downgrades, and cancellations—without duct-taping five different tools together.
But here’s the smart bit: it’s not just billing. It’s deeply connected to Kinde’s Auth system. So roles, sessions, and feature flags are all part of the same flow. When someone logs in, Kinde already knows:
- ✅ What plan they’re on
- ✅ What features they should see
- ✅ Whether they’ve paid, upgraded, or need a nudge
Why that’s awesome:
- One system — No syncing users between your auth and billing provider. It’s all unified in Kinde.
- Zero setup — Kinde gives you hosted billing UI, plan management, and Stripe integration out of the box.
- Native entitlements — You get real feature flags tied directly to user sessions.
- Plug-and-play — Billing flows live right inside your login/signup journey.
You define plans and entitlements (like “can upload custom avatars” or “has AI access”), and Kinde handles the logic, tokens, and billing states.
It’s clean, minimal setup—and powerful enough to run real SaaS products without ever opening a billing table in your database.
How to Setup Kinde Billing: Step-by-Step
Step 1: Create Plans & Entitlements
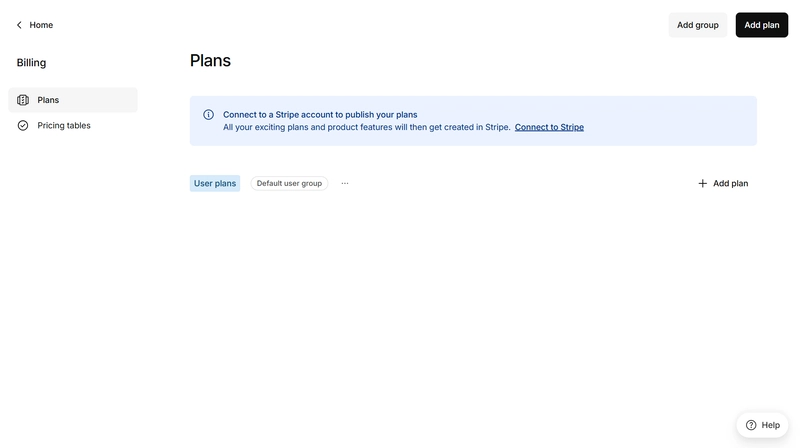
Log in your Kinde Dashboard:
- Go to Billing → Plans
-
Click on “Connect to Stripe”
-
You would be prompted by Stripe to log in
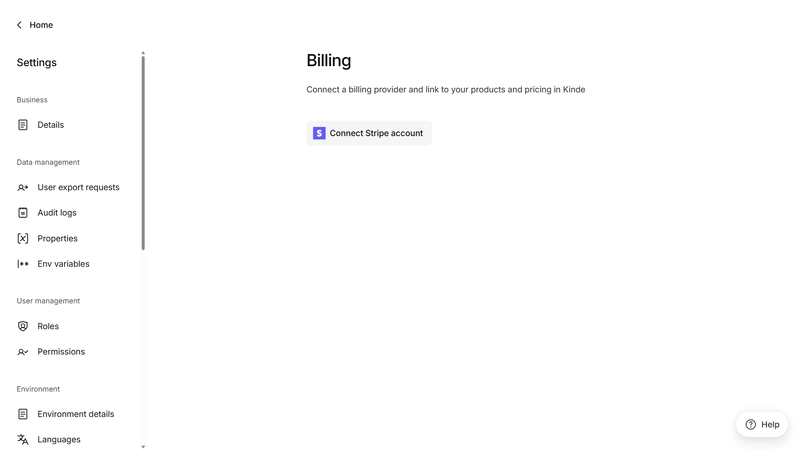
On the backend, Kinde partners with Stripe for secure payments using Stripe Connect so this entire flow is complete in under a minute.
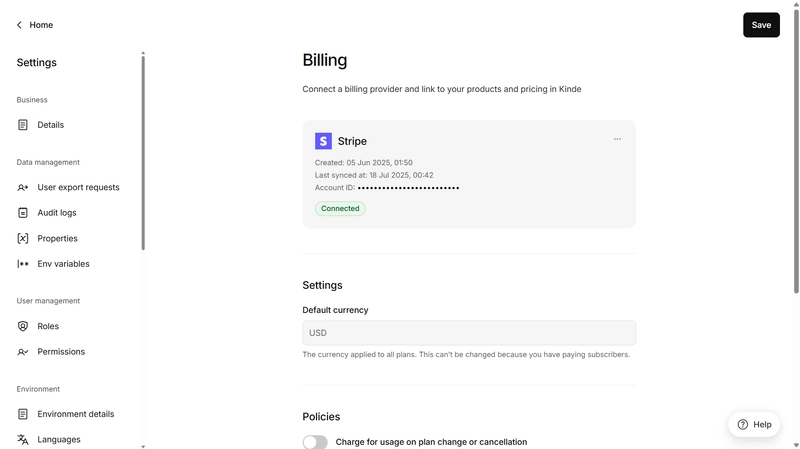
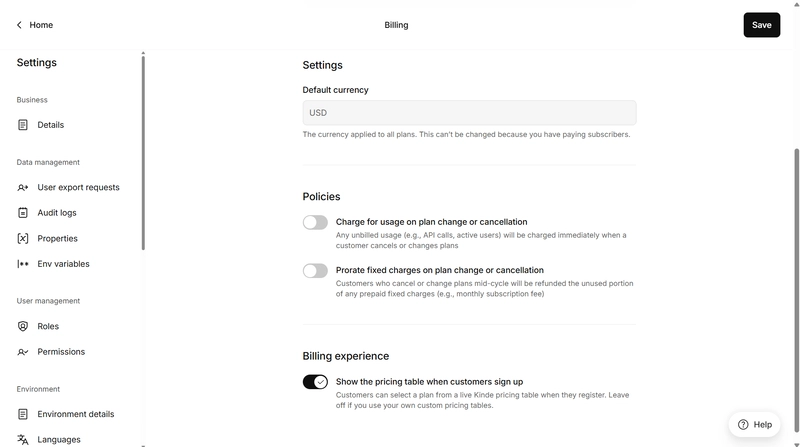
Next, scroll down and toggle “Billing experience” as this would allow Kinde to show the pricing tables that we are about to create to new users after the sign up to your application.
-
Go back to Home → Billing → Plans
-
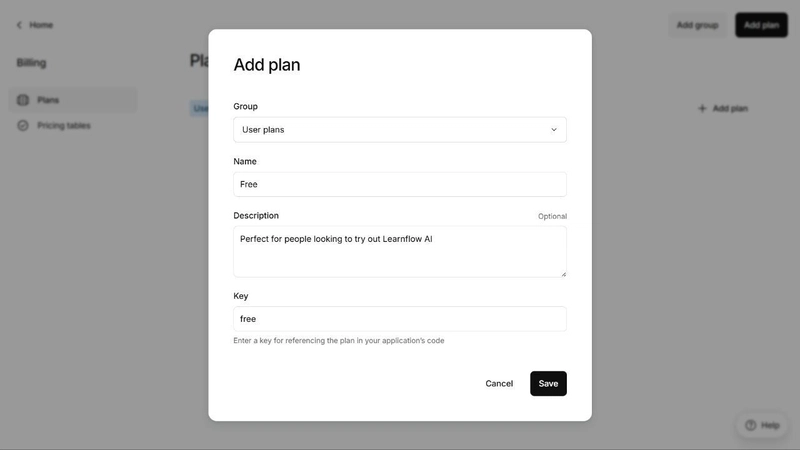
Click Create plan
And then type in a name for your plan and a key that would be used to reference it from your application.
-
Click Add feature
To add new entitlements (features) to the plan. This would help control what users have access to, depending on the plan they are on.
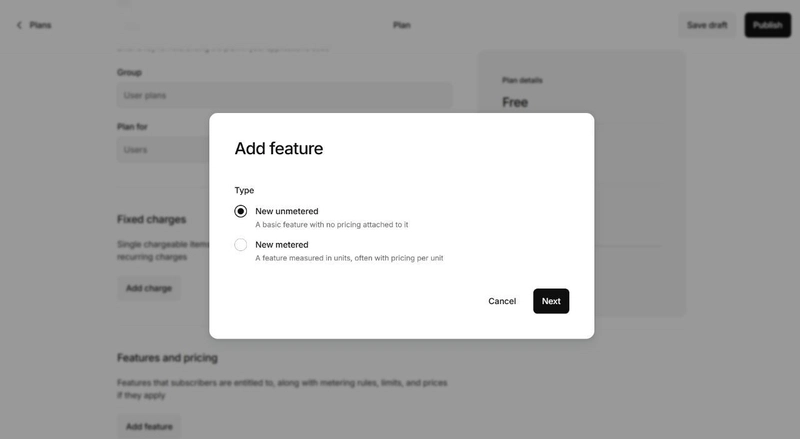
- Unmetered features are fixed and used to gate access to certain features.
- Metered features however are usage-based and define what and how much a user can access and what they pay to access it. These might be per unit, per credit (just like the pricing on Lovable), or per tier.
To read more about plans on Kinde and features, click here.
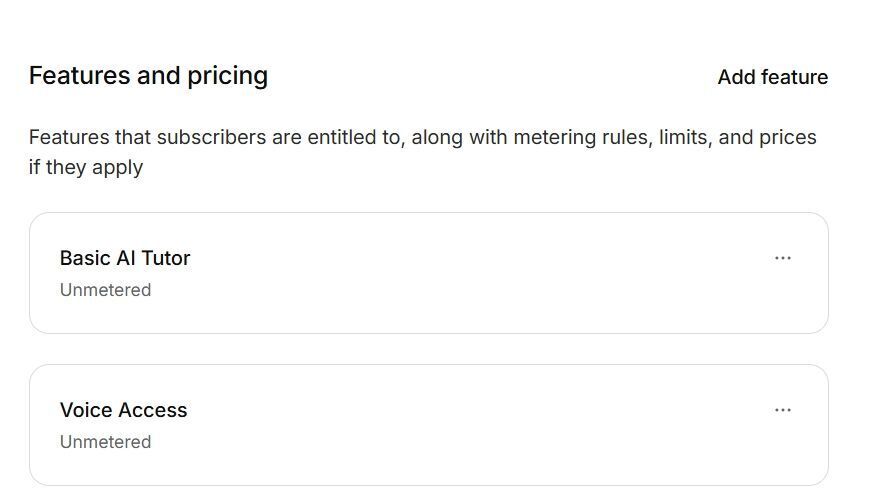
For the free plans, we would be setting up **“Unmetered features”** for our users.
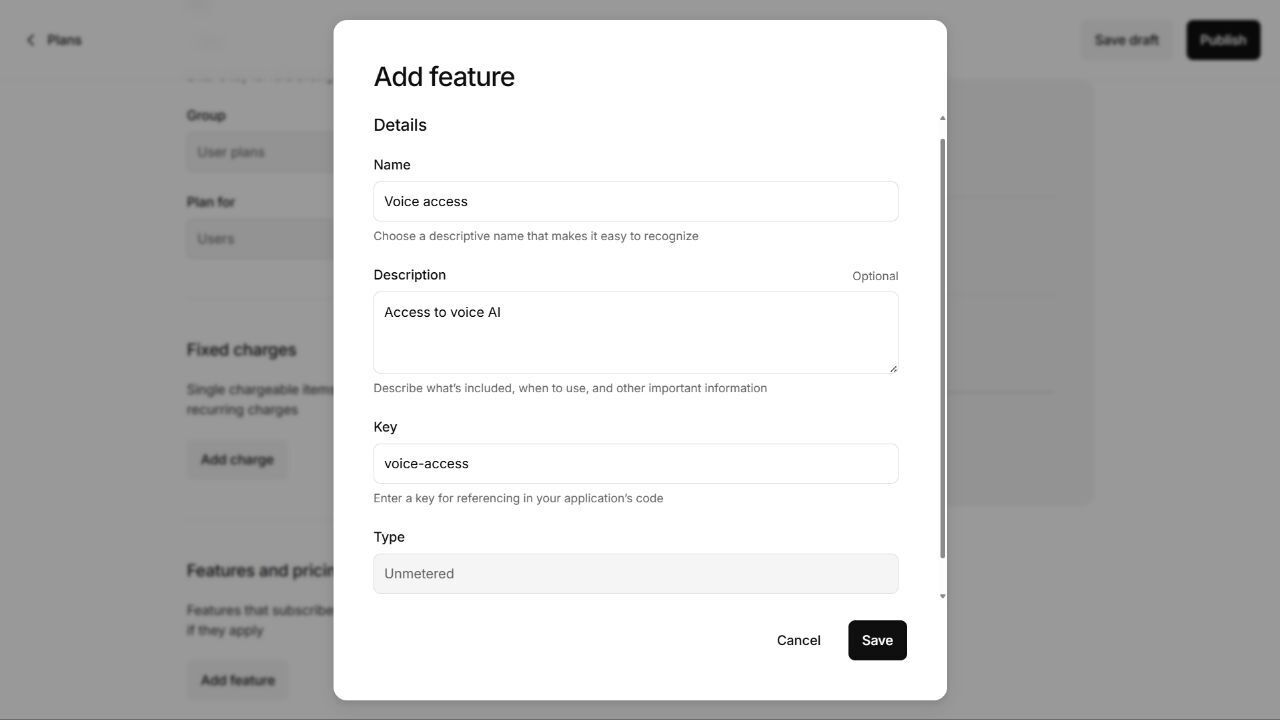
We would add one more feature and just like that, we have given users that sign up to our application access to very interesting features on the app:
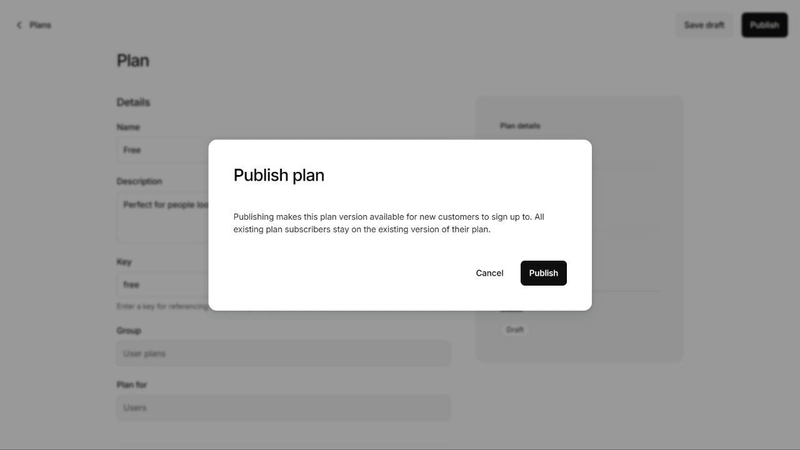
Now we can go ahead and publish the plan. Doing this would enable it to be live on our platform and show it to users after they sign up.
-
Click on the “Publish” button on the top right of your screen where you would be prompted to publish the plan. Confirm it and your plan would be live.
In a few minutes, we have gone from having no way to easily add billing to our application to now having a free plan that is live.
Using the same flow, create a “Pro plan” with these entitlements (features):
-
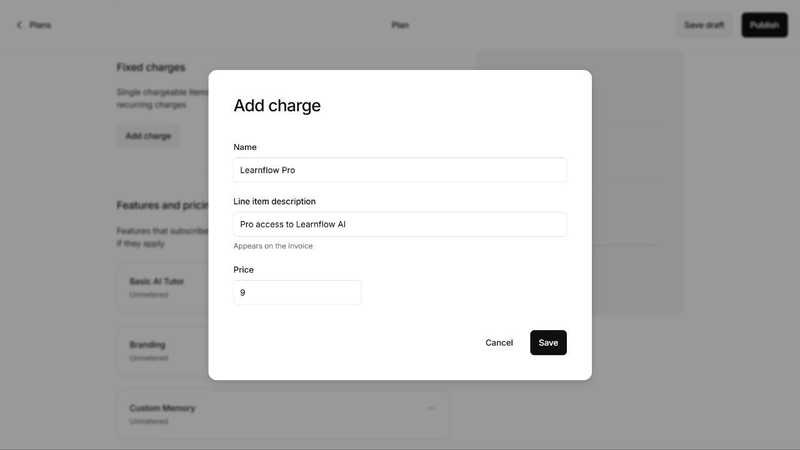
custom-memory,branding,priority-supportBefore publishing the pro plan, click “Add charge” to add a price value to your pro plan.
And after you have completed that, you should have something like this
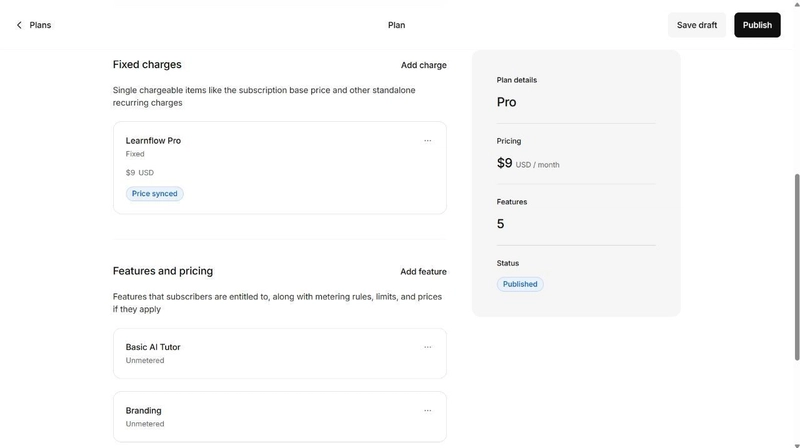
And finally, both plans are ready:

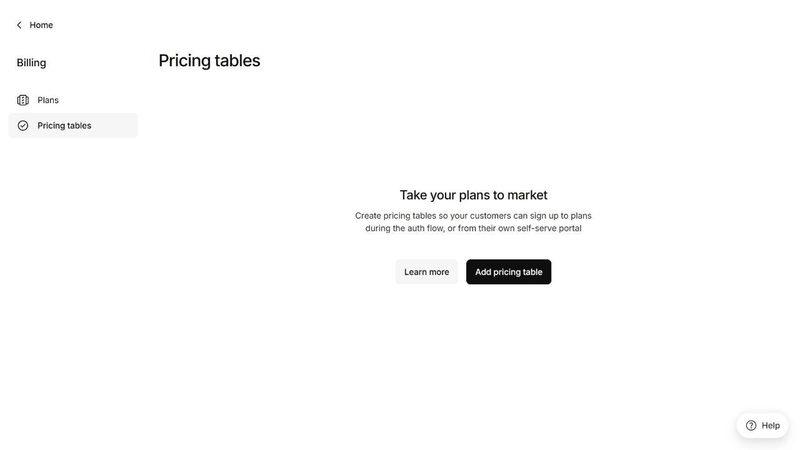
Step 2: Setup Pricing Tables
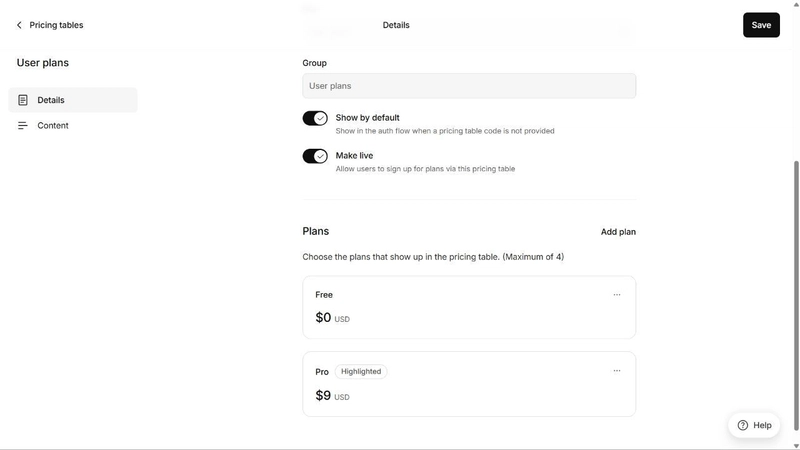
Just below “Plans”, click on “Pricing tables”. This is where you would create the pricing tables that your customers can see and sign up to during the authentication flow.
These tables are also visible via the “self-serve” portal, enabling users to upgrade or downgrade their plans.
Kinde has a thorough step-by-step process on how you can build pricing tables for your plans, click here to read through, it would help you better understand how pricing tables work, what users see, and how best to add features, highlights, and languages to pricing tables.
Learn more about about Building Pricing Tables with Kinde Billing
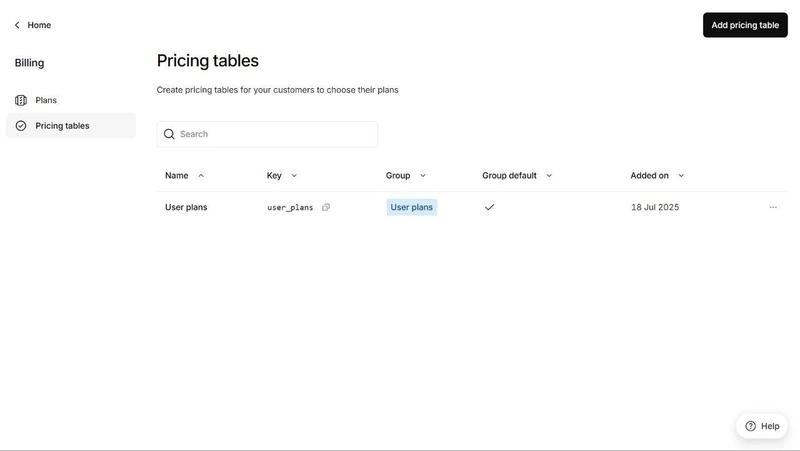
After setting up pricing tables, it should look like this:
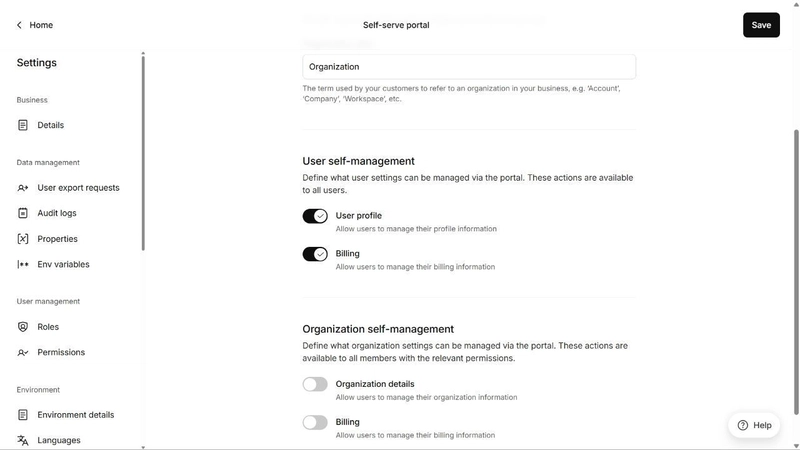
Next, visit the self-serve portal; Home → Settings → Self-serve portal and toggle both settings under the “User self-management”.
Step 3: Install & Set Up the React SDK
Copy and run in your project:
npm install @kinde-oss/kinde-auth-reac
Then wrap your app:
import { KindeProvider } from "@kinde-oss/kinde-auth-react";

<KindeProvider
  domain={process.env.REACT_APP_KINDE_DOMAIN}
    clientId={process.env.REACT_APP_KINDE_CLIENT_ID}
    redirectUri={process.env.REACT_APP_KINDE_REDIRECT_URI}
    logoutUri={process.env.REACT_APP_KINDE_LOGOUT_URI}
>
  <App />
</KindeProvider>
Make sure clientId and domain come from Settings → Applications → Details in your dashboard.
Step 4: Implement Login & Signup Flows
Kinde gives you easy components and functions:
Component version:
import { LoginLink, RegisterLink } from "@kinde-oss/kinde-auth-react/components";

<LoginLink>Sign In</LoginLink>
<RegisterLink>Sign Up</RegisterLink>
Pre-select a user plan:
import { RegisterLink } from "@kinde-oss/kinde-auth-react/components";

<RegisterLink planInterest="pro">Get Pro Now</RegisterLink>
planInterest auto-tags the new user to the plan—works out of the box. You can read more about setting up urls for billing here.
Step 5: Feature Gating With Entitlements
Once logged in, fetch their entitlements:
import { useEffect, useState } from "react";
import { useKindeAuth } from "@kinde-oss/kinde-auth-react";

const { getAccessTokenRaw, isAuthenticated } = useKindeAuth();
const [entitlements, setEntitlements] = useState(null);

useEffect(() => {
  if (!isAuthenticated) return;
  async function fetchEntitlements() {
    const token = await getAccessTokenRaw();
    const res = await fetch(
      `${process.env.KINDE_ISSUER_URL}/account_api/v1/entitlements`,
      { headers: { Authorization: `Bearer ${token}` } }
    );
    const data = await res.json();
    setEntitlements(data);
  }
  fetchEntitlements();
}, [getAccessTokenRaw, isAuthenticated]);
Then, use it in your code like this:
const isPro = entitlements?.data.plans.some(p => p.key === "pro");
return isPro ? <ProFeature /> : <UpgradeButton />;
And that’s it—no extra feature logic needed.
Step 6: Add the Billing Portal
Let customers manage their plan and payment info:
import { PortalLink } from "@kinde-oss/kinde-auth-react";

<PortalLink>Manage Billing</PortalLink>
One line creates a hosted self-serve billing UI—no backend calls.
Edge Cases & Pro Tips
Trials & Annual Billing
- Kinde supports monthly and usage billing now
- Annual, trials, metered trials are coming soon
You can read more about all the features they are working on in real-time here.
Webhooks
- Basic billing webhooks included in all tiers, unlimited in paid
- Use them to trigger notifications or add custom logic
Error Handling
-
getAccessTokenRaw()may throw an errror—best to wrap it intry/catch. - Check
entitlements.data.plansbefore using.some.
Billing Flow?
- Coupon codes? Not live yet—but pricing table keys exist and can be used to create discounted pricing offers for users
- Return URLs? Use
postLoginRedirectURLorpost_logout_redirect_url.
Final Thoughts
In about 10 minutes, you:
- Created Free and Pro plans
- Installed the Kinde SDK and wrapped your app
- Added signup, gating, and self-serve billing portal
- Got entitlements-based feature control
You skipped:
- Writing webhooks
- Connecting Stripe
- Syncing users manually
- Building UI from scratch
The result? Smooth, future-safe billing built fast.
Over to You…
- Have you used Kinde Billing in your app?
- Currently using Stripe, Paddle, Lemonsqueezy, what is the experience like?
- What feature(s) would help your flow (trials? annual?)
- Would you consider switching to Kinde Billing?
Drop a comment—I’ll respond to every one.
Want to try Kinde Billing for yourself? Start here 👉 Try Kinde Billing