🔰How to Build a Real-Time Chat App in Flutter Using ZEGOCLOUD ZIMKit (No Backend Needed)
📌 Introduction
Real-time chat functionality is now a core feature in modern apps—whether you’re creating a messaging platform like WhatsApp, a customer support chat, or a community group application. Instead of building servers, handling WebSockets, and syncing messages manually, ZEGOCLOUD provides ready-to-use APIs and UI components for Flutter developers. With ZIMKit, you can create a real-time chat app in minutes—without managing any backend infrastructure.
In this tutorial, we’ll build a real-time chat app with:
✔ Login
✔ Private chat
✔ Group chat
✔ Messages in real time
✔ No backend required
🎯 What You Will Build
By the end of this article, you will be able to:
✔ Integrate ZEGOCLOUD ZIMKit in Flutter
✔ Initialize the chat SDK
✔ Register users locally
✔ Create private chats
✔ Create and join group chats
✔ Display conversations in real time
🔍 What is ZEGOCLOUD?
ZEGOCLOUD is a communication platform that provides SDKs such as:
In-app Chat
Voice & Video Calls
Live Streaming
Interactive Rooms
🌍 Website
https://www.zegocloud.com
💬 In-App Chat Product
https://www.zegocloud.com/product/in-app-chat
📚 Flutter Docs
https://www.zegocloud.com/docs/zim/flutter/quick-start
🟢 Step 1 — Install Zego ZIMKit
Open your pubspec.yaml file and add the ZIMKit dependency:
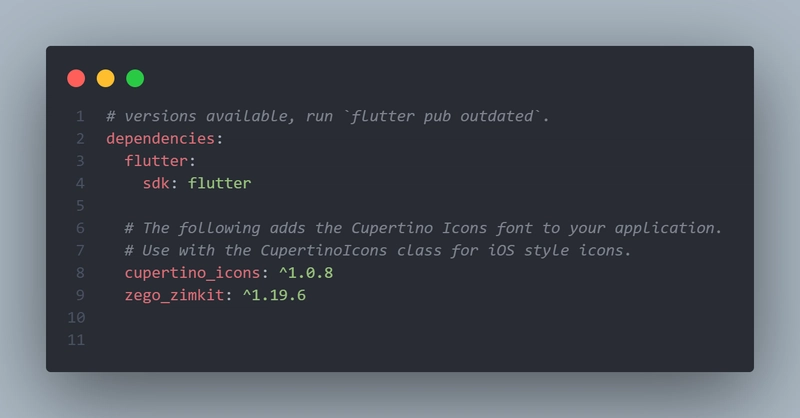
Then run:
flutter pub get
🔑 Step 2 — Initialize the Chat SDK
Create a file for credentials:
utils/app_string.dart
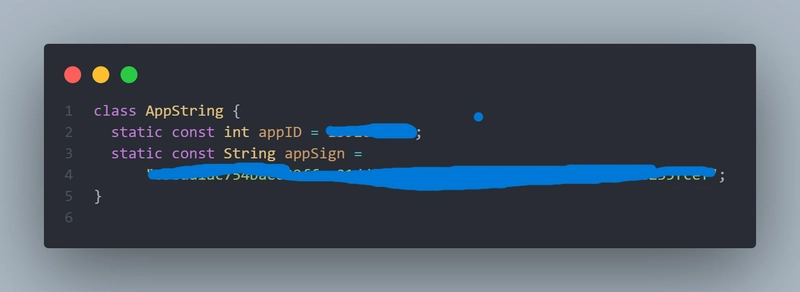
⚠️ Never expose your AppSign in public repos.
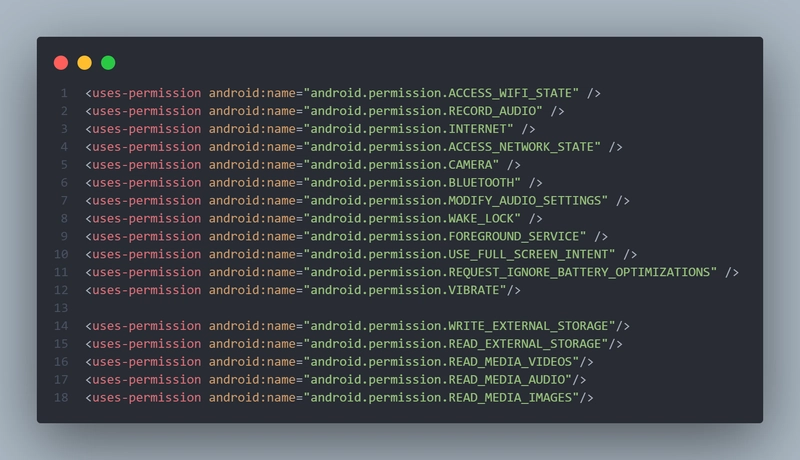
Required Android Configuration
1️⃣ Permissions
Add these permissions inside:
android/app/src/main/AndroidManifest.xml
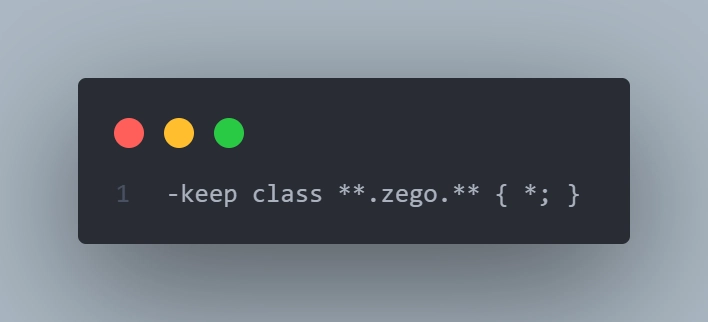
2️⃣ Proguard Rules (Release Mode)
Create or edit:
android/app/proguard-rules.pro
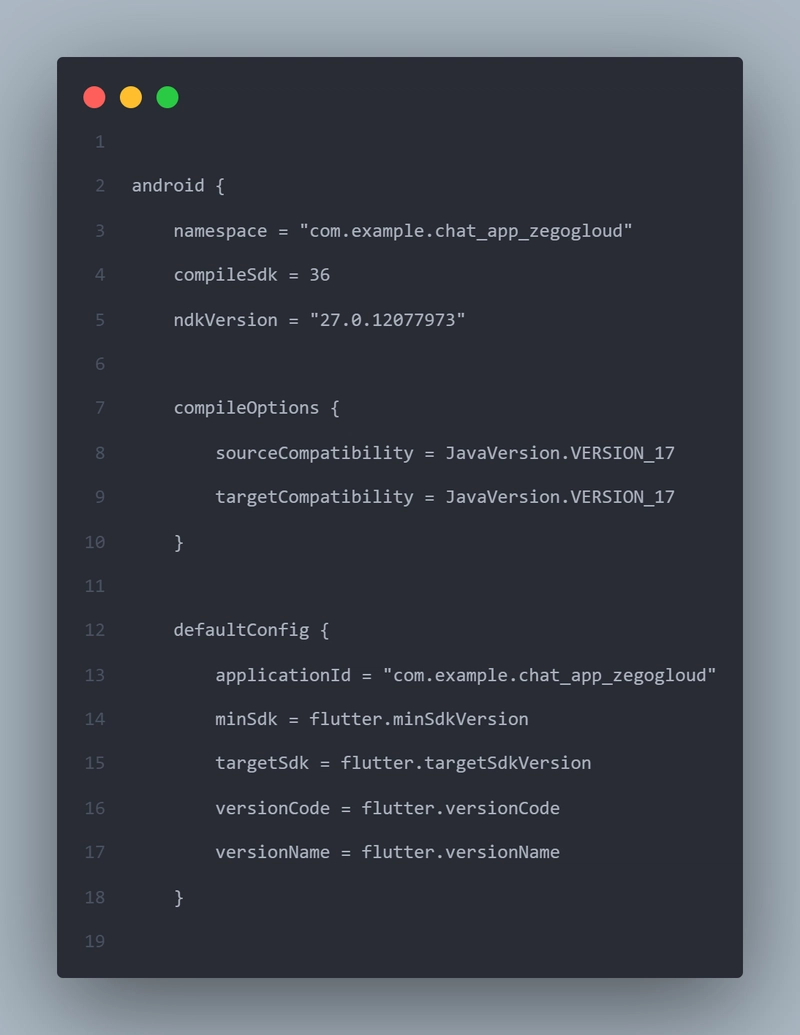
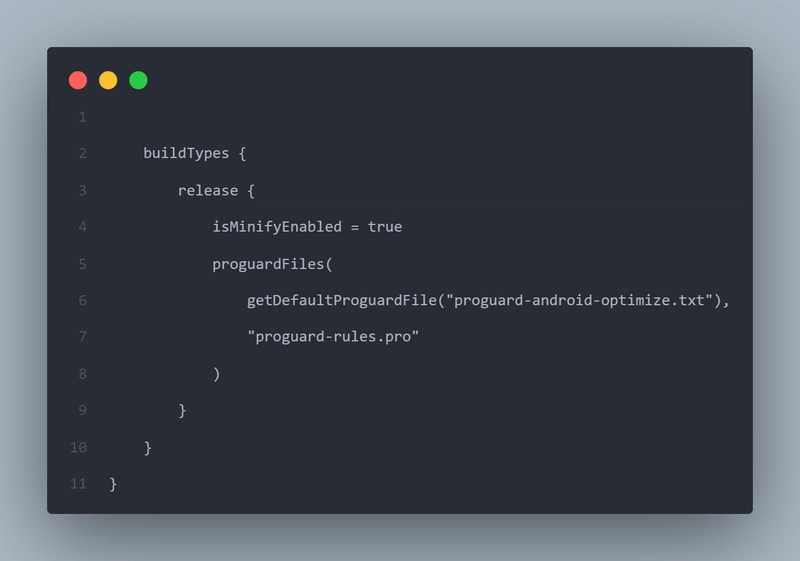
3️⃣ Build Gradle Config
android/app/build.gradle
Enable minify + proguard:
🚀 Step 3 — Initialize ZIMKit in main.dart
import 'package:chat_app_zegogloud/screens/login.dart';
import 'package:chat_app_zegogloud/utils/app_string.dart';
import 'package:flutter/material.dart';
import 'package:zego_zimkit/zego_zimkit.dart';

void main() async {
  WidgetsFlutterBinding.ensureInitialized();

  ZIMKit().init(appID: AppString.appID, appSign: AppString.appSign);
  runApp(const MyApp());
}

class MyApp extends StatelessWidget {
  const MyApp({super.key});

  @override
  Widget build(BuildContext context) {
    return MaterialApp(
      title: 'Zego Chat',
      theme: ThemeData(primarySwatch: Colors.blue),
      debugShowCheckedModeBanner: false,
      home: const LoginPage(),
    );
  }
}
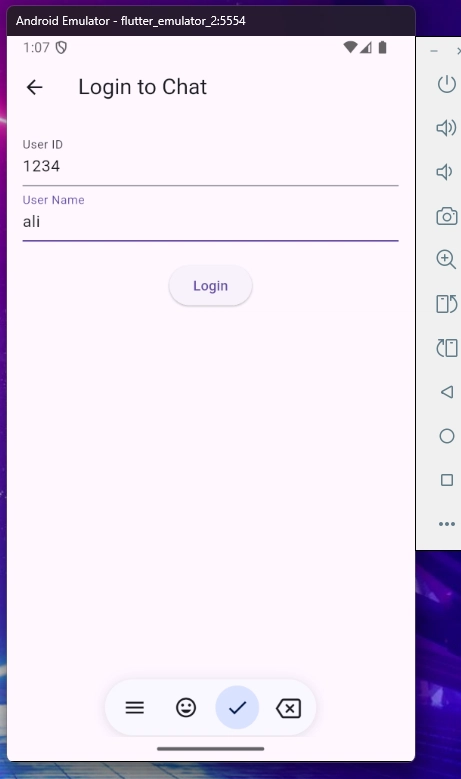
🔐 Step 4 — Create Login Page
We authenticate users locally using userID and username. No backend needed.
screens/login.dart
import 'package:chat_app_zegogloud/screens/home.dart';
import 'package:flutter/material.dart';
import 'package:zego_zimkit/zego_zimkit.dart';

class LoginPage extends StatefulWidget {
  const LoginPage({super.key});

  @override
  State<LoginPage> createState() => _LoginPageState();
}

class _LoginPageState extends State<LoginPage> {
  final userId = TextEditingController();
  final userName = TextEditingController();

  @override
  Widget build(BuildContext context) {
    return Scaffold(
      appBar: AppBar(title: const Text('Login to Chat')),
      body: SingleChildScrollView(
        child: Padding(
          padding: const EdgeInsets.all(16.0),
          child: Column(
            children: [
              TextField(
                controller: userId,
                decoration: const InputDecoration(labelText: 'User ID'),
              ),
              TextField(
                controller: userName,
                decoration: const InputDecoration(labelText: 'User Name'),
              ),
              const SizedBox(height: 20),
              ElevatedButton(
                onPressed: () {
                  ZIMKit().connectUser(id: userId.text, name: userName.text);
                  Navigator.of(context).push(
                    MaterialPageRoute(builder: (context) => const HomePage()),
                  );
                },
                child: const Text('Login'),
              ),
            ],
          ),
        ),
      ),
    );
  }
}
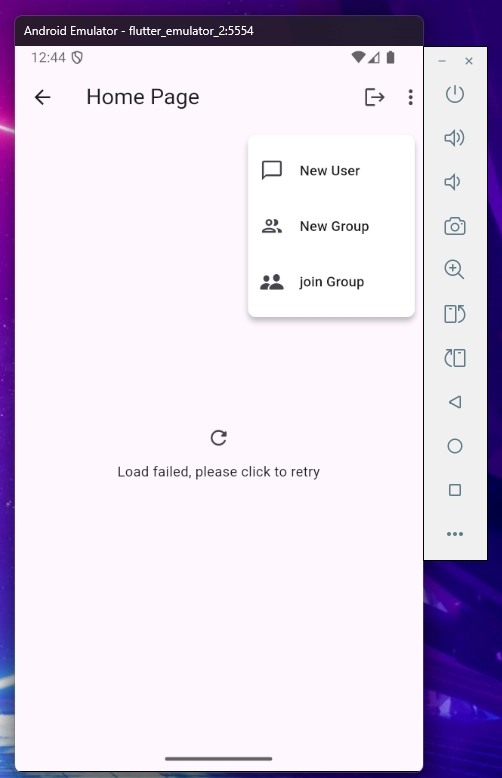
🏠 Step 5 — Home Page with Conversation List
This page shows all private and group chats.
screens/home.dart
import 'package:chat_app_zegogloud/screens/login.dart';
import 'package:chat_app_zegogloud/screens/home_page_popUp.dart';
import 'package:flutter/material.dart';
import 'package:zego_zimkit/zego_zimkit.dart';

class HomePage extends StatefulWidget {
  const HomePage({super.key});

  @override
  State<HomePage> createState() => _HomePageState();
}

class _HomePageState extends State<HomePage> {
  @override
  Widget build(BuildContext context) {
    return Scaffold(
      appBar: AppBar(
        title: const Text('Home Page'),
        actions: [
          IconButton(icon: const Icon(Icons.logout), onPressed: _handleLogout),
          const HomePagePopup(),
        ],
      ),
      body: ZIMKitConversationListView(
        onPressed: (context, conversation, defaultAction) {
          // ✅ غيرت من onLongPress
          Navigator.push(
            context,
            MaterialPageRoute(
              builder: (context) => ZIMKitMessageListPage(
                conversationID: conversation.id,
                conversationType: conversation.type,
              ),
            ),
          );
        },
      ),
    );
  }

  Future<void> _handleLogout() async {
    final confirm = await showDialog<bool>(
      context: context,
      builder: (context) => AlertDialog(
        title: const Text('Logout'),
        content: const Text('Are you sure you want to logout?'),
        actions: [
          TextButton(
            onPressed: () => Navigator.pop(context, false),
            child: const Text('Cancel'),
          ),
          TextButton(
            onPressed: () => Navigator.pop(context, true),
            child: const Text('Logout'),
          ),
        ],
      ),
    );

    if (confirm == true && mounted) {
      await ZIMKit().disconnectUser();
      Navigator.of(context).pushReplacement(
        MaterialPageRoute(builder: (context) => const LoginPage()),
      );
    }
  }
}
💬 Step 6 — Enable Private + Group Chat
screens/home_page_popUp.dart
import 'package:flutter/cupertino.dart';
import 'package:flutter/material.dart';
import 'package:zego_zimkit/zego_zimkit.dart';

class HomePagePopup extends StatefulWidget {
  const HomePagePopup({super.key});

  @override
  State<HomePagePopup> createState() => _HomePagePopupState();
}

class _HomePagePopupState extends State<HomePagePopup> {

  @override
  Widget build(BuildContext context) {
    return PopupMenuButton(
      shape: RoundedRectangleBorder(borderRadius: BorderRadius.circular(8)),
      itemBuilder: (context) => [
        PopupMenuItem(
          value: 'New Chat',
          child: ListTile(
            leading: const Icon(Icons.chat_bubble_outline_outlined),
            title: Text('New User', maxLines: 1),
            onTap: () => ZIMKit().showDefaultNewPeerChatDialog(context),
          ),
        ),

        PopupMenuItem(
          value: 'New Group',
          child: ListTile(
            leading: const Icon(Icons.group_outlined),
            title: Text('New Group', maxLines: 1),
            onTap: () => ZIMKit().showDefaultNewGroupChatDialog(context),
          ),
        ),
        PopupMenuItem(
          value: 'join Group Chat',
          child: ListTile(
            leading: const Icon(CupertinoIcons.person_2_fill),
            title: Text('join Group ', maxLines: 1),
          ),
          onTap: () => ZIMKit().showDefaultJoinGroupDialog(context),
        ),
      ],
      offset: const Offset(0, 50),
      elevation: 4,
      color: Colors.white,
      constraints: const BoxConstraints(maxWidth: 300),

      child: const Icon(Icons.more_vert),
    );
  }
}
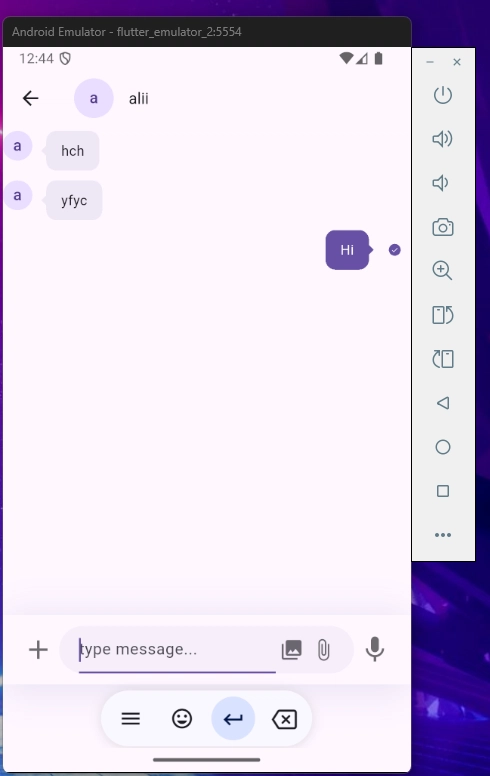
🎥 UI Preview — App Screenshots
🔐 Login Screen
🏠 Home Page + Popup Menu
💬 Private / Group Chat Screen
🎉 Result
You now have a fully working chat app with:
✔ Real-time messaging
✔ Private + Group chats
✔ No backend
✔ Clean UI ready for production
🔁 What’s Next?
Try adding:
✨ Message reactions
✨ Typing indicator
✨ Push notifications
✨ Custom chat bubbles
🎉 Conclusion
You’ve now built a real-time chat app in Flutter with ZEGOCLOUD ZIMKit—no server setup, no WebSockets, and no backend code needed. Everything from message delivery to UI is handled for you.
🚀 Now start customizing your app and ship it to production!
🔗 Useful Links
👉 This article uses the official ZEGOCLOUD chat SDK. Learn more here:
📘 ZIMKit Docs
https://www.zegocloud.com/docs/zim/flutter/quick-start
💬 In-App Chat SDK
https://www.zegocloud.com/product/in-app-chat